3d-printable terrain for all your samurai wargaming needs


We have a new US retail partner to introduce to you today - PELICAN HOUSE GAMES, supporting the gaming scene from Louisiana.
Pelican House Games are the name behind the new samurai-themed wargames SHOSHIN: PATH OF ASCENSION, which recently had its first successful Kickstarter launch!
They're printing our full samurai collection of terrain, so if you can't see the models you want there just drop them a line - they'd be happy to add those to the store, too! Take a look and see what they have for you!
https://shoshingame.com/product-category/terrain
We have a new US retail partner to introduce to you today - KREATIVLAYERS, supporting the gaming scene from Michigan.
They're printing our full samurai and sci-fi collections of terrain, so if you can't see the models you want there just drop them a line - they'd be happy to add those to the store, too! Take a look and see what they have for you!
https://www.kreativlayers.com/collections/terrain
To celebrate the debut of 3DAlienWorlds terrain on their store, they’re also offering a 10% launch discount valid until February 15th:
10% OFF Coupon Code: TERRAIN_DEBUT

We're back again with a new Test of Honour battle report for you!! This time we're playing the Search scenario on our new Fishing Village board.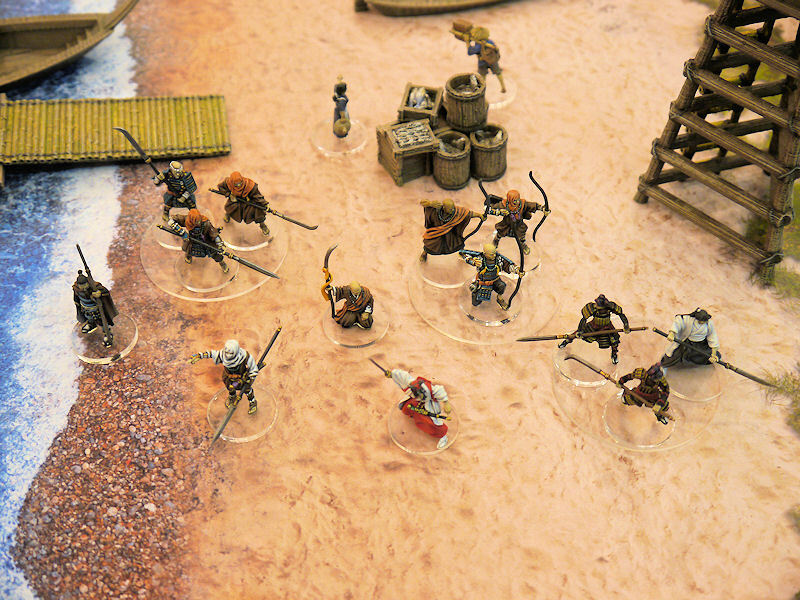
▲ These are the defenders of the fishing village, who might or might not associated with the guerilla rebels in the local area. Lady Reiko (centre, in white and red) leads this force of temple guards with the help of 2 priests and her group of female bodyguards.
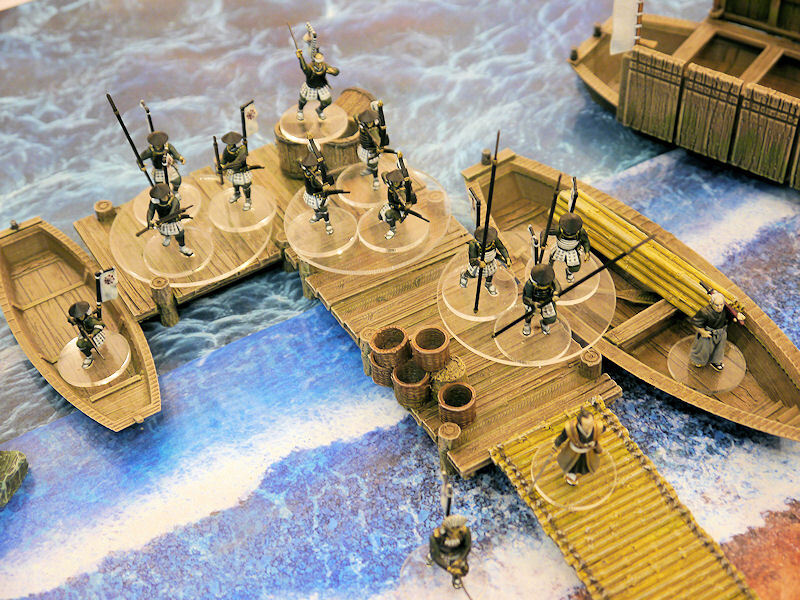
▲ Lord Nobu has heard from his network of spies that the local rebels are receiving a shipment of weapons, cleverly hidden amongst the daily fish catches at the local fishing village. He's planned a surprise raid by boat with his household guard, just as the fishing boats offload their wares.

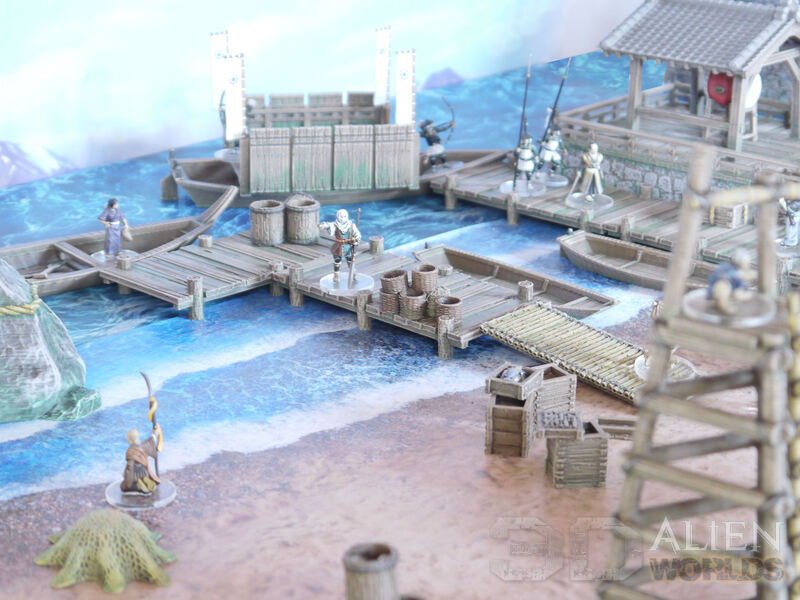
▲ This is today's game board, using a fabulous printed beach mat by DeepCut Studios and our own Fishing Village Set of terrain.
There are 5 potential objectives, all marked by the red rubies in the centre of the board. However, when successfully searched by warriors, only 3 of them will turn out to be genuine stashes of hidden weapons. The other 2 will just be suspicious-looking piles of fish guts!

▲ Lord Nobu's forces rush off their boats and onto the beach, as Lady Reiko's village defenders hurry to assemble a response. One of Lord Nobu's samurai lieutenants speeds forward to seize the central objective, while his musketman opens fire from the drum platform and blasts one of the female bodyguards. First blood to Lord Nobu!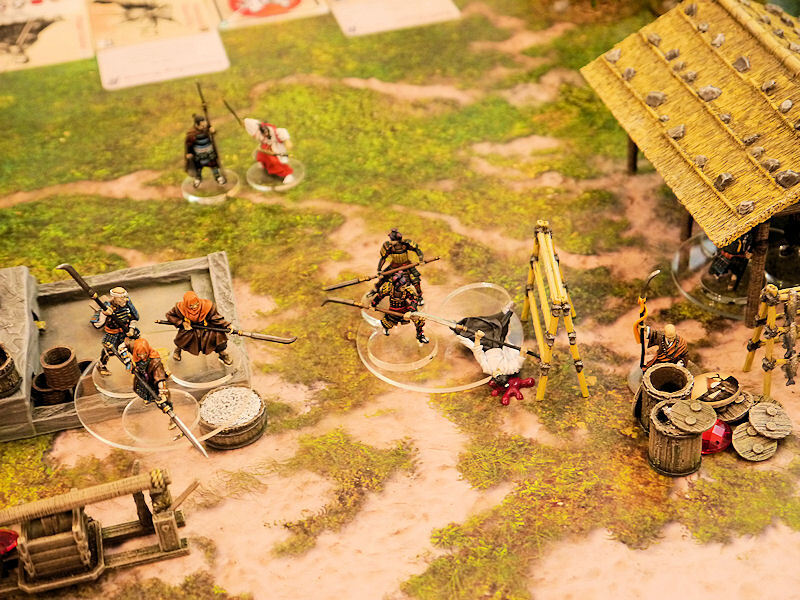
▲ As Lady Reiko's bodyguards recoil in shock from the sudden death of one of their number, one of the priests kneels down to search a pile of barrels for the hidden weapons.
▲ Lord Nobu himself has not deigned to step down off the boat yet, but instead sends his wise old Uncle Taro forward to search and secure the closest objective.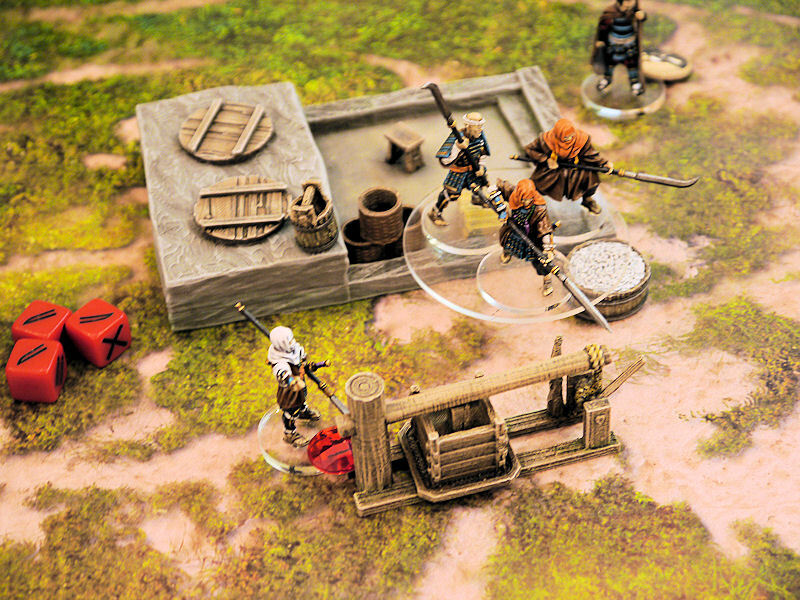
▲ One of the priestly lieutenants manages to locate an objective hidden under the frame of the fish oil press, and pulls out a bundle of cloth-wrapped muskets in triumph!
▲ Before the lucky priest can retreat with his prize behind the cover of the ovens behind him, a hail of arrows slams down amongst a group of temple guards, and although they survive unscathed they lose their footing as they dive for cover!
▲ Wise old Uncle Taro urges his spearmen to search for hidden weapons amongst the roped boxes and crates, but they only find little porcelain dolls bound for market. Curses!!

▲ Lady Reiko sprints forward to the central objective, to prevent Lord Nobu's samurai from searching the buckets and boxes there. 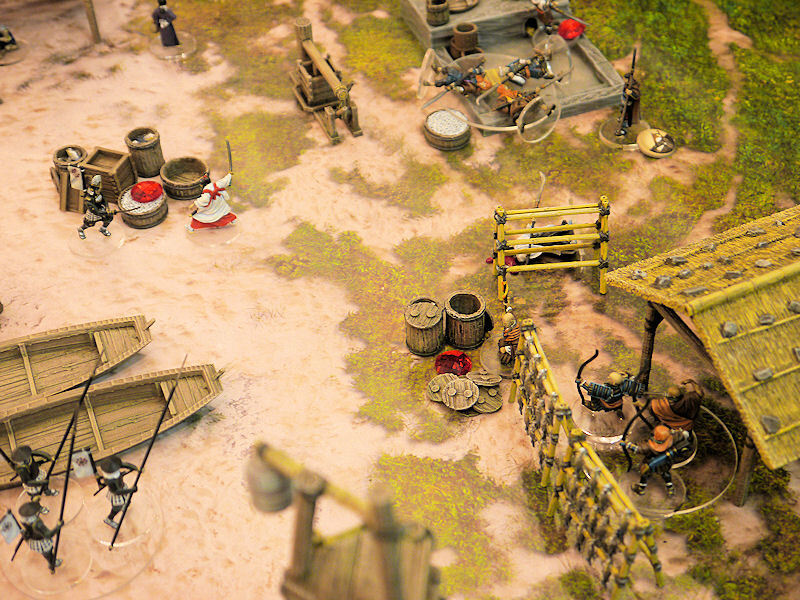
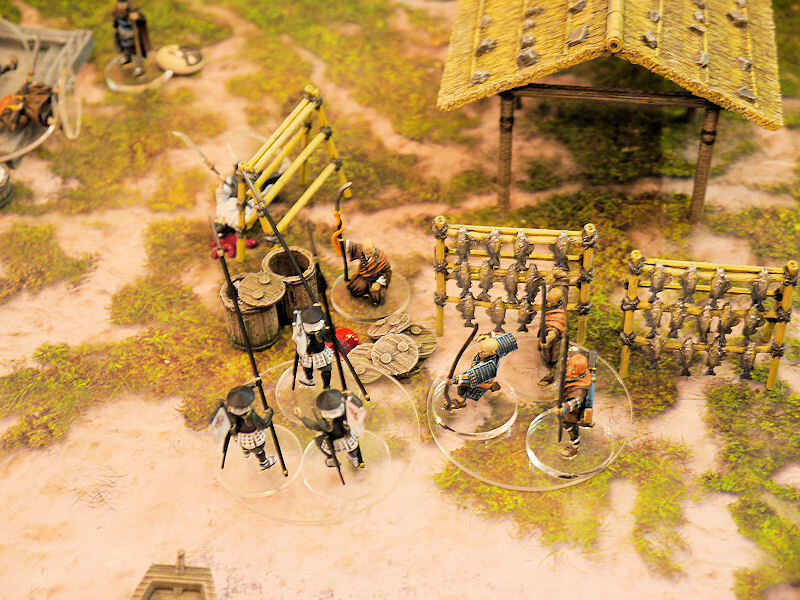
▲ As temple forces move up into the cover of the fish racks and open fire on the approaching spearmen, the kneeling priest continues to search amongst the barrels to no effect! Those lids must be nailed on tight!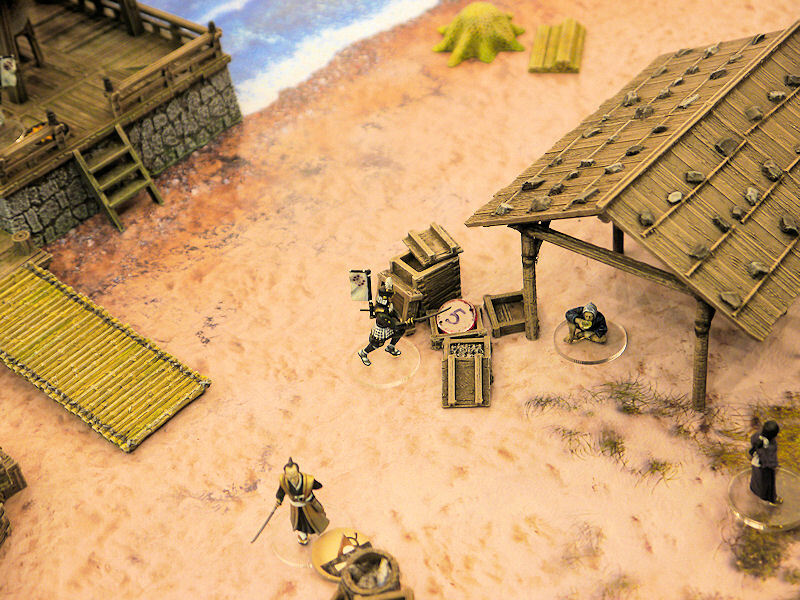
▲ As Lord Nobu strolls from the boat jetty to the central objective, he issues a quick command for his samurai lieutenant to run over and search amongst some other nearby boxes. The devoted samurai duly obeys, but only finds the remains of fish guts and heads!
So with 2 objectives found to be decoys, both forces realise that the remaining 3 are the true hidden stashes - and one is already in the control of Lady Reiko's defenders!
▲ Lord Nobu's spearmen rush forward to distract the kneeling priest from his search, as the temple archers struggle to push them away.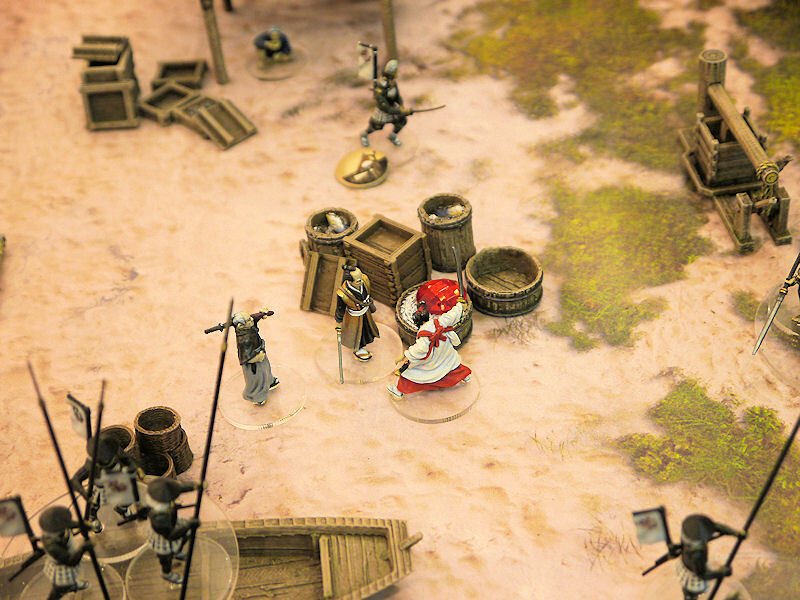
▲ As Lady Reiko fights off the attacks of Lord Nobu at the central objective, she desperately calls for aid as Lord Nobu's lieutenants march in to surround her!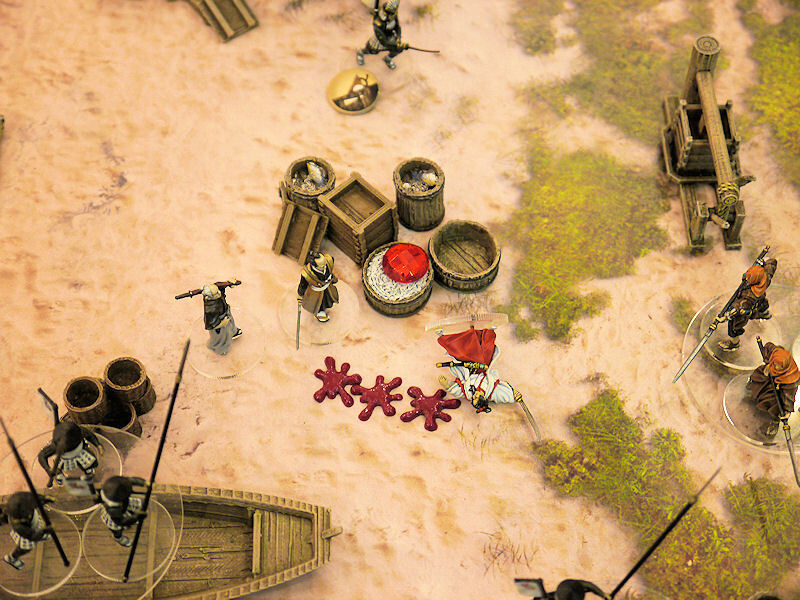
▲ Lady Reiko loses her footing and takes heavy damage from Lord Nobu, as she crawls backwards away from overpowering odds.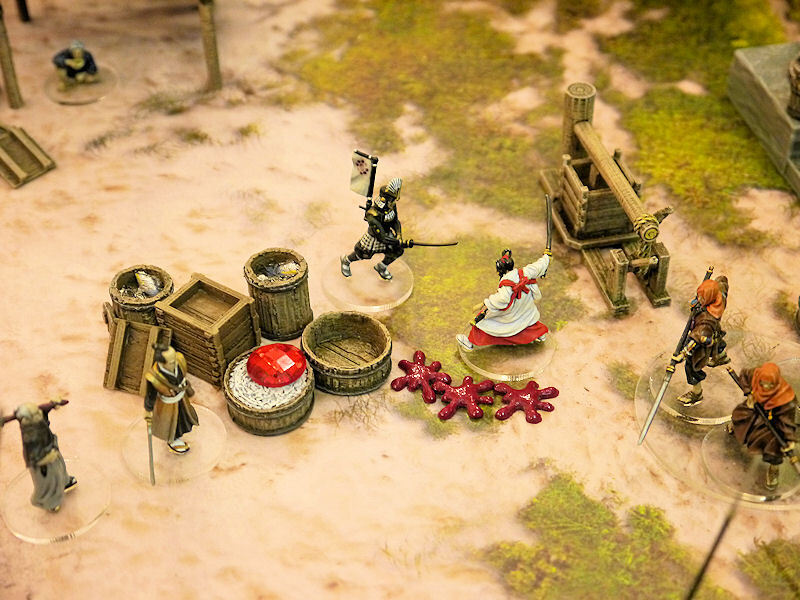
▲ Climbing to her feet, Lady Reiko fends off another ferocious attack from one of the enemy samurai warriors! Can she survive this relentless onslaught?!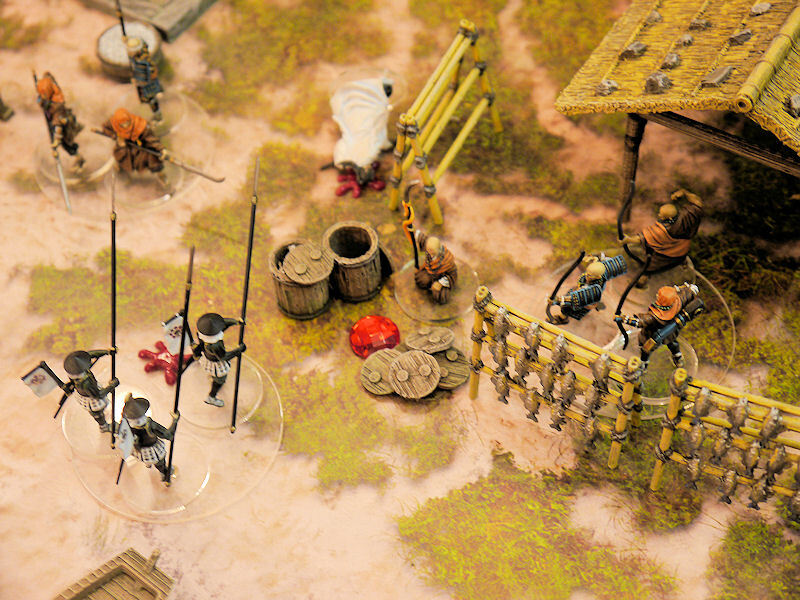
▲ The temple guard dodge back behind the drying fish racks and open fire on the enemy spearmen once again, and this time they succeed in injuring them and slowly pushing them away from the objective.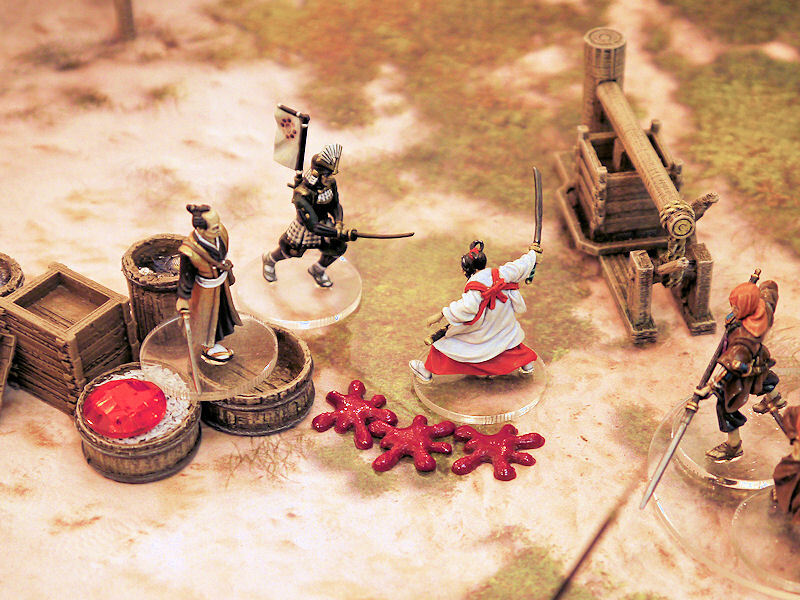
▲ Sensing that the balance has now shifted, Lord Nobu jumps forward to engage the Lady Reiko again, flicking up a handful of fishguts at the Lady's face....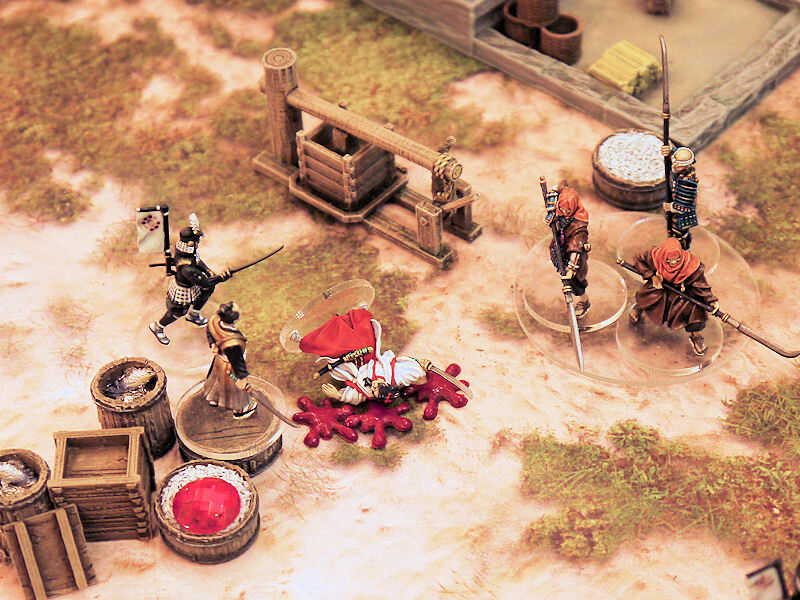
▲ ... as she dodges away from the dishonourable feint, Lady Reiko finds herself impaled on her enemy's blade, and slumps to the ground defeated.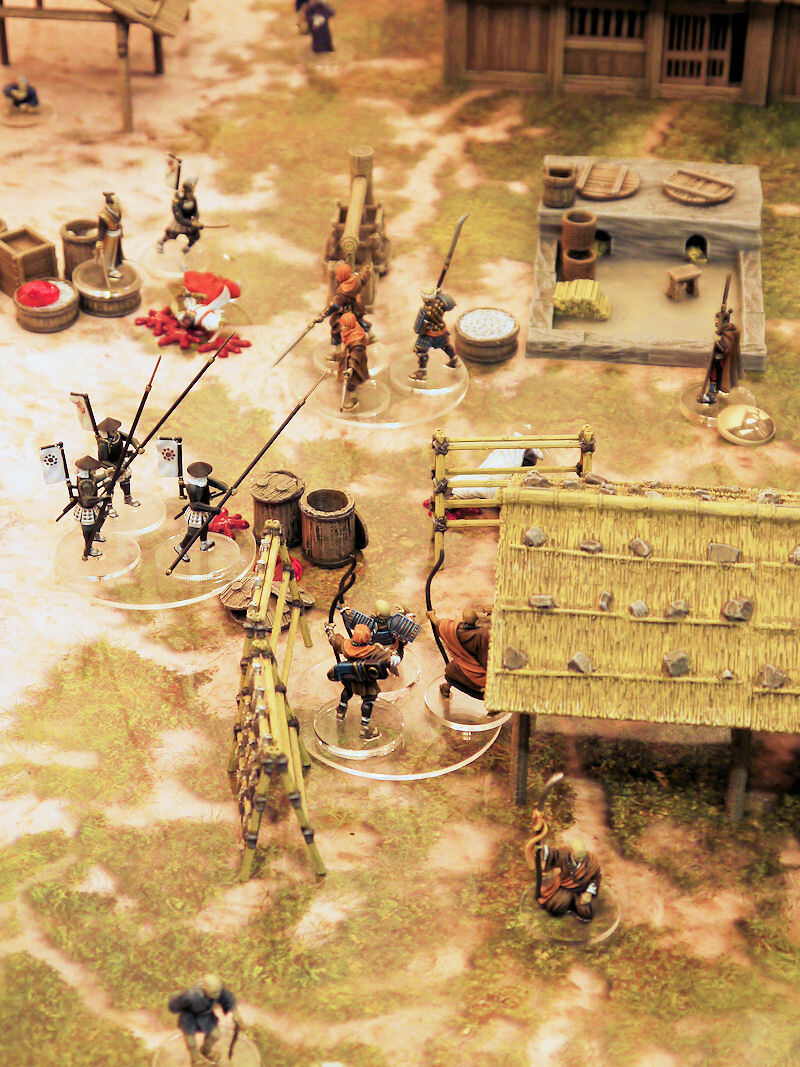
▲ The village defenders grit their teeth and prepare to sell their lives dearly, except for the old kneeling priest, who abandons his search and dodges away from the whirlwind of savagery in the centre of the board.
▲ The old priest quickly regains his senses and rushes back to the fight, but Lord Nobu's forces have seized their chance and pushed forward.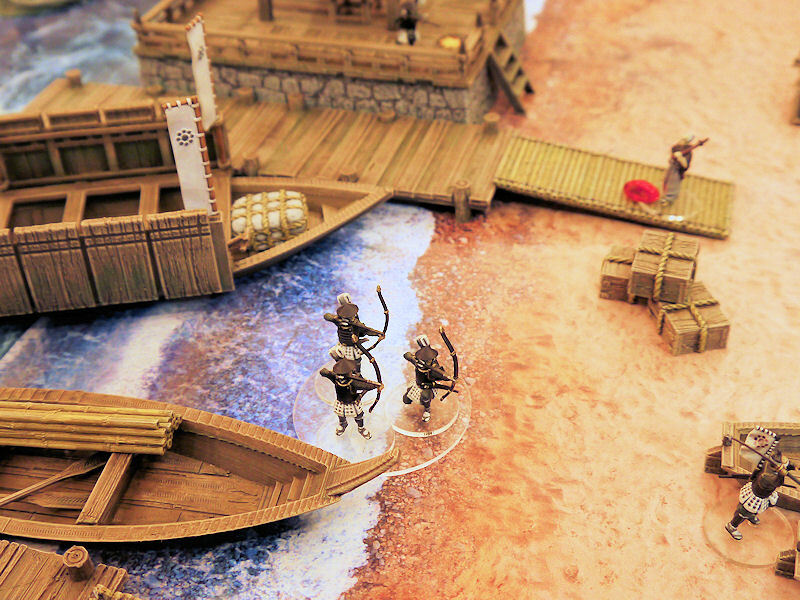
▲ Meanwhile, wily old Uncle Taro has been searching the centre of the board and now retreats to the boats with his prize.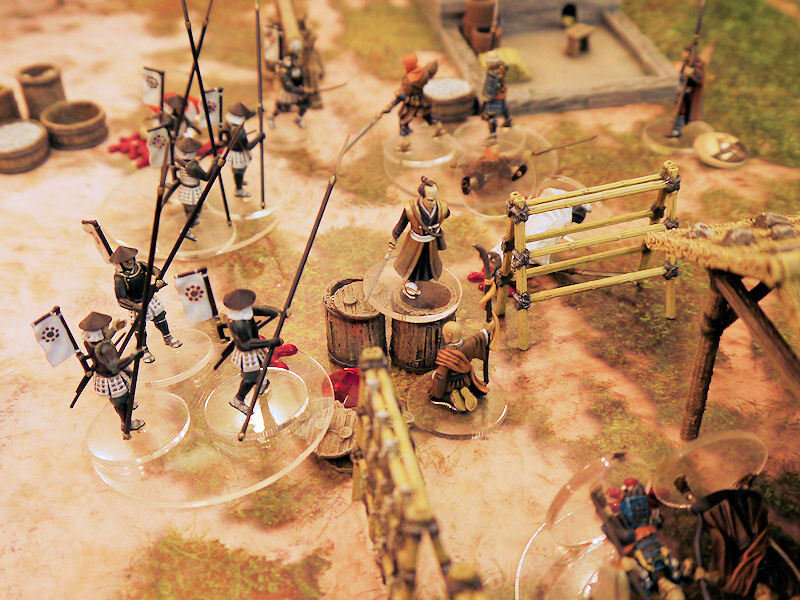
▲ Both forces have now secured one objective each, so Lord Nobu wastes no time in dashing forward to attack the kneeling priest who is currently blocking the final objective.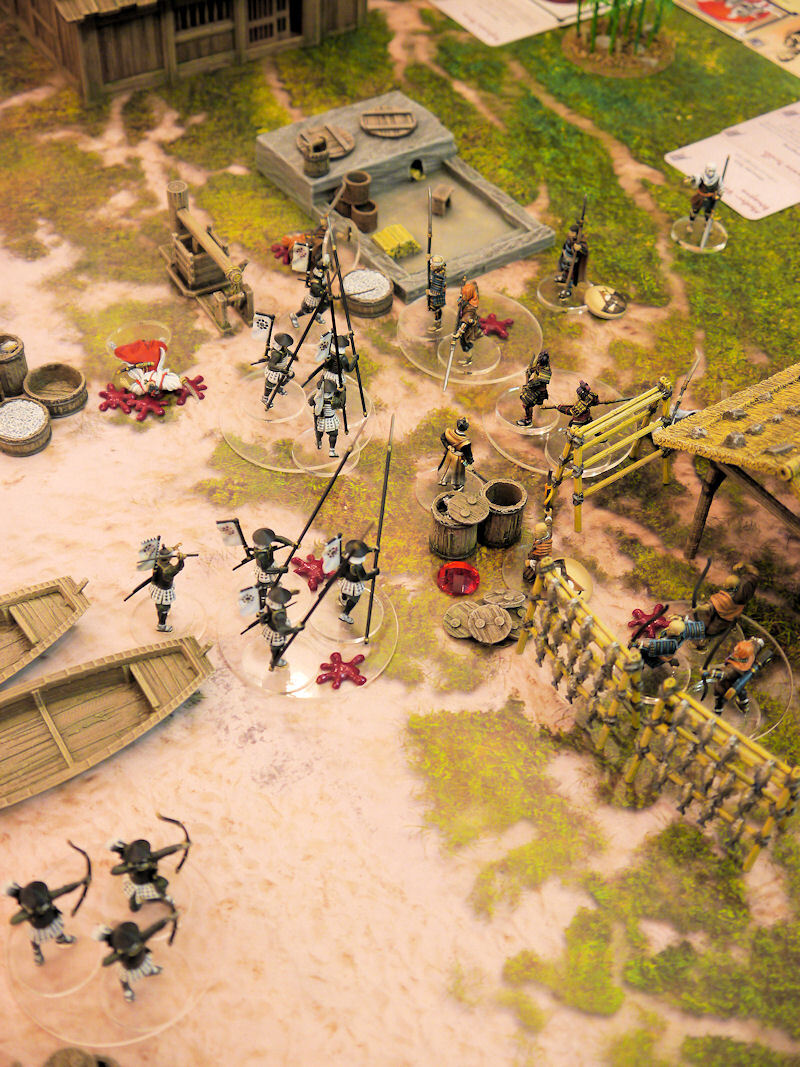
▲ All available forces close in to contest the final objective, as the village defenders desperately try to distract Lord Nobu and his troops.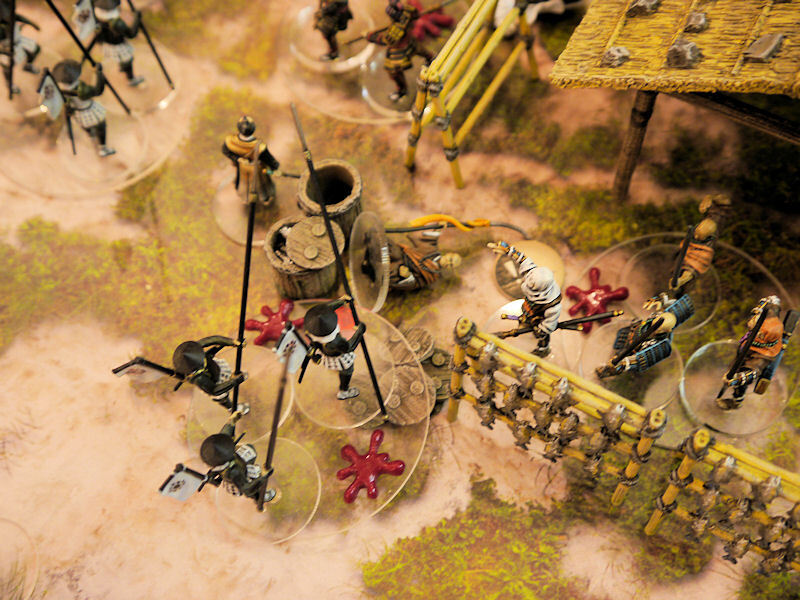
▲ The other priestly lieutenant returns to the fray, just in time to see his old friend cut down by marauding spearmen. 
▲ This final act of bloodshed is too much for the defenders, and the priest flees the battle with his temple archers and temple guards!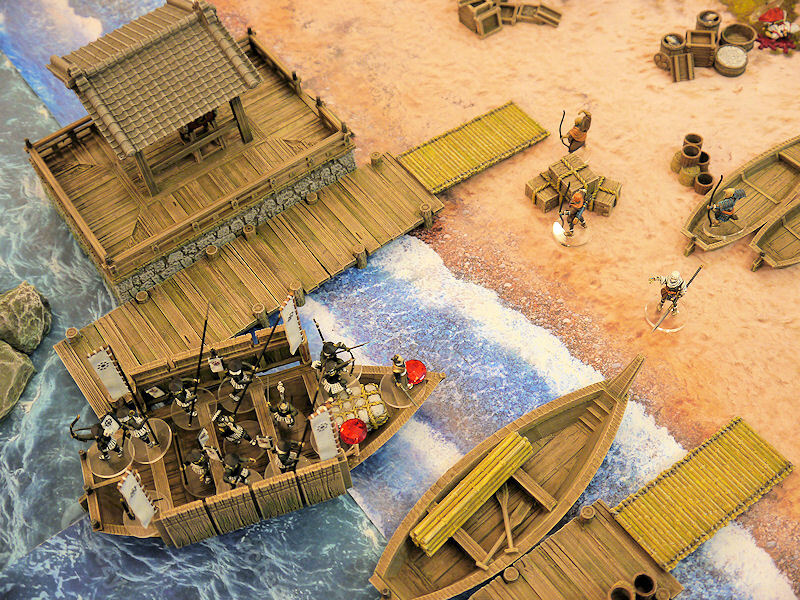
▲ By the time the defenders return to the beach, Lord Nobu and his forces have returned to their boats with 2 objectives and pushed off into the surf.
▲ Lord Nobu stands arrogantly on the prow of his ship, as his oarsmen back them into deeper water and away.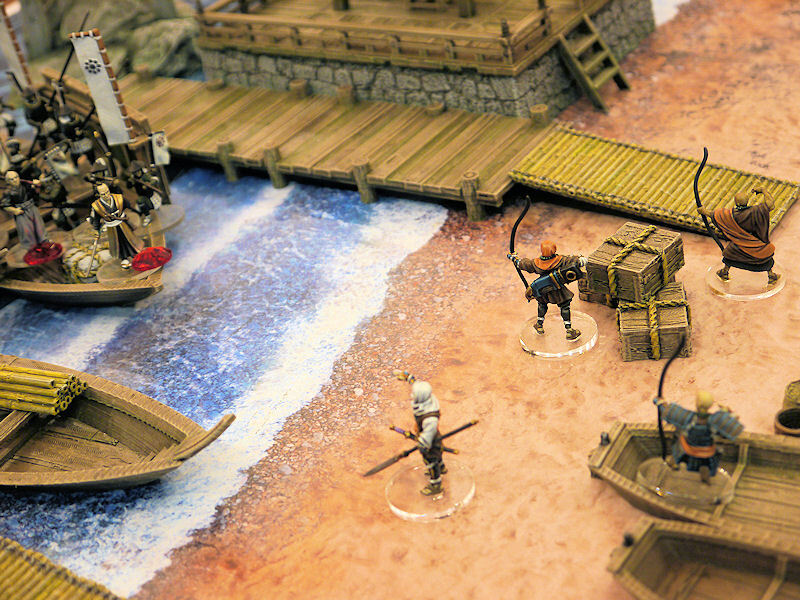
▲ The defenders can only stand and shout from the beach, as they watch their hated enemy sail away with their stolen weapons.
Victory to Lord Nobu!!
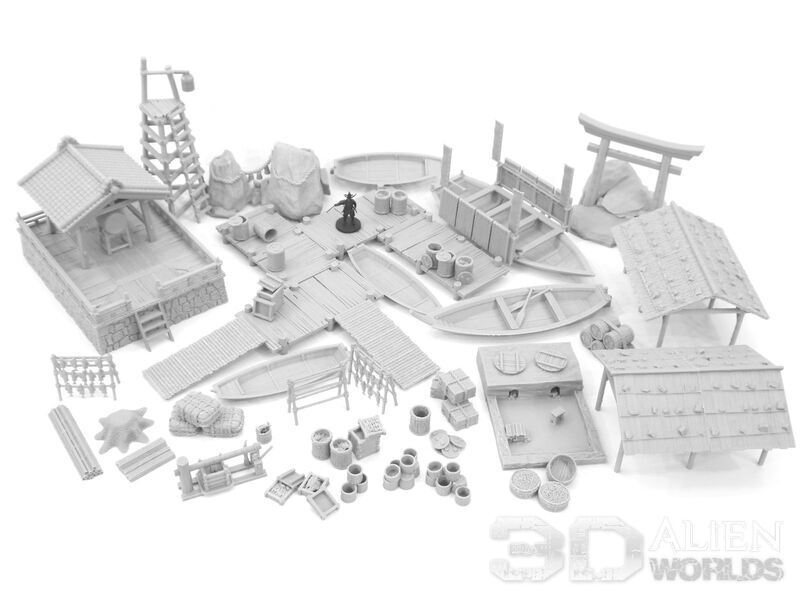
At long last the new Samurai Fishing Village set is ready for release, and we've been having some fun arranging all the models for a proper photoshoot!

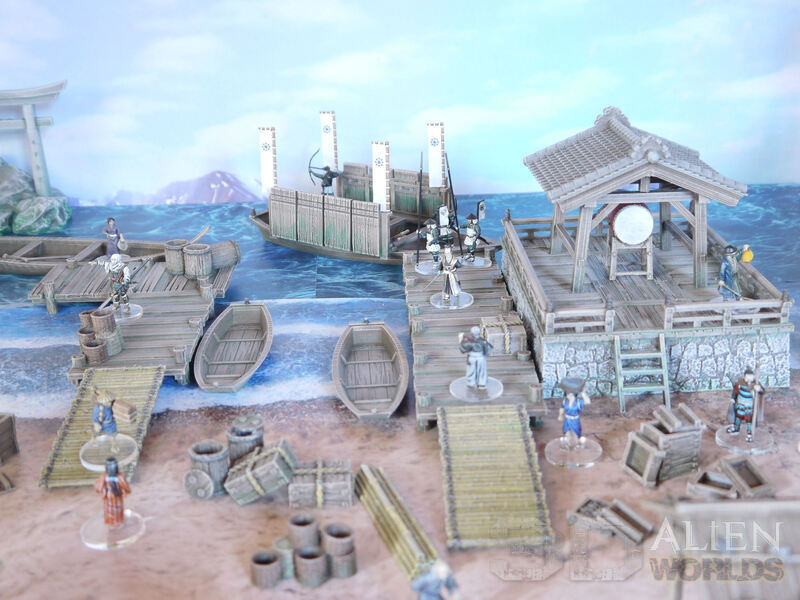
▲ There it is - the whole set in all its glory! Isn't it fabulous?!
Let's take a closer look.....

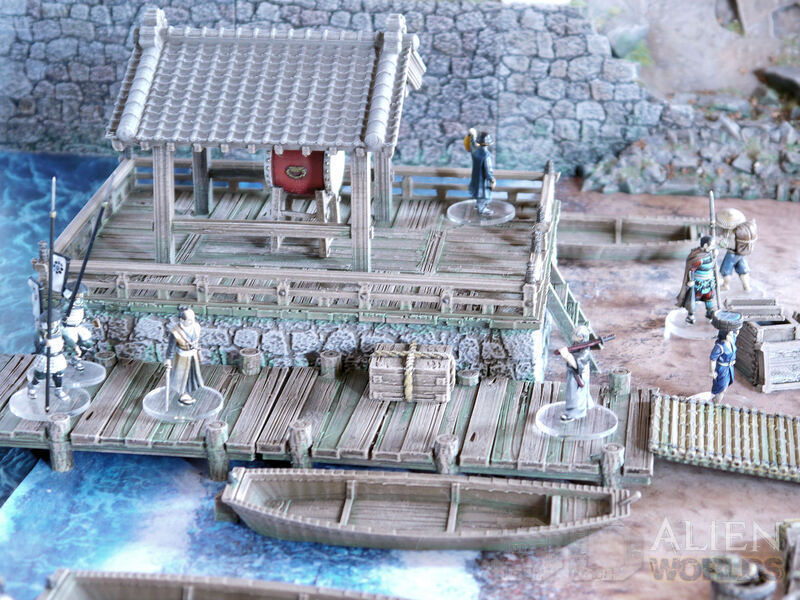
▲ Lord Nobu has arrived at the fishing village's jetty for an official visit, to the sound of drumming from the covered taiko drum. His personal guard have accompanied him in his boat, bedecked with flags and wooden pavises.

▲ Uncle Taro is enjoying a little drink at the top of the warning bell tower, and has missed the lone Ronin warrior passing below, as he strides past the racks of drying fish on his way to confront Lord Nobu!
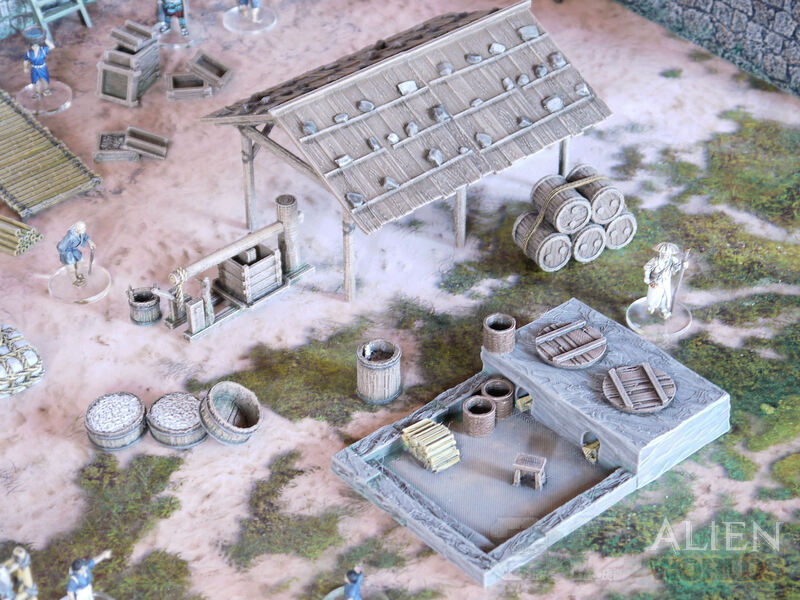
▲ The fish ovens slowly simmer tubs of herrings, before they are transferred to the big wooden press to extract the precious fish oil for the village's lamps.
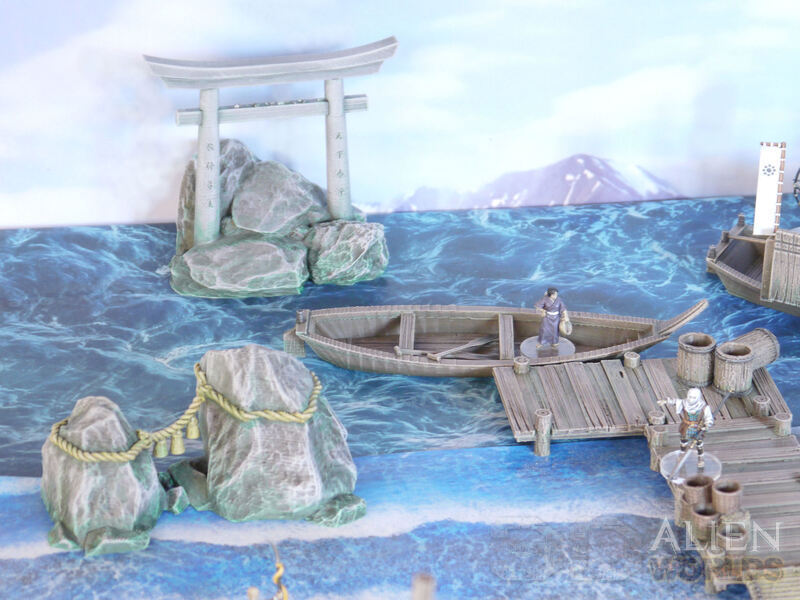
▲ The local fishing boats offload their catches on the jetty, as the fishermen gives thanks at the torii gate for another safe return.
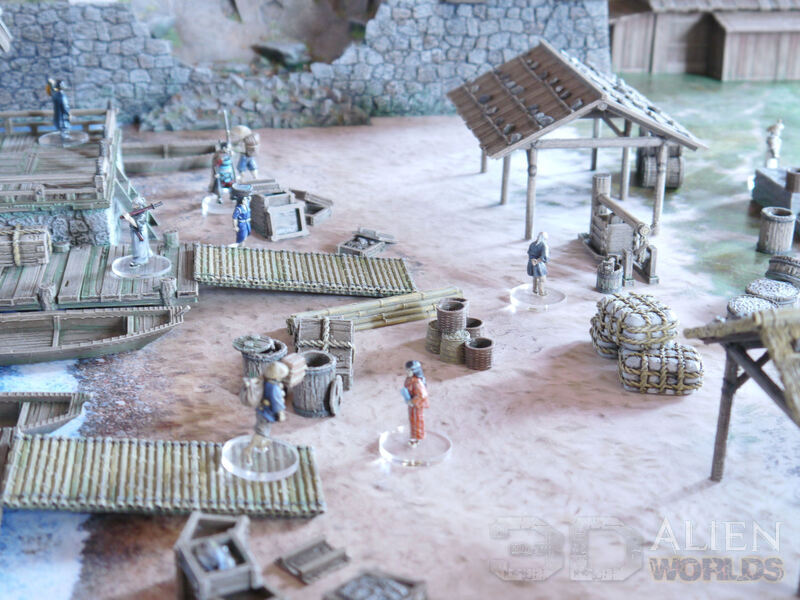
▲ As Lord Nobu is welcomed ashore by the local head samurai, the villagers continue with the daily routine of offloading, sorting and processing all the buckets, barrels and boxes of fresh fish.
▲ There are plenty of crates and other scatter terrain in the set, for your assassins and warriors to fight in and around! You can almost taste the salt in the air, right?
▲ A local priest kneels before the pair of married rocks in the water nearby, as an overseer shouts to get Uncle Taro's attention, in the rickety warning tower.
▲ Every day is a busy day in this fishing village, with endless work to be done. These civilian miniatures from Perry Miniatures and Grey for Now Games really bring the scene to life!
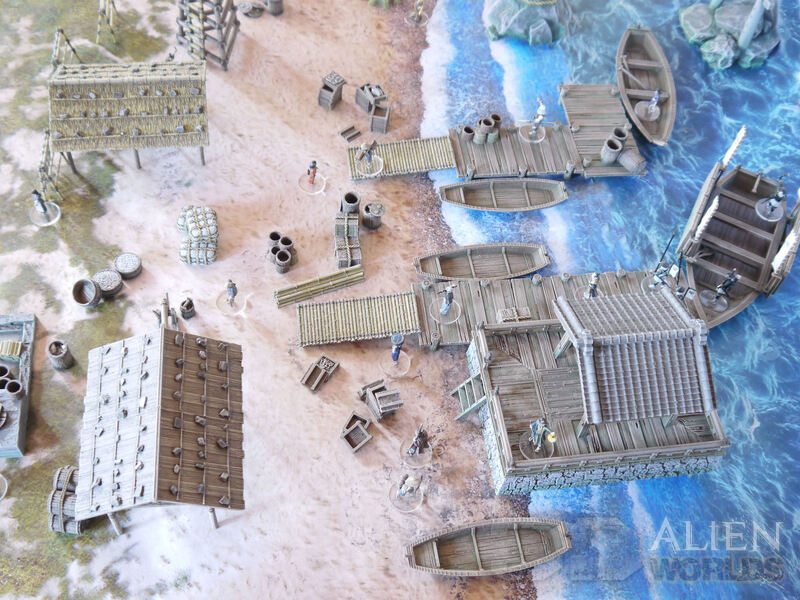
▲ One last bird's eye view of the beach. Let's hope nothing happens to disturb the peace on this fine, sunny day....
▲ The new Samurai Fishing Village set is available for download from today!
Wow! What a lot of brown to paint in this set!! The new Samurai Fishing Village has been on the paint desk for the last couple of weeks, so here's a quick guide on how to paint it up nice and fast...
▲ I started with two colours of spray undercoat - a dark grey for the rocks and fish ovens, and a light brown for everything else! The drumtower model has two-colour rock and wood pieces, which I sprayed in 2 stages with some masking tape to cover off the first colour.
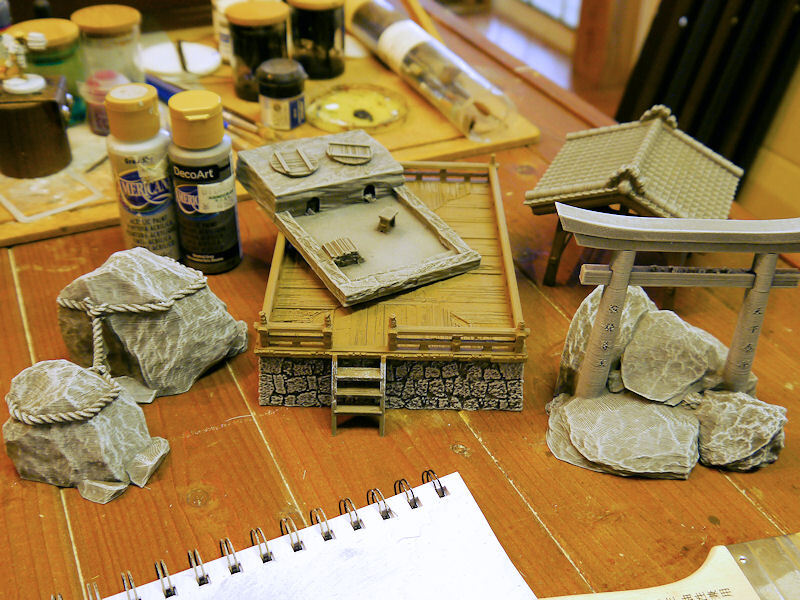
▲ All of the grey rock parts were then carefully drybrushed with light grey, using a 2" wide brush.
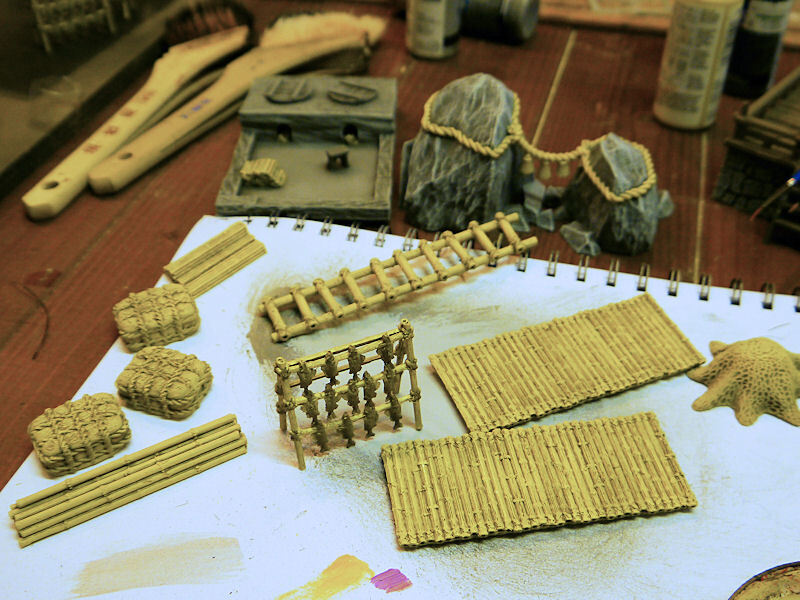
▲ The models made from bamboo or with large rope sections were roughly painted next, with a sand-coloured yellow brown. They were then given a heavy dark brown/black wash to fill in all the deep recesses, followed by a rough drybrush with the previous sand-coloured yellow brown.
▲ All of the wooden models were given a heavy dark brown/black wash to fill in all the deep recesses.

▲ All of the wooden pieces were given a rough drybrush with a light brown, and then some of the smaller details (ropes, cloth patches, fish etc) were basecoated, washed and highlighted.
At this stage everything was looking pretty finished, but there were 2 more steps I wanted to try...
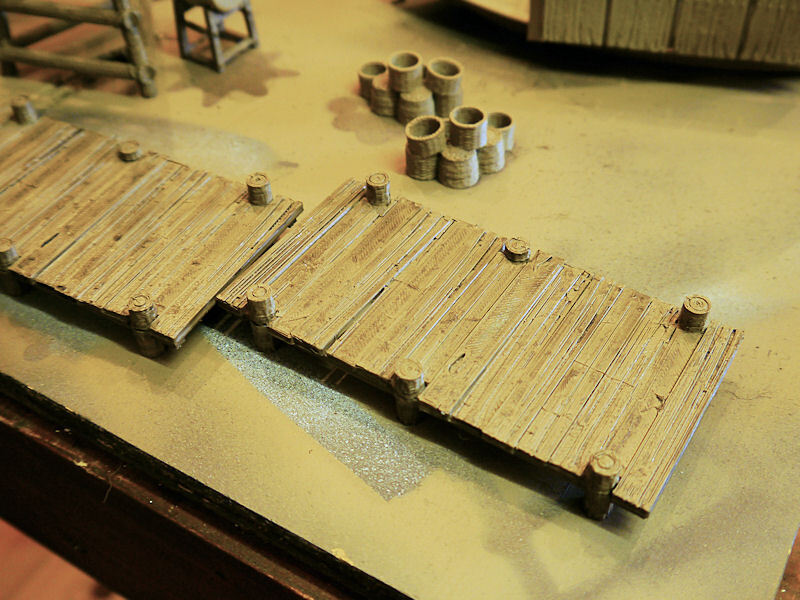
First was a very light drybrush with a very light grey, over almost everything. This helps age the wooden and bamboo pieces, and gives the effect of sun-bleaching - something you'd find on items left outside in the sun and rain at a fishing village.
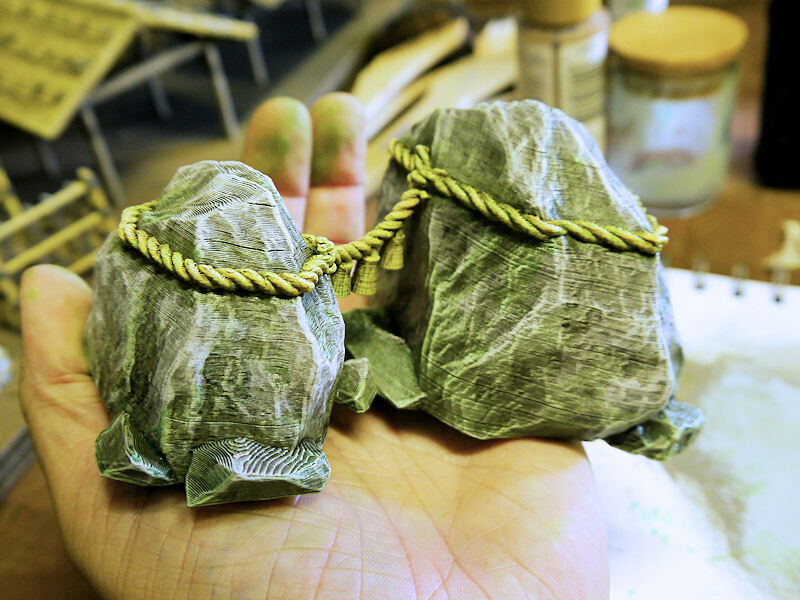
▲ The second step was to generously wash the bottom edges of most items with a green wash. The rocks and boats obviously need this, to help them look at home in the water, so I actually roughy dabbed 2 green washes around the bottom and in the crevices, wherever seawater might leave algae and seaweed.

▲ The jetty pieces also got dabs of green wash around the bottoms of the posts, and on random planks.

▲ This torii gate also benefits from plenty of green washes around the lower rocks, as it would be partially submerged in the seawater at high tides.
The Samurai Fishing Village is now complete, and should be ready for release in a few days. Watch this space!


0 Comments :
Write a comment :