
| << Designing the samurai shops 2023-02-07 | Printing and assembling the shops PART 2 : Accessory sets >> 2023-03-02 |
The new Samurai Shop set has so many possible model combinations, we're going to split the assembly blog into 2 parts.
So today's blog will focus on constructing the shop buildings, and part 2 will show off the 8 shops of accessories. Ready? Let's get started.....
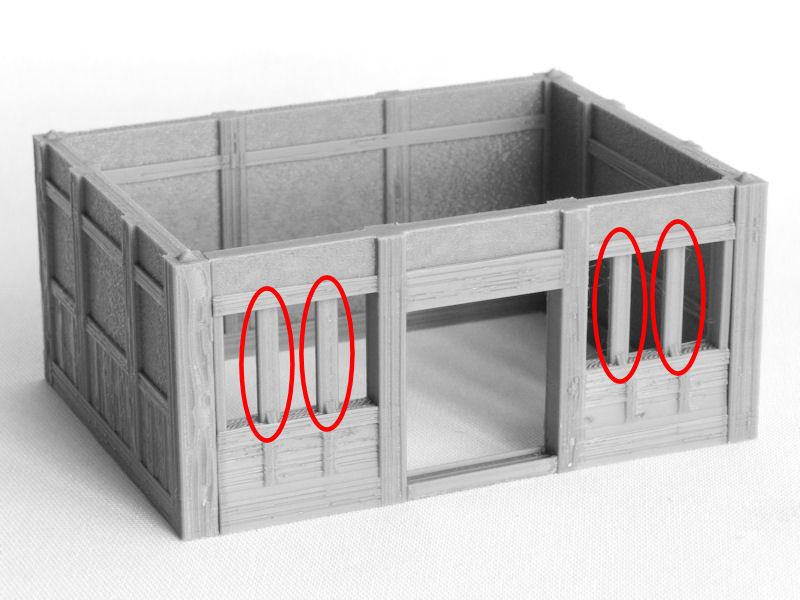
▲ We start the construction process by printing the side and back walls, and then the front wall. Every piece of these shops is designed to print without supports, to make your life easier!
There are, however, a few built-in print supports in the window frames (circled in red in the photo above), which will need to be removed before assembly.

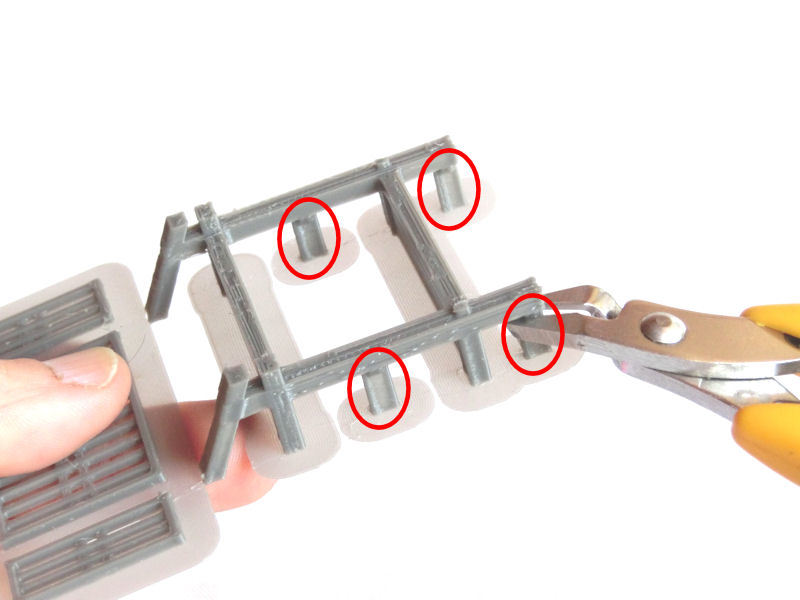
▲ To remove the print supports, I've found that the best method is to slowly squeeze at top and bottom of each support, while also twisting the cutters gently from side to side. Once the supports are removed, you can stick in the window grills.

▲ There are 3 basic patterns of wall texture, as shown in the photo above. The model on the left has vertical wood planks on its lower walls, the model in the middle has horizontal wooden slats, and the version on the right has textured earth walls for all panels.
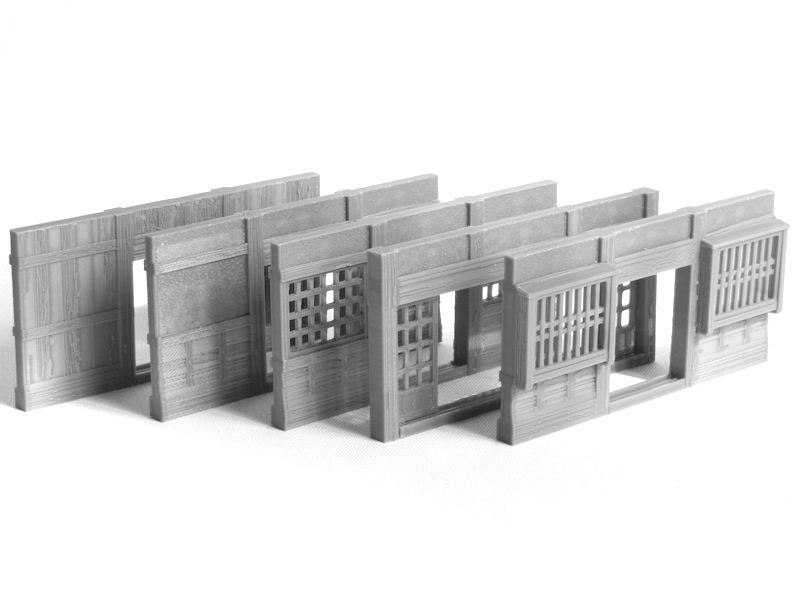
▲ For the front wall of the shop, you have a choice of 5 wall types. From the left, we have:
All of these walls feature sliding doors to enter the shop.
▲ In addition to those 5 front wall types, there is also an optional display window case, which can be attached to the first three wall types (so not the sliding door wall or the projecting box window wall).
There are four small built-in print supports (circled in red in the photo above), which should be removed before assembly.
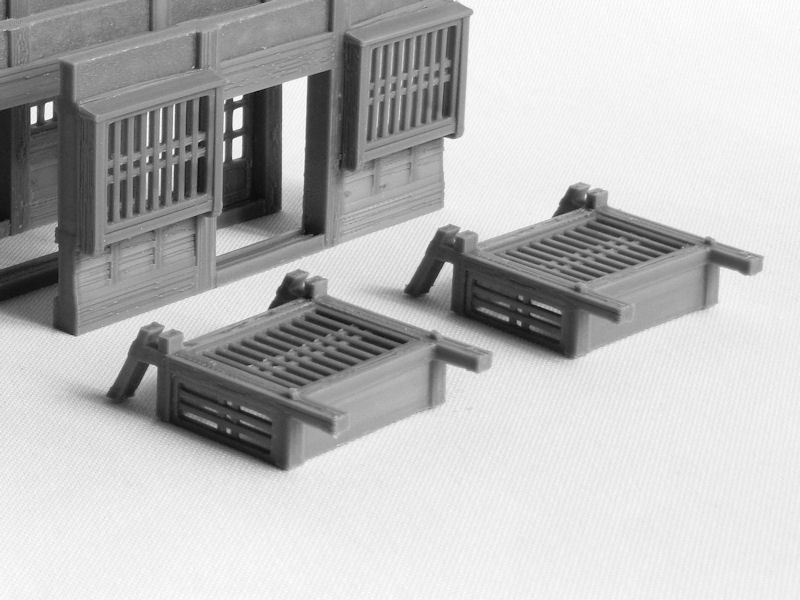
▲ I've printed two of the display window boxes, to use on my fancier shops.
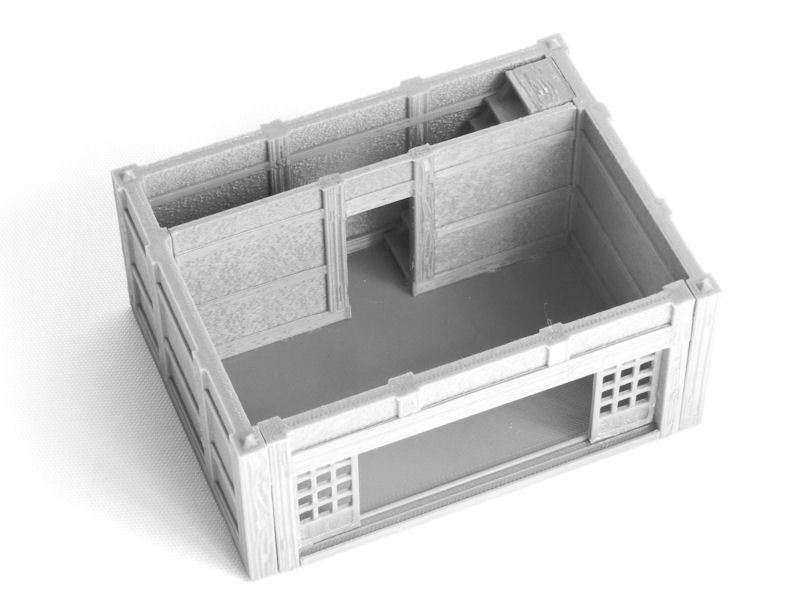
▲ Once you've printed the surrounding walls, you should print the floor section, the inner wall, and the stairs. There are two versions of the inner wall - with and without a small dividing curtain.
If you're thinking that those stairs are narrow, you're quite right - they are tiny! They're not really intended to be used by customers, so shop-owners tend to cram them in to the smallest possible space.
TIP: To make painting easier, DON'T glue the floor and inner wall into the model yet.
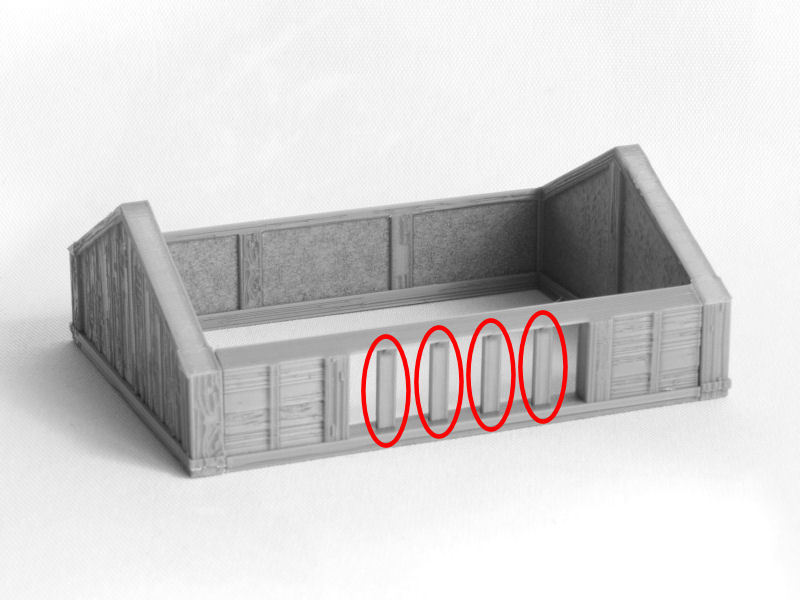
▲ Now we move on to the second storey. You've got several choices for wall types, and more choices for the front wall, too. You can also choose to model your shop with a low second storey (usually just for storage), or with a tall second storey (for a complete room).
Again, some of the wall sections include built-in print supports (circled in red in the photo above) for windows, which should be removed before assembly.
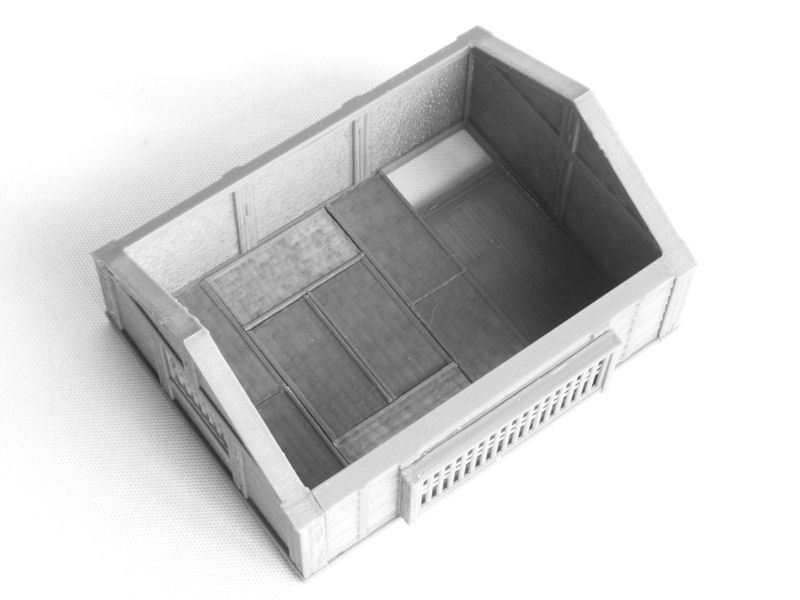
▲ After you've glued your second storey walls together, you should print the small wooden floor piece that goes next to the steps, and then the main floor. In the photo above you can see I've chosen to decorate this taller room with 8 tatami mats for the main floor, but for lower-height rooms you would probably just want to print the wooden floor version instead.
NOTE: The interior is reversible, in case you want to model the stairs to the left, instead of the right.
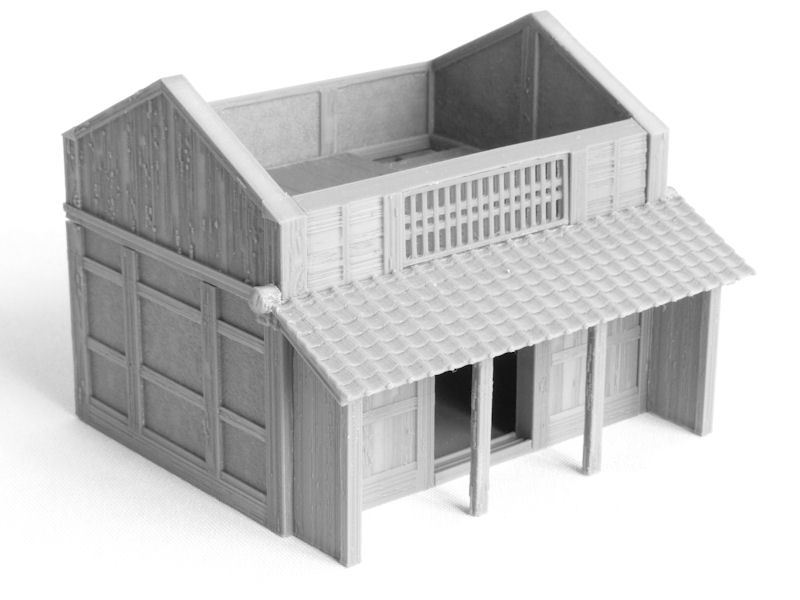
▲ Japanese shops usually have a short roof at the front of the store, to protect customers from the weather and also to create a grander shop front. There are two versions of this front roof included in the set - a wooden plank version (with rocks to protect it from typhoons), and the tiled version shown in the photo above.
The front roof glues to the bottom edge of the second storey, and can be supported by 2 or 4 vertical posts. The picture above shows another option, with a solid wood wall at each end instead of the thinner posts.
NOTE: If you're using the display window boxes, you won't need to add these posts.
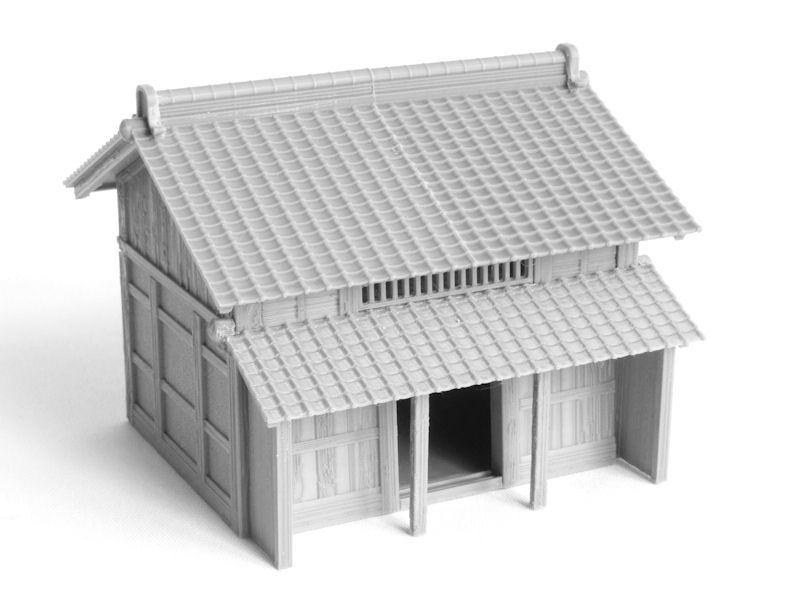
▲ And here it is, a finished shop building with the roof in place. The only thing left to do is to slot two sliding doors into the doorway.
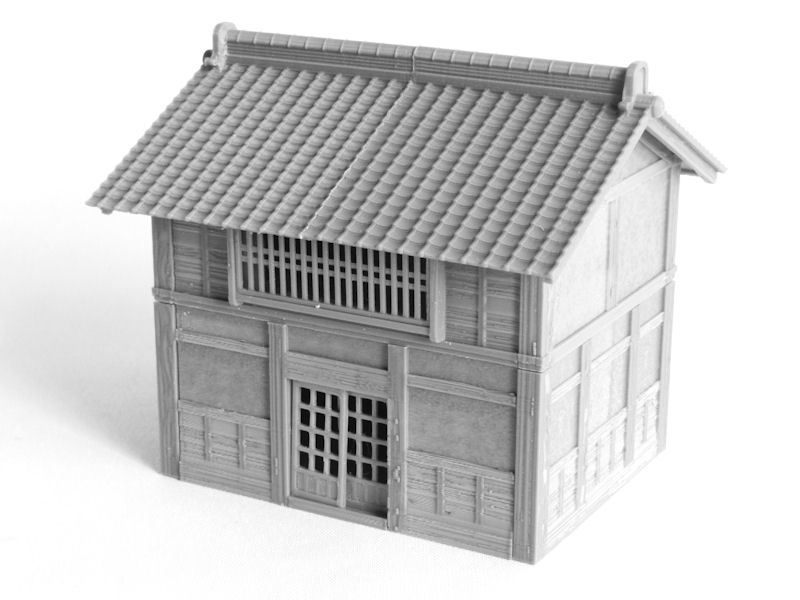
▲ Just as an extra note, you can also use these models as regular two-storey buildings (like in the photo above), if you leave off the front roof section.
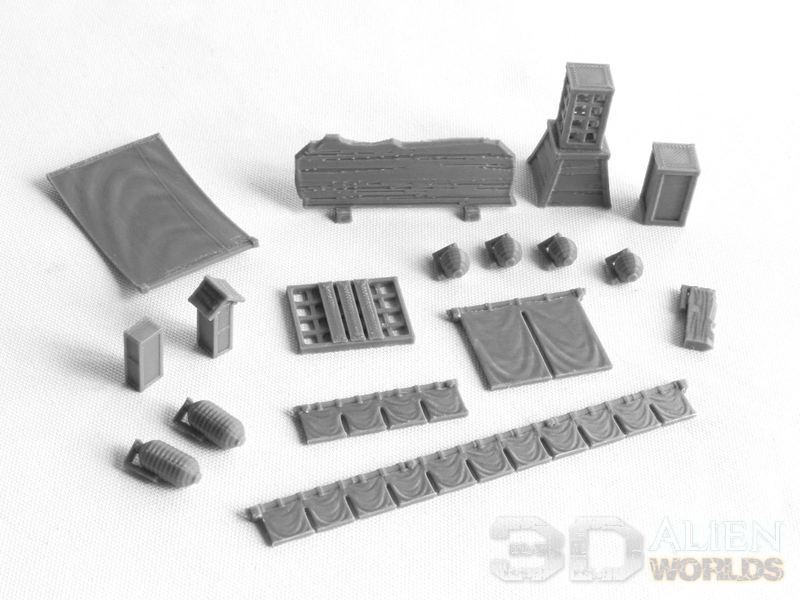
▲ Here are some of the blank versions of the signage accessories included in the set. There are curved fabric signs (top left), large wooden signs (top centre), a new LED standing sign (top right), small paper and wood signs, menu plaques for windows, large noren curtains for the front doorway, short and long noren curtains, and two types of paper lantern.
Some of the shop accessory sets will also include specific versions of these signs, featuring kanji characters.
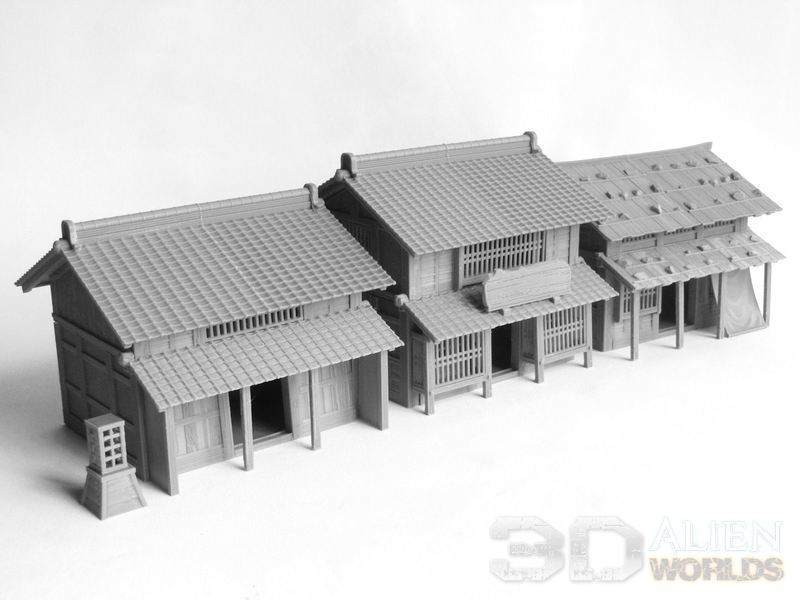
▲ One last photo to show you today, featuring three example shops. These don't include any of the shop accessory sets which will really bring them to life (see the next blog article for these!), but even from this photo you can see the wide variety of building style you can create from this set. The possibilities really are endless!
| << Designing the samurai shops 2023-02-07 | Printing and assembling the shops PART 2 : Accessory sets >> 2023-03-02 |
