
| << Printing the wooden sake cup 2023-12-18 | Painting the wooden sake cups >> 2023-12-20 |
The new Wooden Sake Cup comes in a few different versions, but perhaps the most interesting is the option to emboss your own design on the front?!
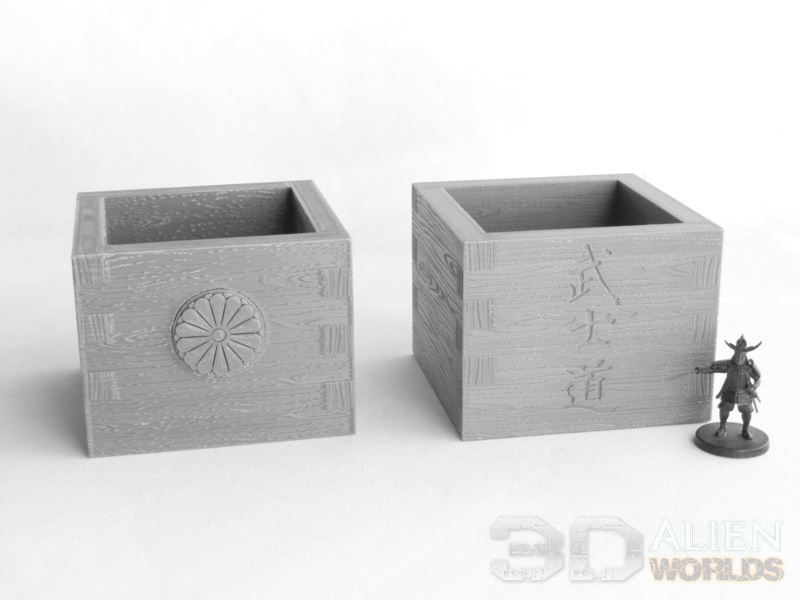
▲ Want to emboss your own logo or name on the front, so it looks like it's been engraved or branded on (like on the version on the right)? Read on.....

▲ The only things you'll need (apart from the STL file for the cup itself) are a black and white version of your logo, and some free 3D modelling software.
* For this example, I used the logo of the Shrewsbury Wargames Society, as it's a nice simple design and looks cool. Apologies guys, for borrowing your logo :)
Some handy 3d modelling software comes included free with Windows10, called 3D Builder, and that's what we're going to be using today! The instructions below show the step-by-step process, and although the blog might look a bit long, it's very easy and can be done in as little 3 minutes. Yes, really! If you don't believe me, check out the 3-minute video at the end!

▲ 1. Open Windows 3D Builder, click on New Scene.
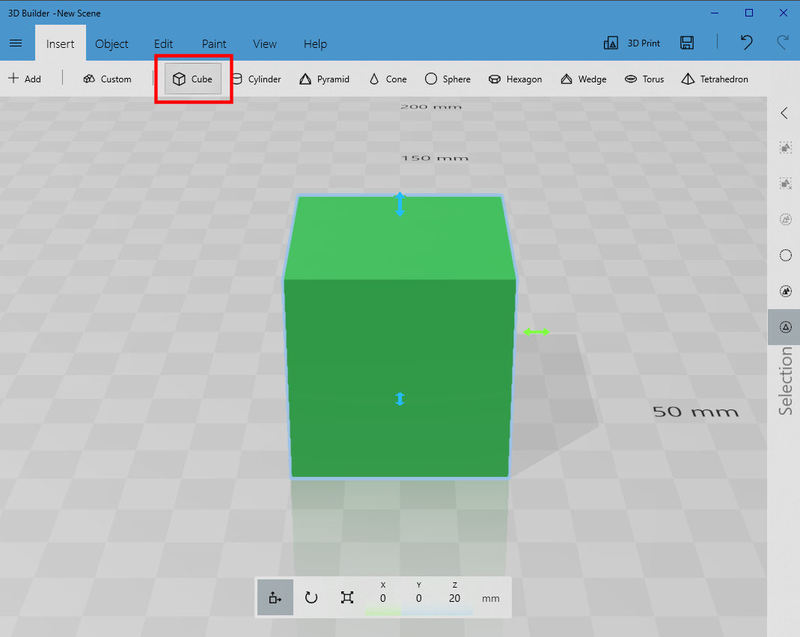
▲ 2. Select Insert from the menu at the top, and then the Cube button.

▲ 3. Click on the cube, and then the Scale button at the bottom.
4. Change the X to 90mm, and the Z to 70mm. This is the same size as the front of the box, which makes it easier to position your logo.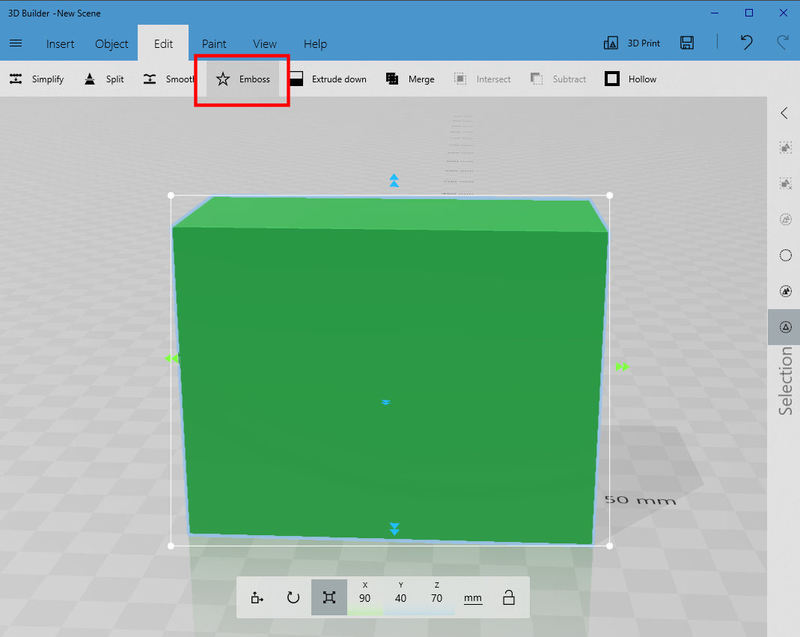
▲ 5. Select Edit > Emboss from the menu at the top.
▲ 6. Click on the Pattern button, and select Load to load your black and white logo file. A simple logo design works best for this, as some of the embossed lines will only be 1-2mm wide.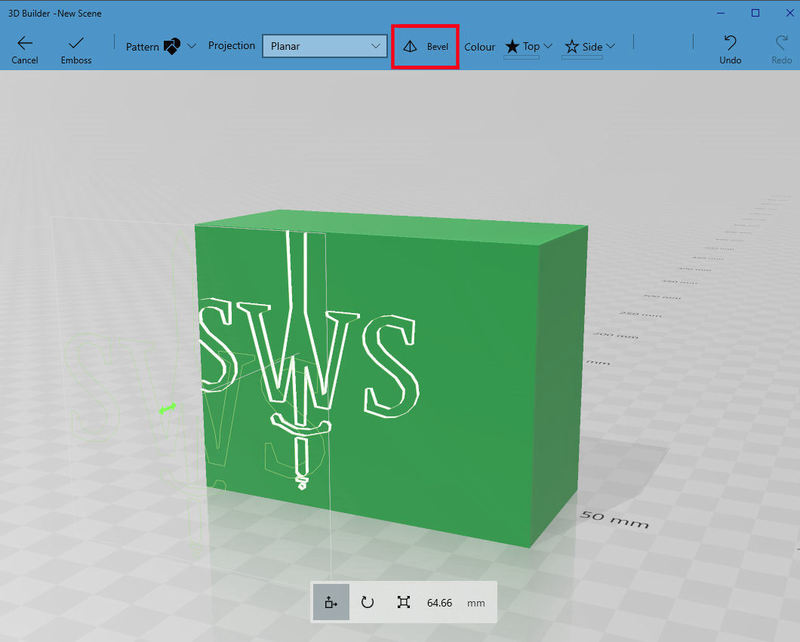
▲ 7. Unclick the Bevel button.
▲ 8. Click on the Scale button at the bottom, and drag an arrow until you have the logo at the right size (about 50mm x 50mm works best).
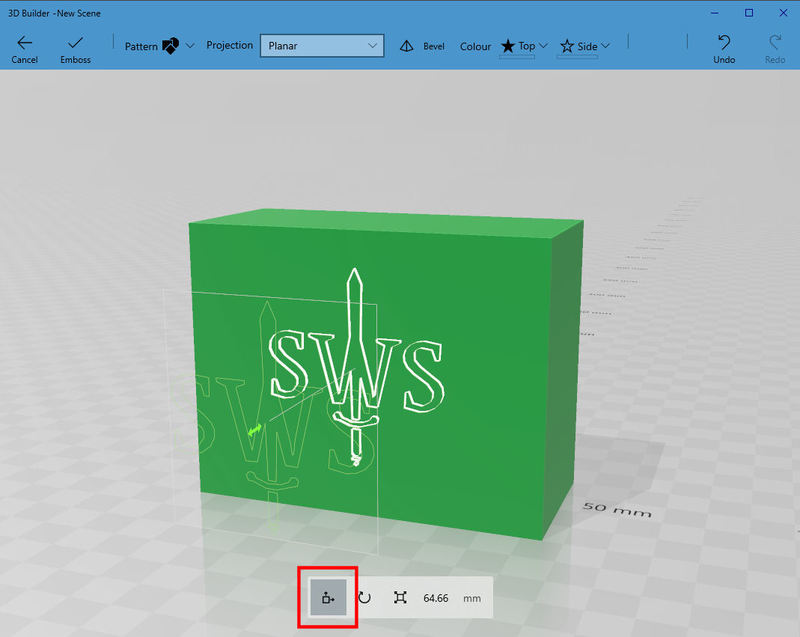
▲ 9. Click on the Move button, and drag the logo to the centre.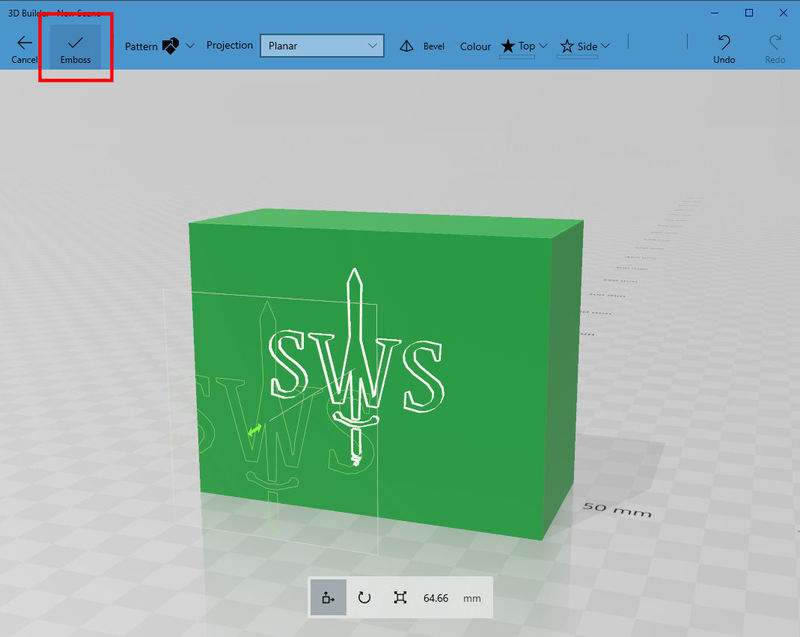
▲ 10. Click the Emboss button at the top to produce the embossed block.
▲ 11. Here's the finished, embossed block. But we have one more step, which is to reverse the shape because we'll be using the negative of this logo to cut out the box...
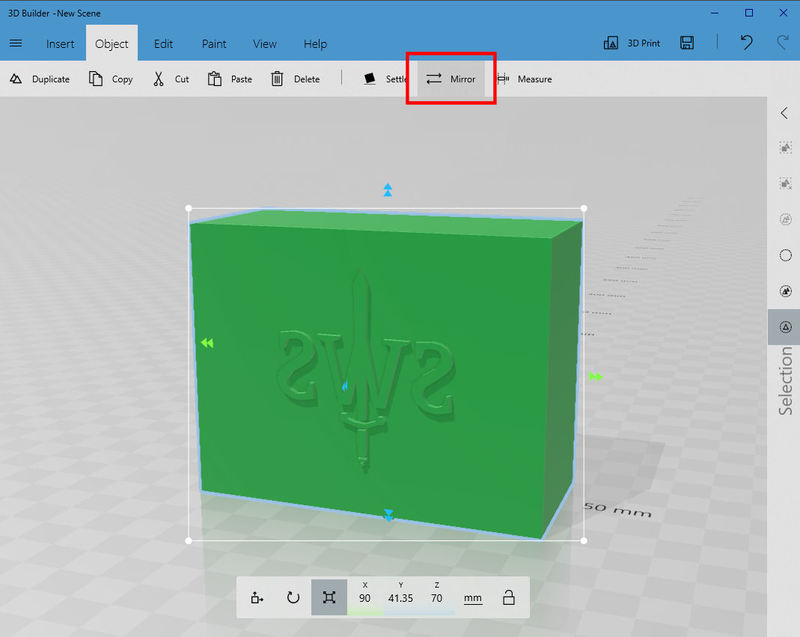
▲ 12. Click on the green block, and select Object > Mirror to reverse it.
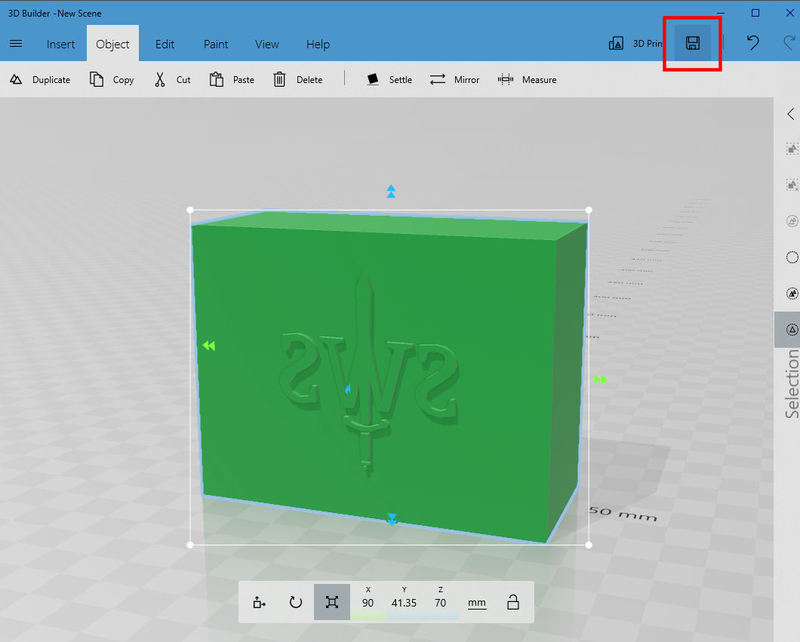
▲ 13. We've completed the first part of the process, so save the file as a 3MF or STL file (e.g. 'embossedlogo.stl').

▲ Part 2
1. Open the blank version of the box in Windows 3D Builder (or maybe a copy of that file, just to be safe?).
▲ 2. Click on Insert > Add.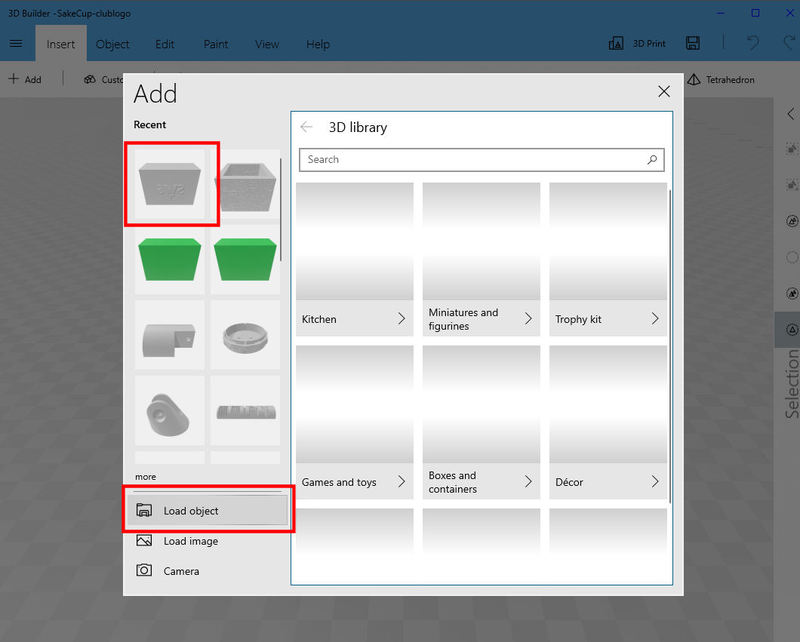
▲ 3. Select your embossed logo (e.g. 'embossedlogo.stl') from the thumbnail list or use the Load Object button to find and load it.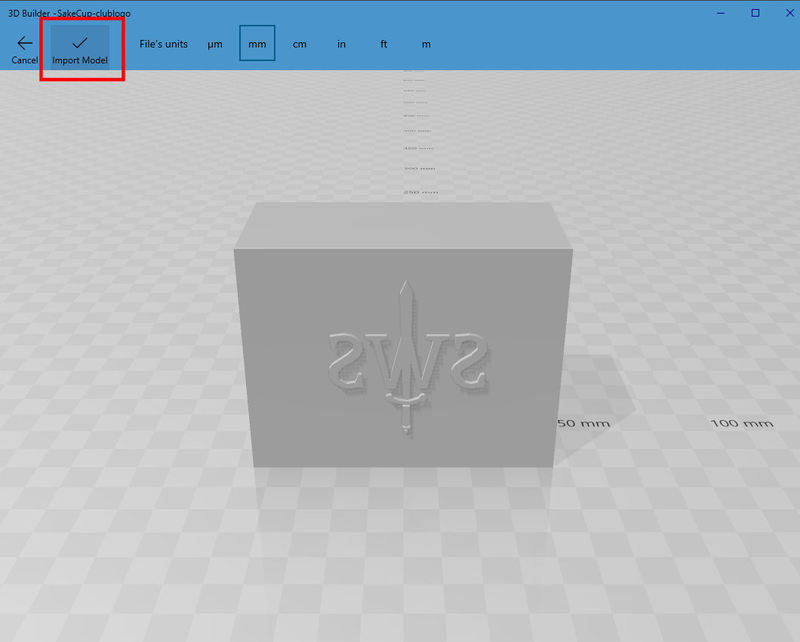
▲ 4. Click on the Import Model button at the top.
▲ 5. Drag your logo block next to the wooden box.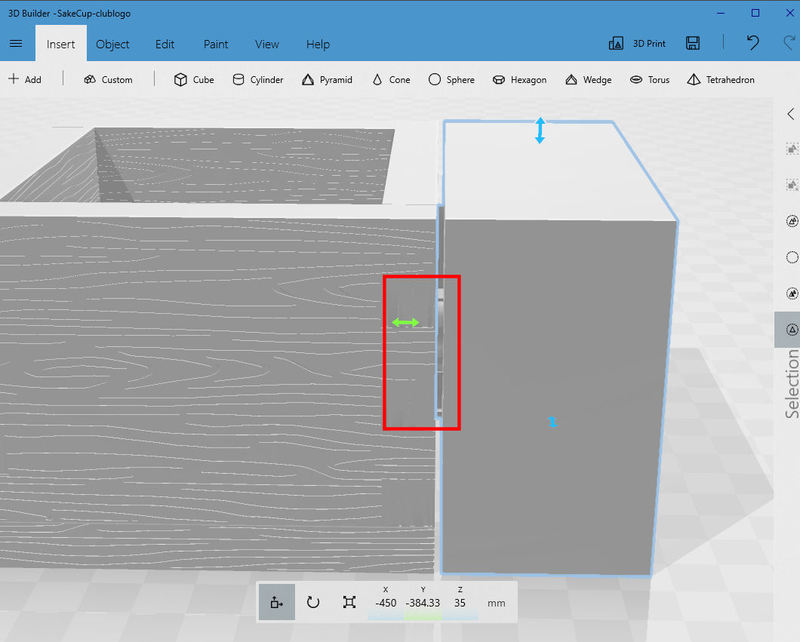
▲ 6. Place it against the side of the box, until it just touches. It will sort of magnetise itself to the box when it's aligned. You'll be able to see the logo in between the two boxes, from the side.
▲ 7. Click on the Y value, and add 0.5mm in the text box. In the example above, I changed it from -384.33mm to -384.83mm to move it closer. Push the Accept button.

▲ 8. Click on the embossed block, and select Edit > Subtract from the menu at the top. This cuts the logo block out of the front of the wooden box.
▲ 9. Save your wooden embossed box. You're done!
10. Get printing!
And just to show that the whole process in this really looooong blog can actually be completed in only 3 minutes, here's the video:
| << Printing the wooden sake cup 2023-12-18 | Painting the wooden sake cups >> 2023-12-20 |
