3d-printable terrain for all your samurai wargaming needs


| << Introducing OZWARGAMING, our new Australian print partner... 2024-01-13 | Printing & assembling the Guesthouses >> 2024-01-25 |
Last time we looked at how to assemble the outer and inner walls and gates, and this time we're moving on to some of the ancillary structures around the grounds of the new Samurai Lord's House.
These include a fancy roofed water well, 2 thick kura storehouses, and a long storehouse.

▲ Let's start with the water well! As you can see from the photo above, the water well has a pretty fancy roofed structure surrounding it, and I was able to replicate this nicely in the printed version...
▲ The structure is printed upside-down and then the two-part roof is added on top and finally the two-part well itself is placed underneath. None of these require print supports, and it's a quick and easy print.

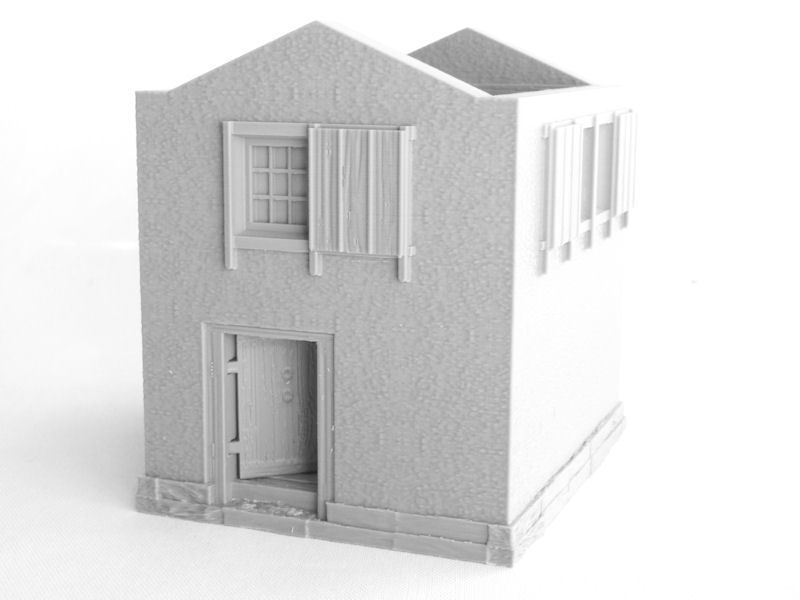
▲ Next we are moving on to the two big storehouses. These are solidly-built, thick-walled storehouses traditionally used for keeping the possessions of the household safe from theft, and they also helped to keep the house itself relatively free from clutter. The walls are the normal wood-framed construction used on other buildings, but the exterior walls were gradually covered with up to 24 layers of clay, and the roof eaves were also similarly enclosed in clay. All of this helped to keep the storehouses safe from fire, and so the lower level was often used for rice storage, and the upper level might be used for prized possessions - furniture and ceremonial items.

▲ The print starts with a single piece (the photo example shows Storehouse #2, by the way), which includes some built-in print supports in the doorway. These print supports, highlighted in red in the photo above, should be removed with clippers.
TIP: A few of the windows have overhanging shutter boxes. These print best, I've found, if you set the slicer to print walls "Inside-to-outside" instead of "Outside-to-inside". That pretty much holds true for all of our terrain models, since dimensional accuracy of a print is less important to us than the appearance. Just a handy tip for you!

▲ Next we need to print 3 floor sections, and the stairs. These simply slot into place, but you might want to glue them into place later on rather than now, for better access when painting the interior.

▲ The doors are next, which can be connected to their hinges using spare filament (maybe clean the holes with a 2mm drill bit first) or brass rod, as shown in the photo above.
▲ Again, you might want to paint the doors before permanently attaching them to the model.

▲ You could, if you wanted, simply add a roof at this stage and call it finished, like in the photo above. But I recommend adding the small window and doorway roof pieces too, as shown in the next stage.
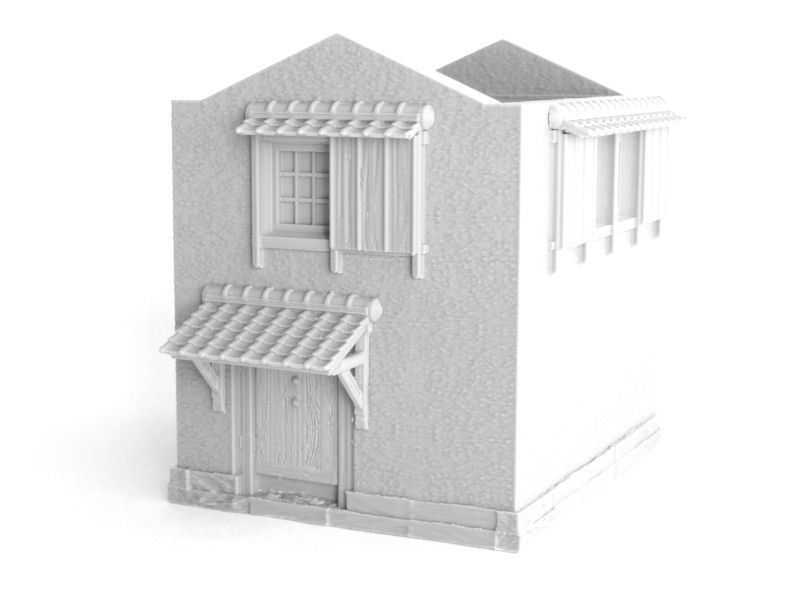
▲ These kura storehouses have small roof pieces to protect from rain over the doors and windows (called 'water-cutters' in Japanese!), and these look really unique when glued into place. 
▲ The interior of the storehouse is playable, although it's not particularly spacious. I'm planning on leaving the upper floor unglued, so it can be removed for better access during games. The rice bundle stack is included in the files, by the way.

▲ The roof prints in two halves, and completes the storehouse model. Even the roof of this very functional storehouse is pretty fancy! This version of the storehouse (Storehouse #2) has two hinged doors, one on each end of the building. Technically those were sometimes also covered in clay to make them more fire-proof, but that's a bit boring to paint, so I modelled the storehouses with wooden doors.

▲ Storehouse #1 is assembled in a similar method, but this version has a big double-door to the front of the building instead.

▲ This is the finished model of Storehouse #1. In the actual Inaba Residence that this layout is based on, this storehouse is the one right outside the kitchen, and would probably contain more foodstuffs.

▲ Our final building for today is the long storehouse shown in the photo above. This isn't as thickly-walled as the other two buildings, and has timber-beamed walls instead of clay covered ones. It's only a single-level building.

▲ The building prints in two halves, and there are three doorways that have built-in print supports (shown in red above), which should all be removed.
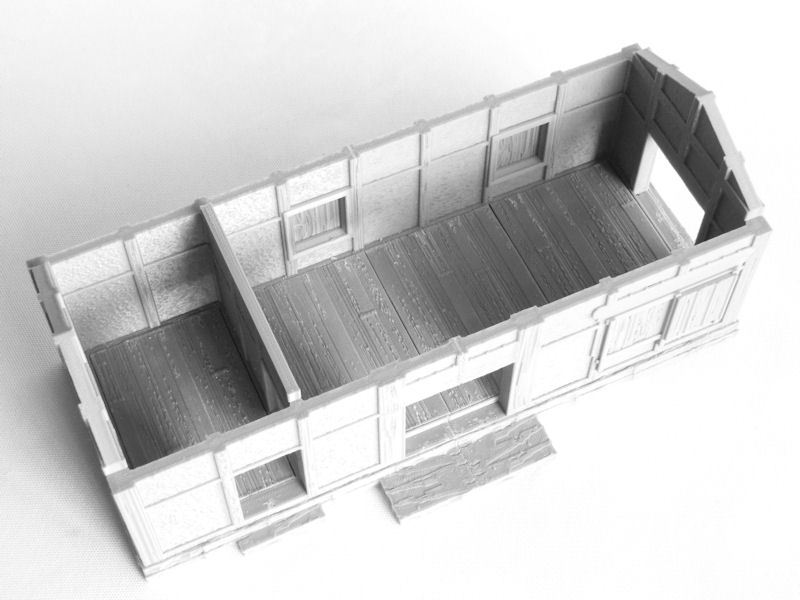
▲ There are 4 floor sections, and the slightly shorter one should be placed in the small room on the left. Again, you might want to leave these unglued until after they've been painted.
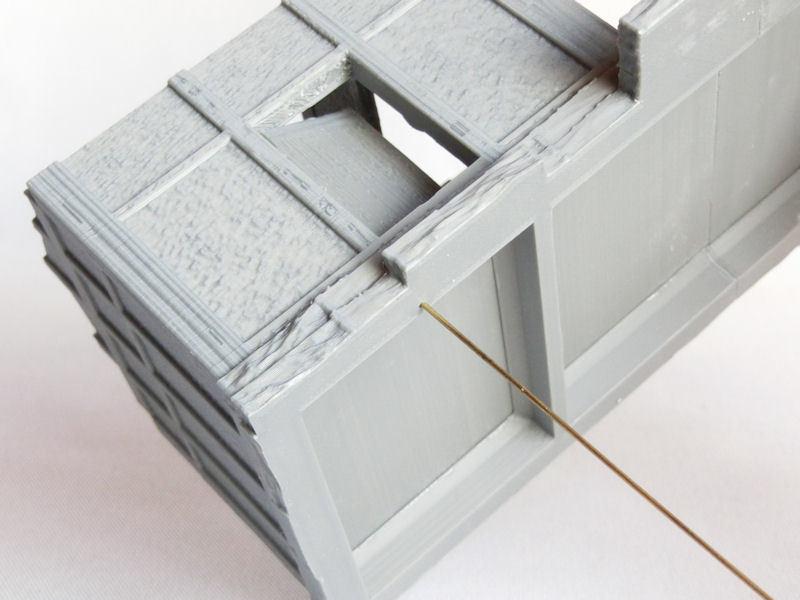
▲ The small door on the left is another hinged design, which should be connected using filament or brass rod.

▲ The other two larger doorways are both sliding door types, which can be slotted into the frame and opened and closed during play. The small grooved beams should be glued into place at the base of each sliding doorway.

▲ The long storehouse also has those cool roof pieces over the big doorways and the window at the front.

▲ The interior of the long storehouse is quite spacious, and makes a good contestable game objective, with all those entrances and exits.

▲ Here's the completed storehouse model. The roof prints in two large pieces, and includes built-in print supports for the fancy end pieces, which can be snapped off before assembly.
None of the buildings in this article require extra slicer print supports.
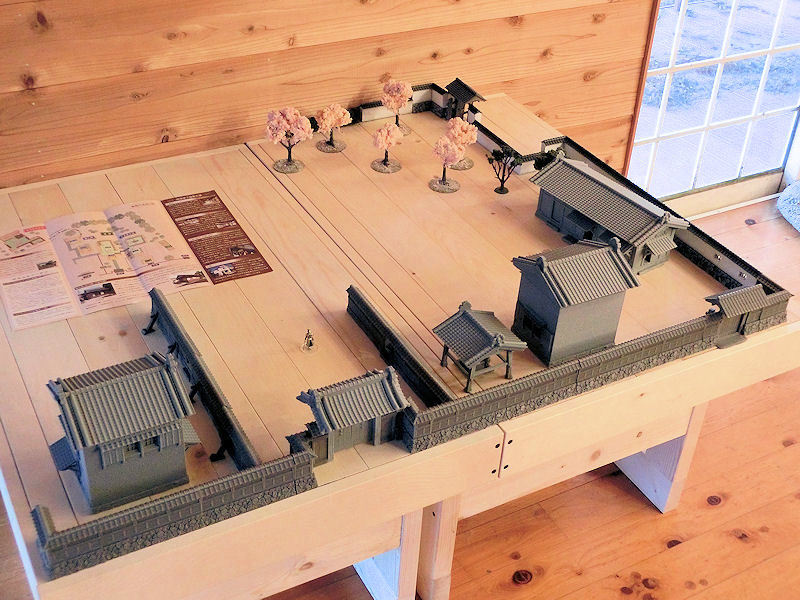
▲ One last photo to show you today - the work-in-progress pic of the whole residence layout. That's where the storehouses and water-well are located in real-life, near the outwer walls. It's looking pretty good so far, yes?
Next up will be the two guesthouses, and we'll be showing pics of those as soon as they're ready! Watch this space...
| << Introducing OZWARGAMING, our new Australian print partner... 2024-01-13 | Printing & assembling the Guesthouses >> 2024-01-25 |


