3d-printable terrain for all your samurai wargaming needs


In yesterday's blog post, we showed how to print and assemble the first two levels of the new Temple Pagoda. Today we'll show you how the other three levels go together, and then show off some completed pics!
Ready?
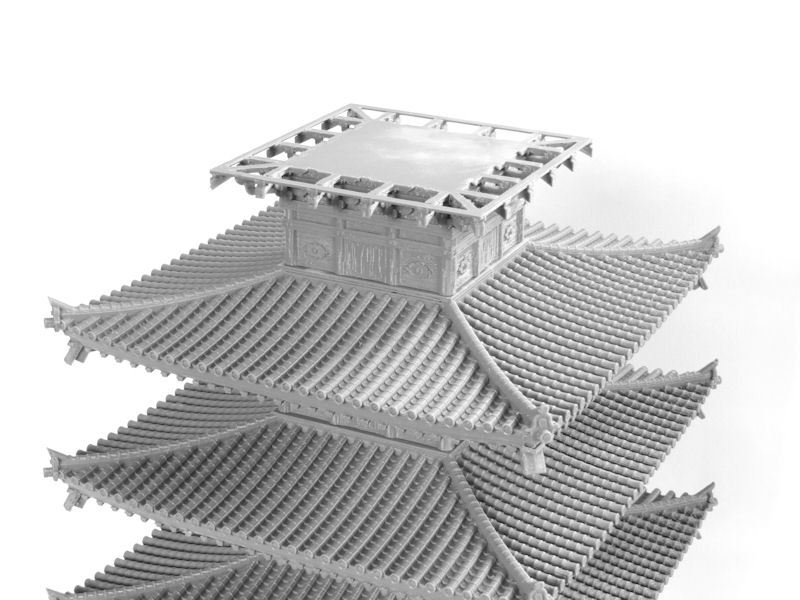
£ We'll start the 3rd level of the pagoda with a simple one-piece print. The 3rd level room prints upside down, and doesn't require any print supports at all. Unlike the first two levels, from the 3rd level up the rooms don't have interiors. There just isn't any space for models!
They may look like small but regular rooms from the outside, but there aren't actually any stairs at all in pagodas. Those doors on the side from this level upwards are more decorative than functional, since they are only about 50-60cm tall!
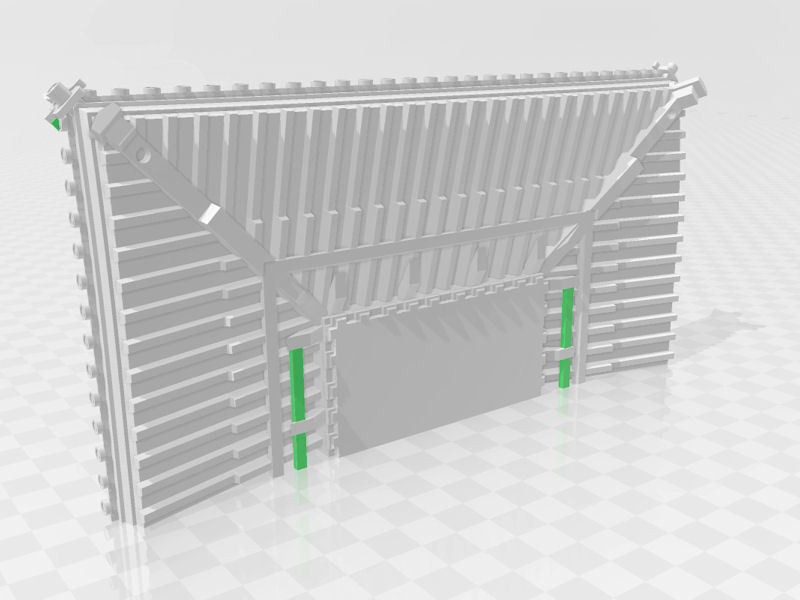
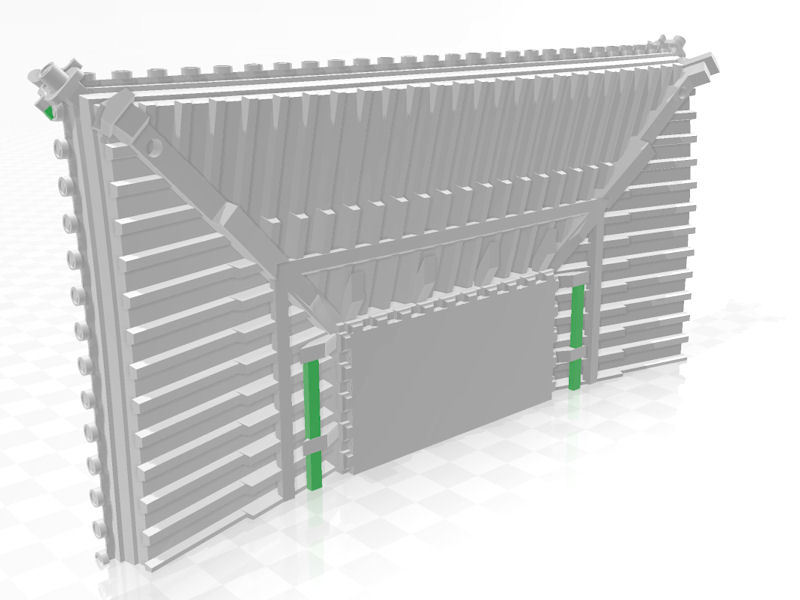
£ The roof for the 3rd level is printed in two halves (or 4 quarters for smaller printers), and simply glue together. There are a couple of built-in print supports (shown in green in the image above), which should be removed during assembly.
I recommend that you don't glue the roof sections onto the room below yet, because it will make painting harder!
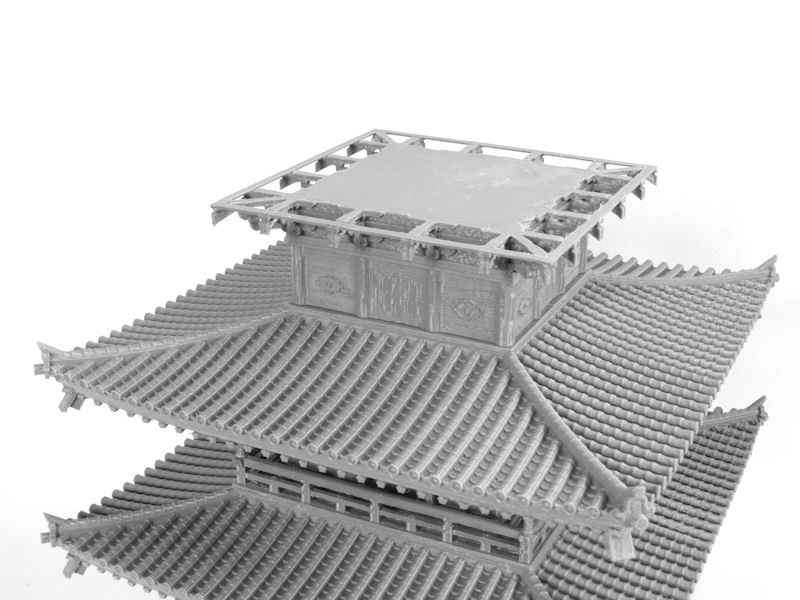
£ The 4th level room is printed much like the 3rd level. It's a solid one-piece print, and simply slots into place.
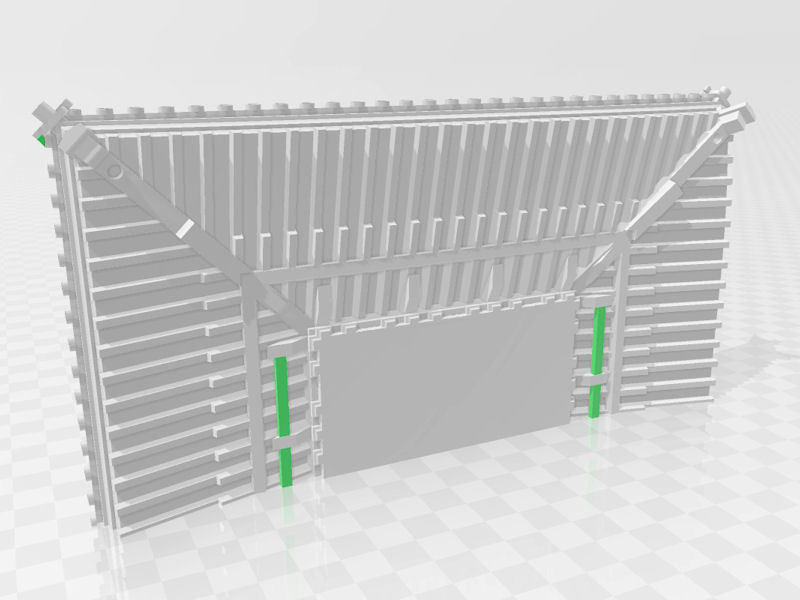
£ Similarly, the 4th level roof is printed exactly like the others, in two halves. Don't forget to remove the built-in print supports during assembly!
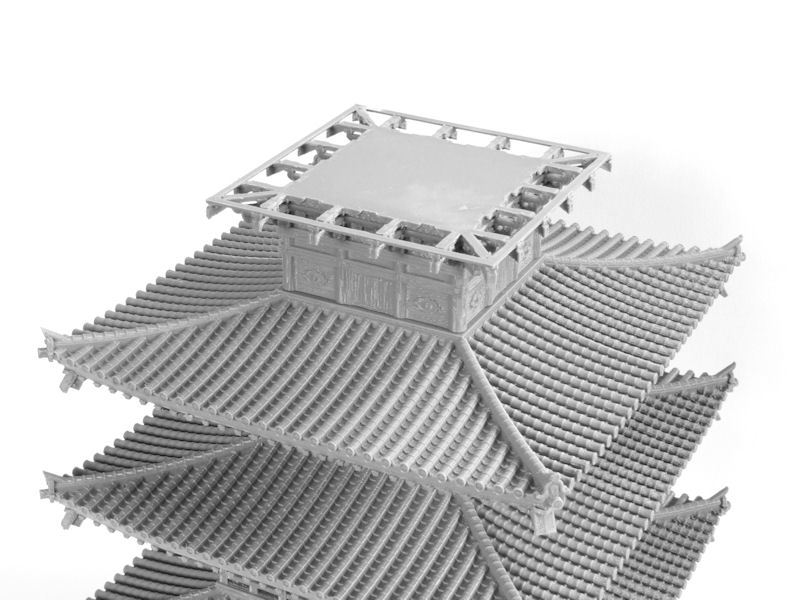
£ Phew, we've finally made it to the top 5th level. This is another easy one-piece print.
£ You'll probably be sick of printing roof sections by now, but these are the last! Yay!
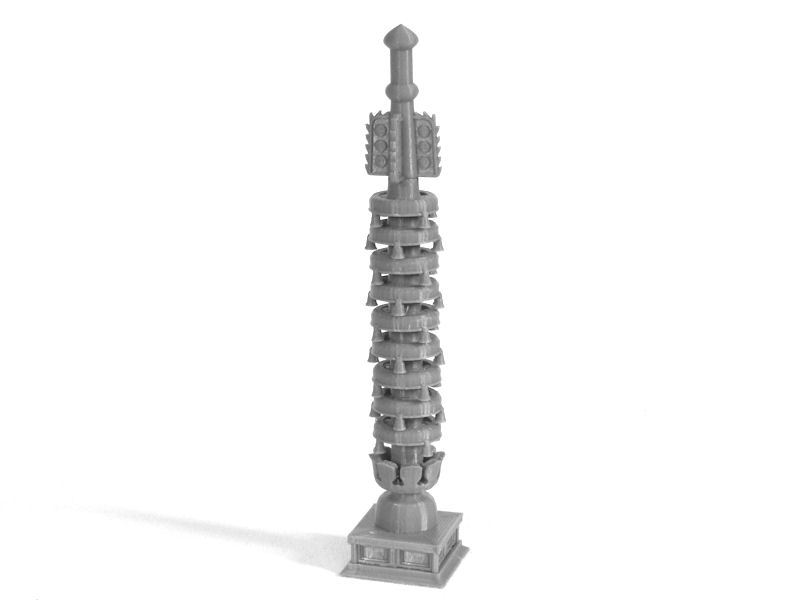
£ The spire that goes on the very top of the pagoda is the last big item! There are three main pieces - the base, the top, and the rings. You will need to print 9 of the rings, which is the traditional number on a pagoda.
All of these can be printed without supports (the rings print upside-down), and simply slot together as shown in the image above.
The last accessories to print are the 20 bells, which hang off each corner of each level of the building. They are easy 2 part-prints, and I'd recommend you paint them before gluing them into the holes.
So that's it..... we've completed the pagoda assembly. Congratulations!
Would you like to see some finished pics?
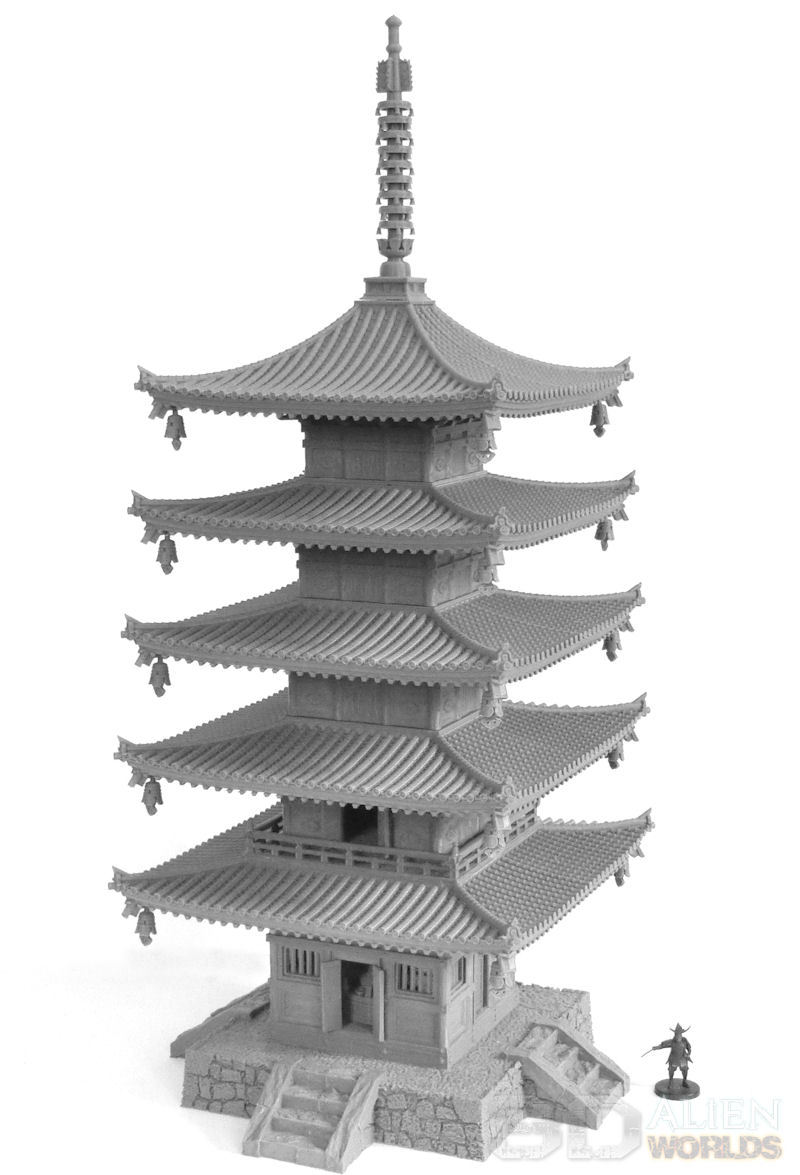
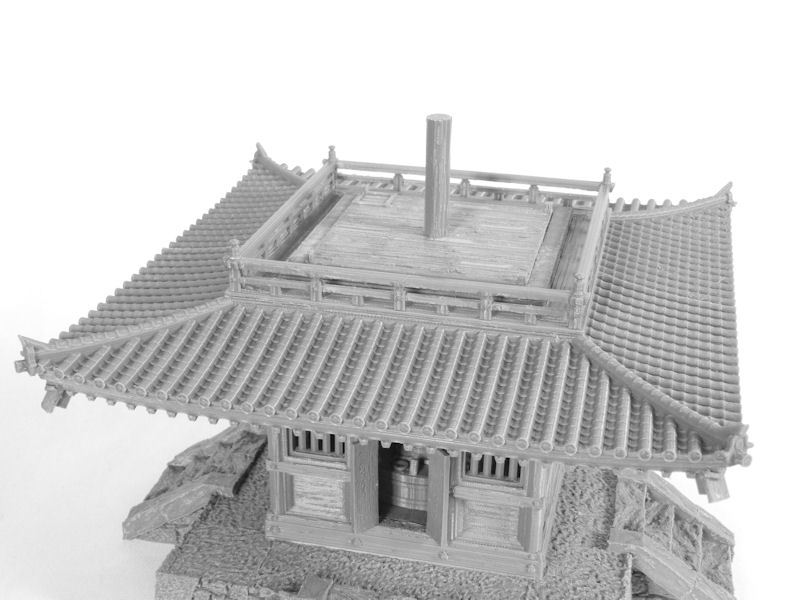
£ LOOK AT THAT BEAST - What a building! This stretches up 57cm from base to tip, which is actually even taller than the big castle! Yikes....

£ Since it's so very tall, your models AND your players will probably be seeing this view when they're battling around it! The underside of each level is completely authentic and super detailed, but I hope to paint this fantastic model in just a couple of days, with the use of spray undercoats, heavy washes, and big-brush drybrushes!
Watch this space....
Wowee! The very, very, VERY tall pagoda is now fully printed, so it's time to share an assembly guide.
There are 5 levels to this building, so we're going to split this assembly guide into 2 parts; today's blog will deal with the first two levels, and in the next blog you'll get to see the top 3 levels and some completed pics....
* Every piece of the model was printed at 0.2mm layers on an FDM printer, at 5% infill (except the buddha statue, who got printed at 0.1mm layers).
£ We'll start this model at the bottom, with the stone base. You have a choice of 3 variations for the base - with a single steps, 2 steps (one on opposite sides), and 4 steps (one on each side). I've chosen the biggest version, with 4 sets of steps.
My printer was big enough to print the 25cm base in one piece, but of course cut up versions are included in the files for smaller printers, too.
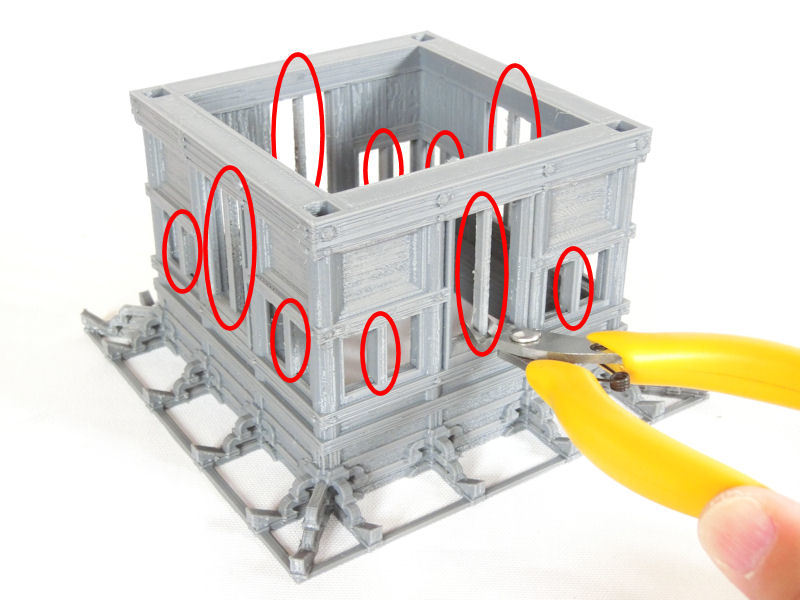
£ Next we can start printing the first level. This prints in one piece (or 4 pieces if your printer is smaller), upside-down. Like every piece of this model, you can print without supports! Clever, eh?
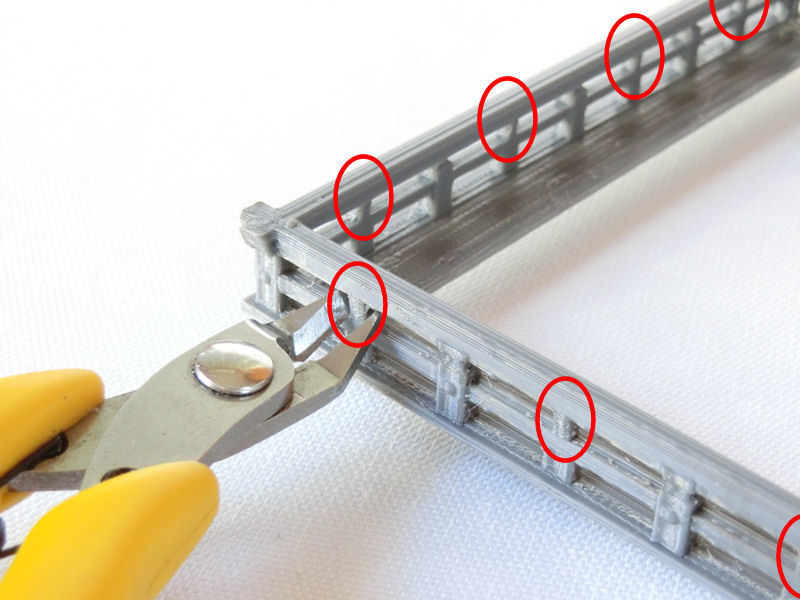
Having said that, this first level does include some windows and doorways, which have a few built-in print supports. These are circled in red in the picture above, and should be carefully removed with clippers.
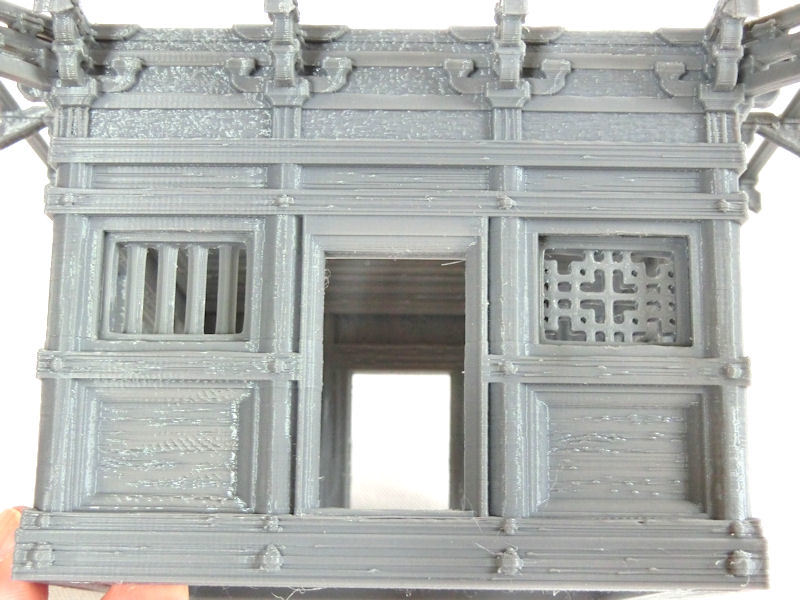
£ This first level can be fitted with 2 patterns of window. In the left window you can see the simple wooden bars, and on the right you can see the more ornamental version. You will need to print 8 of your chosen design, and then push them into the window frames from the inside. 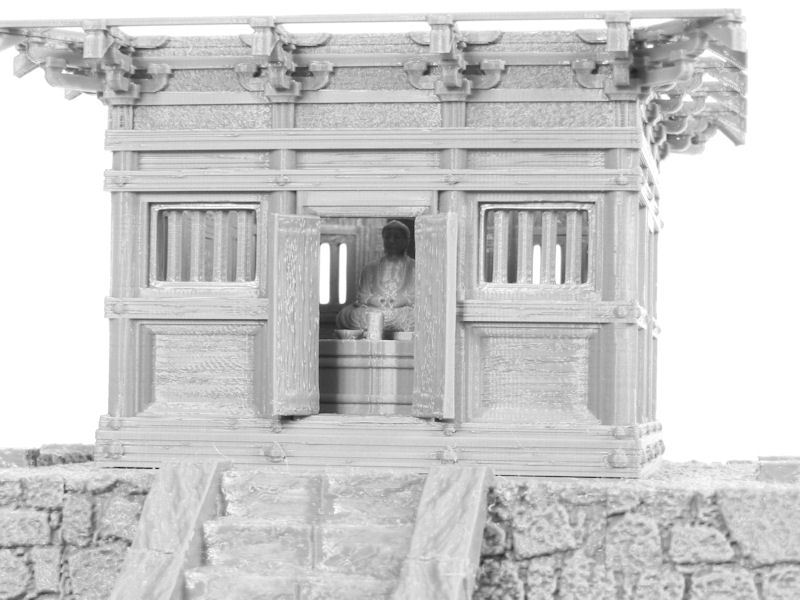
£ To complete the first floor room, you will now need to print the wooden floor, and your selection of doors - you can choose from open wooden shutters (as shown in the photo above), closed shutters, or a wooden grill. I chose a mix of doors, so my pagoda would be open at the front and back, but have grills at the sides to let in more light.
Also included are some accessories for the first level. Real pagodas, as I found out during my research trip at Ruriko Temple, actually have a small curved table/dais with some small bowls and vases, and then a statue of Buddha on top. These are included in the set as well, and make great decorations!
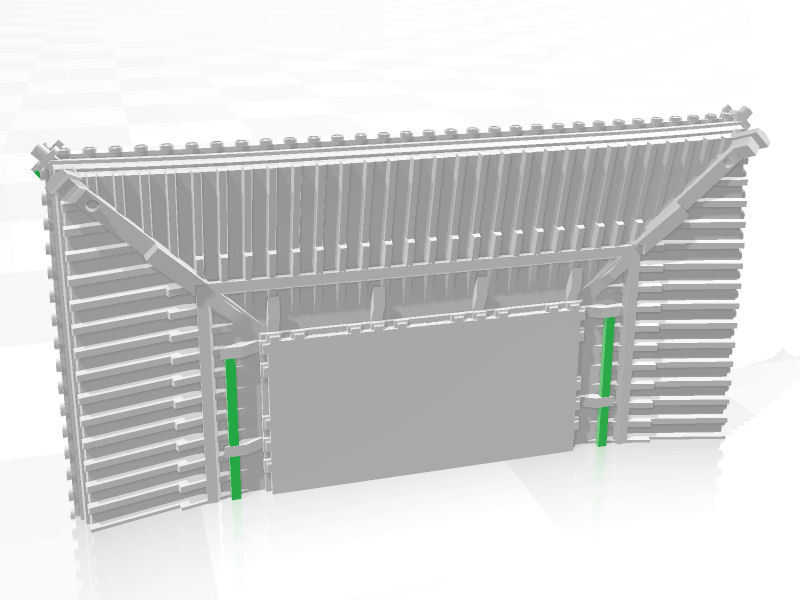
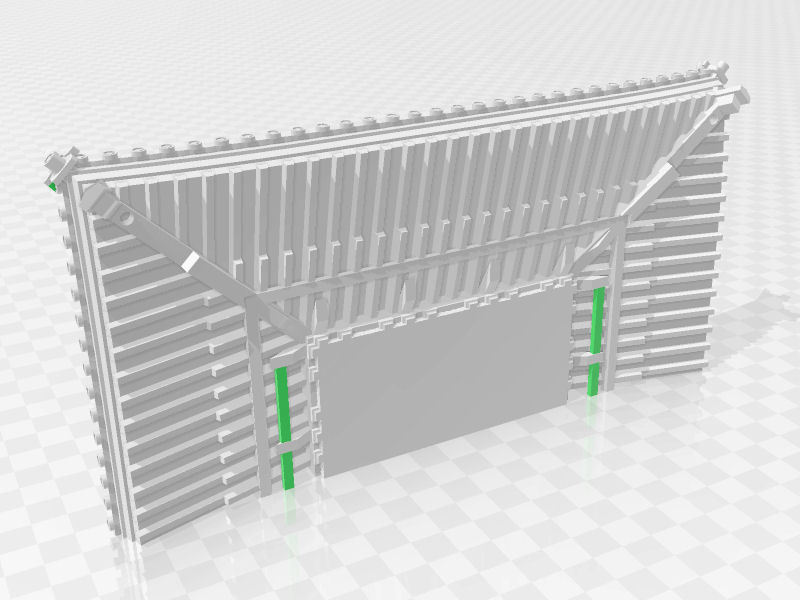
£ The roof for the first level prints in two halves (or 4 quarters if you have a smaller printer), and does not require print supports. In the image above you'll see that there are a couple of built-in print supports (the vertical green bars), which should be removed during assembly.
There are also tiny print supports included on each top corner (the green dot at the top left in the pic), but you don't really need to remove those unless you want to - they are only 2-3mm, and probably nobody will ever notice them anyway!
After you've glued the roof sections together, they should fit neatly on top of the room below. If you don't want access to the interior for gaming, you can glue the roof on top, but you don't need to - and it will make painting much harder anyway.
£ Now we can move on the the second level, which starts with this awesome balcony railing. There are a few print supports built-in (circled in red in the photo above), to help your printer span those gaps smoothly, and you can remove those by gripping the support and carefully twisting sideways with your cutters. That should neatly grind/cut through each support without damaging anything else.
You can also print a small decorative cap for each corner of the balcony, if you want to make it super authentic!
£ You can now glue down the balcony piece onto the first level's roof - it's a pretty tight fit!
The floor of the second level can also be glued down at this point.
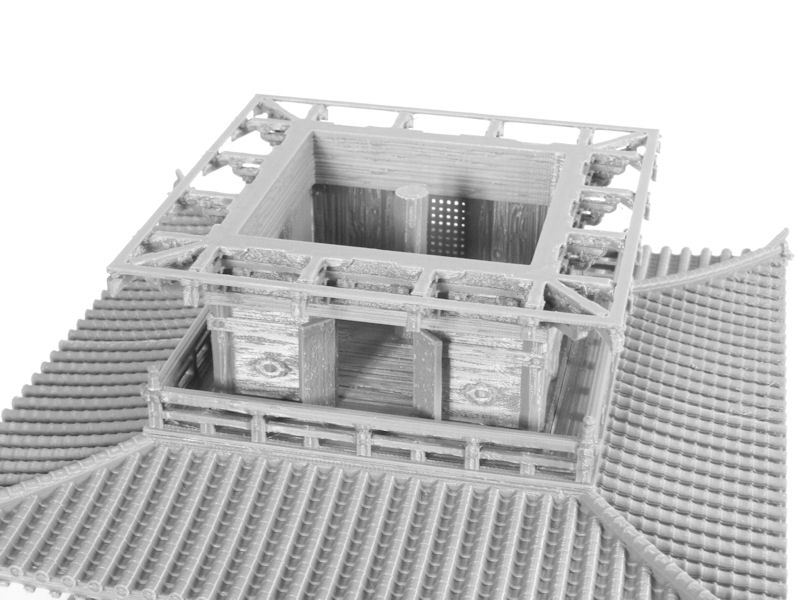
£ The second level room also has a full interior, and does not need to be glued down. You can choose from 3 patterns of door, as for the first level.
I chose to model the front doorway open, the sides closed, and the rear doorway covered by a grill.
£ The second level roof prints in two halves (or 4 quarters), in the same way as other levels. You should remove the built-in print supports during assembly, pictured in green in the image above.
That's it so far. The first two levels are now complete, and the remaining 3 levels will be much quicker to assemble, because they don't have interiors. Stay tuned for the next blog, where we'll reveal some completed pics....
When you think of Japanese architecture, there are basically 2 big ones, right? The massive samurai castle, and the tall and elegant pagoda!
Well, we are very pleased to show off completed renders of our upcoming 5-storey temple pagoda. This is a very large and very detailed terrain model, based on the beautiful wooden pagoda at Ruriko Temple (built in 1442) in Yamaguchi. This model features authentic details and measurements taken from construction schematics kindly provided by temple staff, and we featured some of the pics from the research trip in a previous blog!
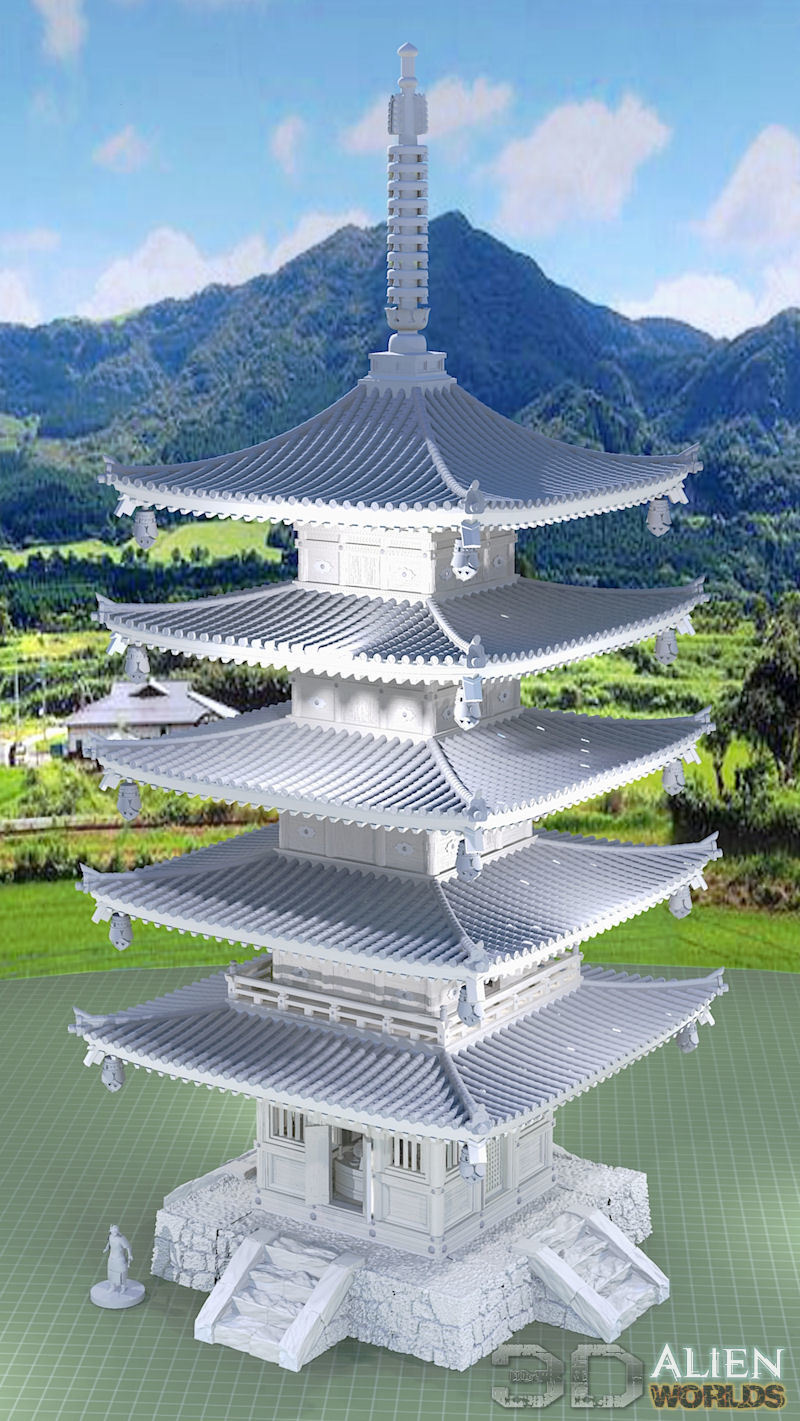
£ This enormous pagoda has been carefully modelled according to the dimensions of Ruriko Temple, although we have swapped the wooden roof for a more eyecatching tiled version, and also swapped the wooden stage for a more sturdy stone base.
I think you'll all be surprised to hear that this entire model can be printed without supports, and everything has been designed to print even at half size, for those of you with 15mm scale collections. With a bit of care in printing, it should even work at 6mm scale.
Yes, even that awesome spire at the top can be printed without supports, and simply slotted together!
£ The intricate supports on the underside of each roof are quite breathtaking, and with an overall height of 566cm (23"), your players should get a great view of them during games!
The bottom two levels have full interiors, and you can choose to model them with 3 types of door; open or closed shutters, and/or a wooden grill. The bottom level also features windows on each side, which you can model with vertical wooden bars or a more ornamental grill design.
The second level also features a narrow balcony, which is actually more ornamental than practical. As I found out during my research trip, there are no interior stairs, but the second level does include a trapdoor in the floor.
£ Levels 1 & 2 both include a central column from floor to ceiling, and the bottom level can also be fitted with a statue of buddha and offering table (both included in the set).
This super-tall model is currently test printing this week, and we'll be showing off some assembly guides soon....
We have a new print partner to announce this week - FROM SCRATCH 3D, our very first retailer from France. They are now selling print versions of our sci-fi Taui and Eldari models, plus our samurai terrain on their store!

We were invited recently to collaborate on a tie-in with TabletopSimulator, to include some of our samurai terrain models in the video game system. They'd seen our new Temple Outer Gate model, and asked if we could shoot a simple 360-degree spin video. 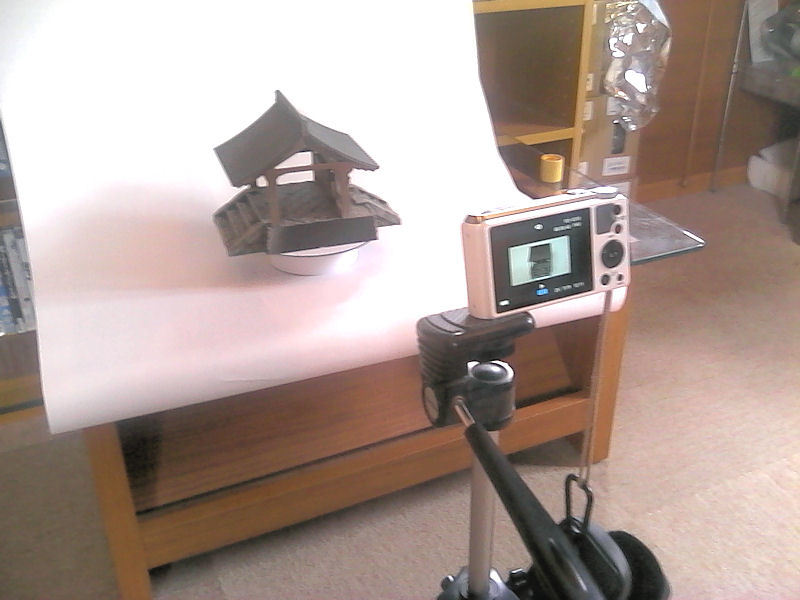
Please excuse the blurry photo - obviously we couldn't use the best camera to take the pic, because it's already IN the pic!
The video is then loaded into clever software, which pulls out all of the relevant detail and removes the background - leaving a full 3D version of the painted model, to be added into TabletopSimulator as a terrain asset.
This was a first draft, just to test some lighting settings, but you can see it should look pretty great once fully-rendered. Hopefully you should be able to fight your away in and around these models very soon, so watch this space!


0 Comments :
Write a comment :