3d-printable terrain for all your samurai wargaming needs


We're almost there now! One more level (the 2nd level) is currently printing, so here's an assembly guide to the 3rd level of the castle.....
£ Assembly starts like many of the other levels; in four quarters. As for all the parts from this level, none of these sections require print supports. Each section's model is marked with letters to show where they go in the arrangement, and you'll need to pay attention to this or the floor supports won't be in the right places.
Once the four sections are printed, you'll also need to print the corresponding floor supports. These are also marked with letters, so it should be an easy job to slot those in the correct place, as shown. A couple of overhead beams fit into place in the alcoves for extra strength.

£ There are also two roof sections for each quarter, which can all be printed without supports. Carefully glue those into the correct place around the outside.

£ Now we start to get onto the fun stuff - the interior of the 3rd level. There are three rooms on this level, plus a hallway, so you should start by printing the walls and the wooden floor section. For those of you with larger printers, there is a combined version of the wall sections, too.

£ Next you should print the doorway pieces, which slot into place between the floor of each room, and plenty of tatami mats.
TOP TIP: Leave one row of mats unprinted for now, and dry fit all the tatami mats before gluing. You might find (like I did) that the fit was very tight in places, so I found it easier to print one row of tatami mats 1mm shorter than normal, so they would fit more easily against the wall. That seemed easier than sanding down 1mm from several mats.

£ Add in some sliding doors, a handrail and the staircase, and the 3rd level is complete!
Time to put these together....

£ Wow!! Getting enormous now!
The last level should be printed and assembled in a few days, and then we can take a look at the completed building!
Progress is finally flying ahead on the samurai castle! While the next level prints behind me, it's time for an assembly guide for the castle's 4th level.....
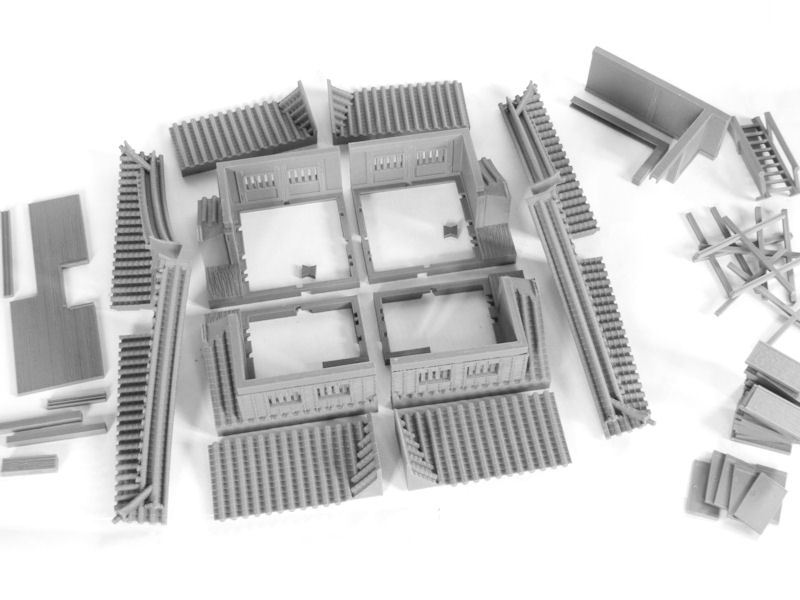
£ These are all the parts required for the complete 4th level. The main sections comprise of 4 quarters, each with 3 parts - cut to fit on smaller printers and also to ensure that the edges of the roof sections print as well as they can without supports.
£ Start with the four room quarters. You will need 2 of the left piece, and 2 of the right. These are of course printable without supports. Glue these together, and don't forget to add 4 joining clips for extra strength.
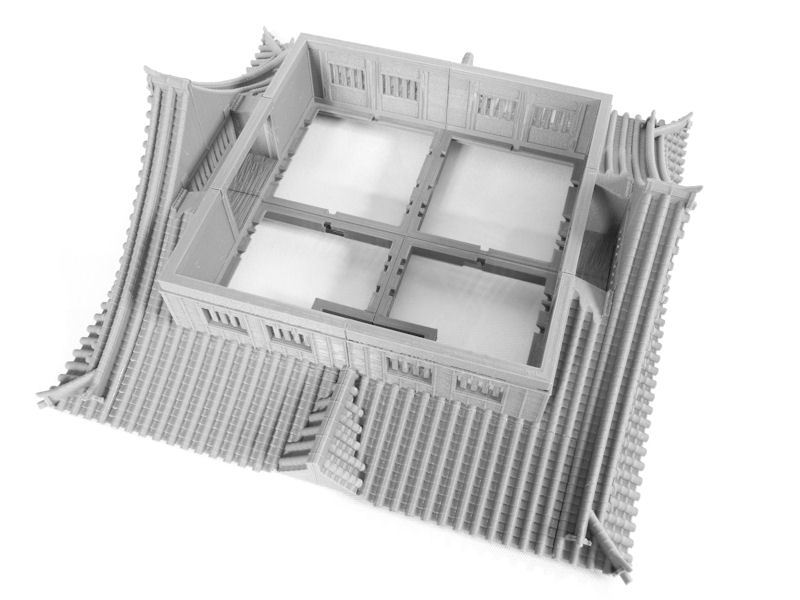
£ Print 2 of each roof section (without supports), and glue them as shown. It's a bit fiddly to make sure everything lines up, so take your time and go bit by bit. There are also a couple of thick beams to be glued in place above the alcoves on each side.

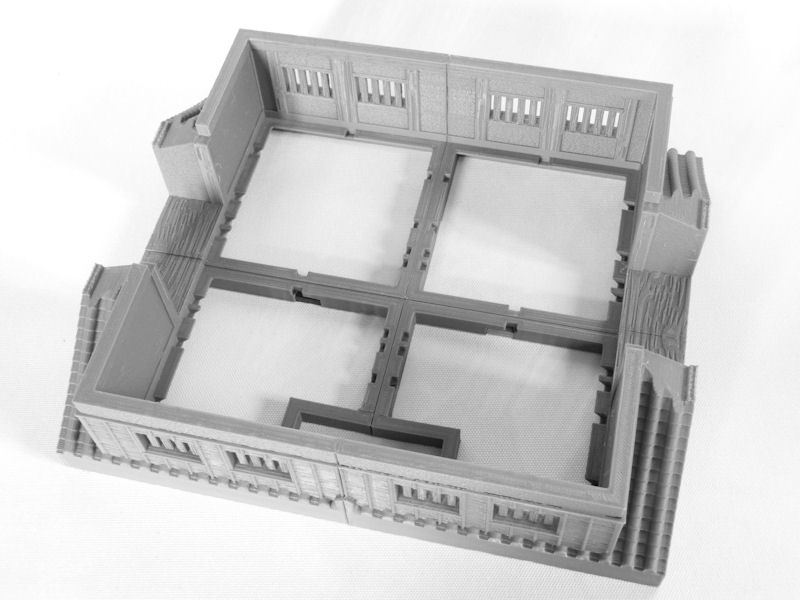
£ Next job is to print the 4 floor supports - 2 of each shape. You'll find that they only fit one way - with the two at the front different from the two at the back, because of the hole for the stairs.
You can now start to add in the floor and walls as shown, and then two doorway pieces are glued on the left and right for the sliding doors. You might want to dry-fit all the floor pieces including tatami (see next step) before gluing.
One extra piece of short wood is included in the walls file, which is designed to fit in on the left alcove, underneath the beam. It plugs the small gap left between the sliding doorway and the alcove wall.

£ Print 22 tatami mats, and glue them in as shown. I found this to be a pretty tight fit, so keep some sandpaper on hand to smooth off edges.
You'll also need 6 sliding doors, which can be inserted in the doorways and can be left unglued, and then finally the staircase to the next level.

£ That's it - you're done!! Your authentically detailed fourth level is complete.
Let's add the 4th and 5th levels together....
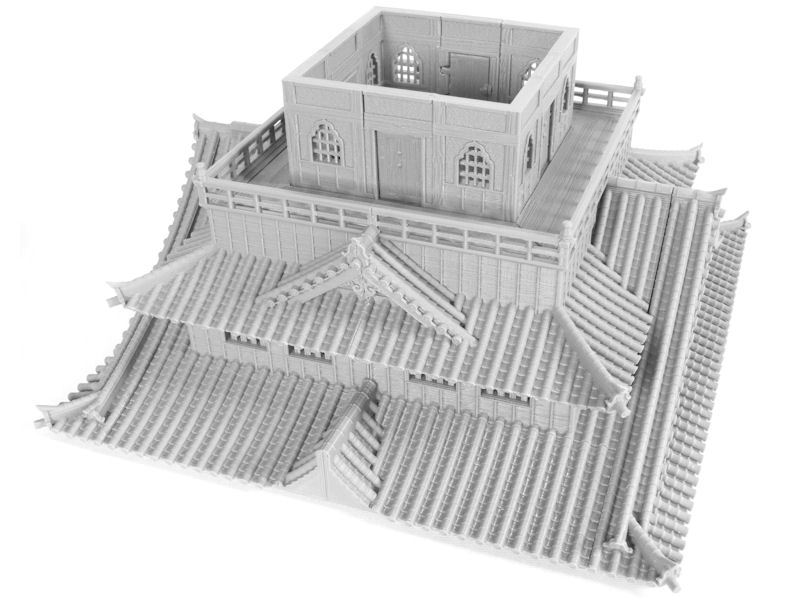
£ You can see from the photo that the join is pretty invisible. You can carefully slide the 5th level section up from this one for gaming inside!

£ Now it's starting to look like a castle, eh?

£ I can't believe it looks this good with only the top two levels done! It probably weighs close to 1kg at this point, by the way.
On to the 3rd level next.......
Here's a special sneak peek for those of you checking in to the blog regularly - an assembly guide for the fifth level of the samurai castle.
Half the levels are now fully printed and assembled, with the others soon to follow - but strangely it's easier to work backwards from the top level, to ensure all the roof sections line up once printed (and to spot any problems in the files!). So please bear with me.....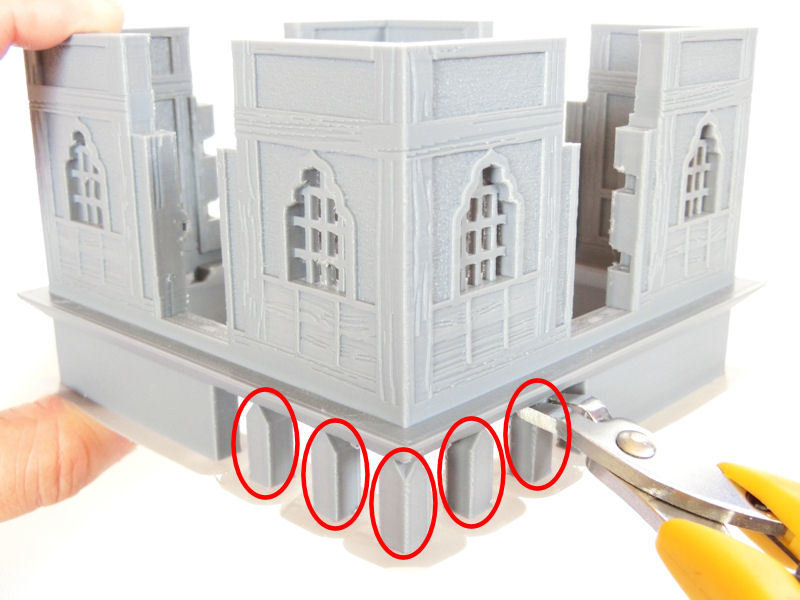
£ The central section of the 5th level is this single room with a door on each side. It prints as one piece, without supports. Please note that you will need to cut off the 5 built-in support posts in one corner (circled in red above), as those will block the stairs if not removed.

£ As for other buildings in the samurai collection, you can open and close doors. The doors in this section all lead out on to the balcony, and can be hinged with a piece of brass rod or filament. Simpy insert the rod all the way down, and cut at the top of the door, as shown above. Each door has a top section that is glued in to place above the door, locking in the hinge rod.
The support beams for the floor is printed as one piece, and includes space for the stairs to lower levels (on the right of the photo).

£ The next step is to glue in 7 tatami mats in the arrangement shown above, and then the extra wooden sections and stair railing (top left of the photo).

£ Next we go BIG! The lower parts of the 5th level are printed as four quarters (two left and two right sections), and the upper room is then slotted into place and glued. Apologies for this, but these four sections will need to be printed with supports. :(
* Angie from our partner shop Alt Reality Terrain mentions that the best choice for her was Cura "tree supports" for printing this section, by the way. Thanks for the tip, Angie!
With the central room glued in place, the last parts are 4 balcony floor sections to be slotted around the outside of the room, and then the 4 corner knobs. You can add more if you want to make it even more decorative!

£ We're almost there now! The top roof is printed in two halves (the same section twice), and are simply glued together. This can be printed without supports, and I decided to print very slowly at good quality (0.1mm layers) - because the top roof will probably be inspected more closely than any other section of the castle by gamers!
If you look closely at the corners, you might notice a tiny piece of built-in support right near the tip (2mm long bar, circled in red in the photo above). This can be carefully removed if you prefer, but in all honesty probably nobody will ever notice if you leave it there!

£ With the two halves of the top roof firmly glued together, you can finally print the decorative shachihoko dragonfish, and glue those on top. These are very small, so I printed them at the best quality my printer could manage, and they look great!
If you really want to make your castle even fancier, you could print extra dragonfish ornaments, as they will fit pretty much any roof spines on the castle, on any of the 5 levels. So go nuts if you want!!!

£ With the roof section placed on top of the 5th level, you can get some idea of just how super-detailed this castle will be! It's huge, and every part of it has been lovingly designed. The roof tiles in particular, have caused many headaches for creating the files, but the final sections seem to be rolling off the printer smoothly now.
So apologies for the delays, and thank you all for your patience!!
We have a new print partner to announce this week, PRINTABLE FANTASIES, from Washington, USA. They are now selling print versions of our Japanese samurai terrain on their Etsy webstore!

After many, many thousands of individually placed rooftiles, and many, many hours of cursing ancient builders, the final version of the HUGE 5-level samurai castle is now complete.
So here we go........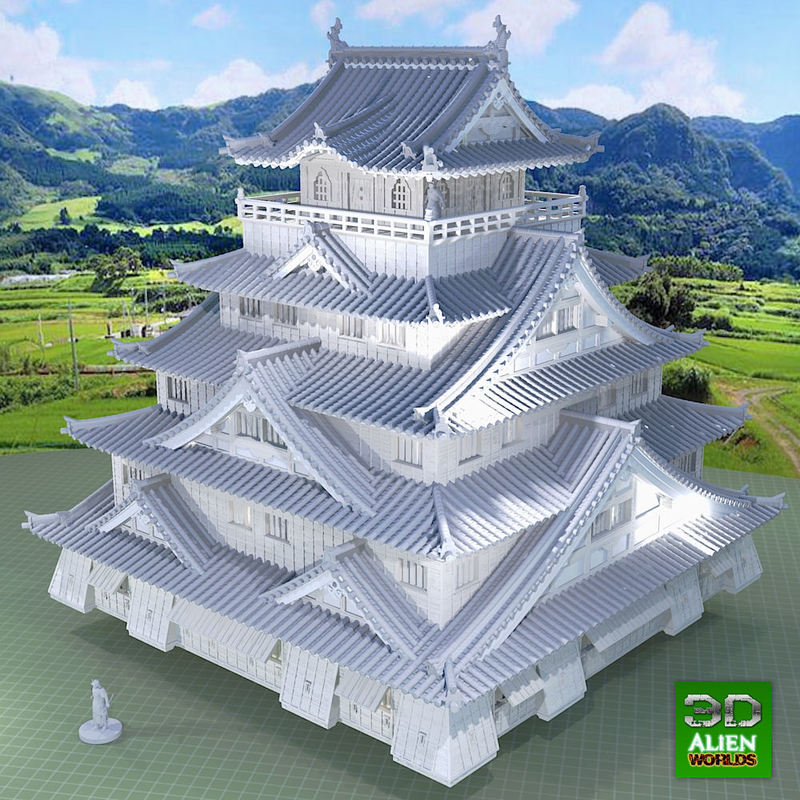
Isn't it awesome?! This is just the CG render, and at this size it's a little hard to see the details put into every square centimetre of this design - but rest assured, it's covered head-to-toe in authentic details, fully detailed interiors, and textured floors, walls and roofing!
Printing begins in earnest in a few more days, so fingers crossed that I haven't made any stupid mistakes!!


0 Comments :
Write a comment :