3d-printable terrain for all your samurai wargaming needs


With a sudden flood of players wanting to build their own necron tombcities (it might have something to do with the upcoming release of Warhamemr 40,000 9th edition, I guess...), people have been asking for a few extra pieces for our Necrontyr range.
The first new design to come off the printers is this ruined wall section, to be used alongside the larger Tombcity Wall set.
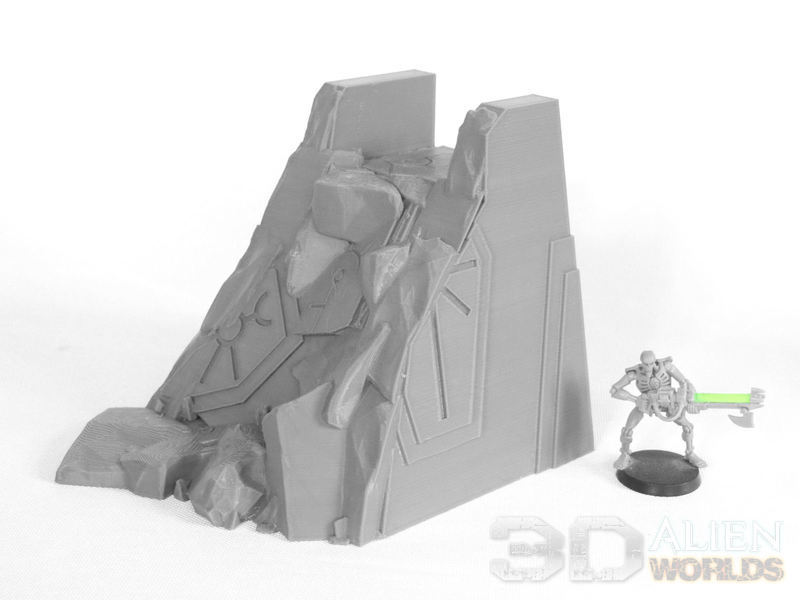
£ As you can see, this model is based on the 12cm straight wall section from the larger set. It has the same dimensions, and the same protected walkway at one end on the top.
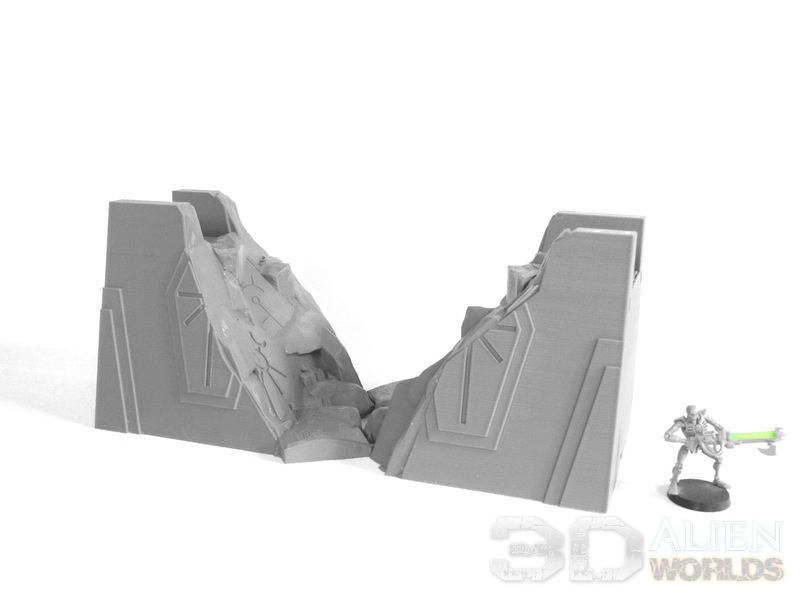
£ This is a simple one-piece print (no supports required), and you'll probably find it most useful at the end of a line of walls, or placing two prints together to create a wall breach.
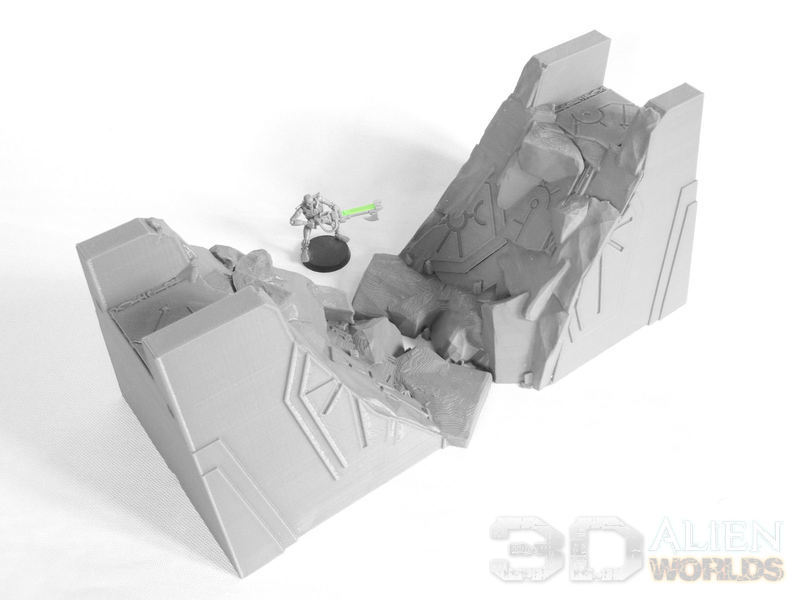
£ From above, you can see that several large slabs of the outer facing have collapsed inwards amongst the larger chunks. These might look great with painted battle damage, with their green glow slowly fading to darkness.
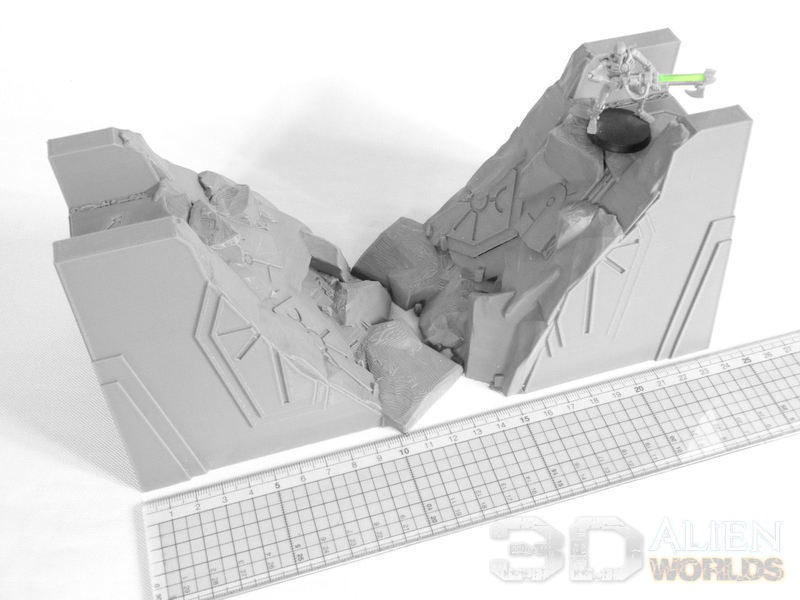
£ This piece was carefully designed so that two prints could be placed together like this, and make a 240mm long section, to be used in the place of two regular undamaged sections.
These will be hitting the paint desk this weekend, and will be released next week!
Here's a very special video from Terry Gaudet, of his totally awesome Necron World table - featuring pretty much every design from our Necrontyr collection. Go look!!!!
Here are some of our favourite moments.....
£ Who doesn't love a wide-shot? Even the walls of Terry's gaming room look to have been bathed in the glorious green glow!

£ Look at that lovely conversion of the Necrontyr Portal, with a trapped C'tan inside!
And then look at the awesome custom battlemat he designed as 2foot sections, all covered in his carefully airbrushed digital pattern. Great use of simple stencils!

£ Terry also created these special mat sections, where the digital taint of the necron city is slowly spreading across the surrounding terrain. This means Terry can have half tables for the Necron city terrain, joining up neatly with more natural terrain on the other half. Genius!

£ He's crammed his table with so much terrain that he didn't even have room to place this pyramid in the video! Continuing the digital pattern up the sides of this massive piece just makes it look alive!
Well done, Terry!!!
This project is of course the ultimate goal of the samurai terrain range - to have a massive, fully detailed Japanese castle, that anybody can produce on their own 3D printer, and scare friends and family!!!
It's taken a while to build up the courage to actually start it, but finally .... FINALLY construction has begun on this huge 5 level castle!
Today I have some early pics to show off from the assembly instructions, as the building slowly takes shape.......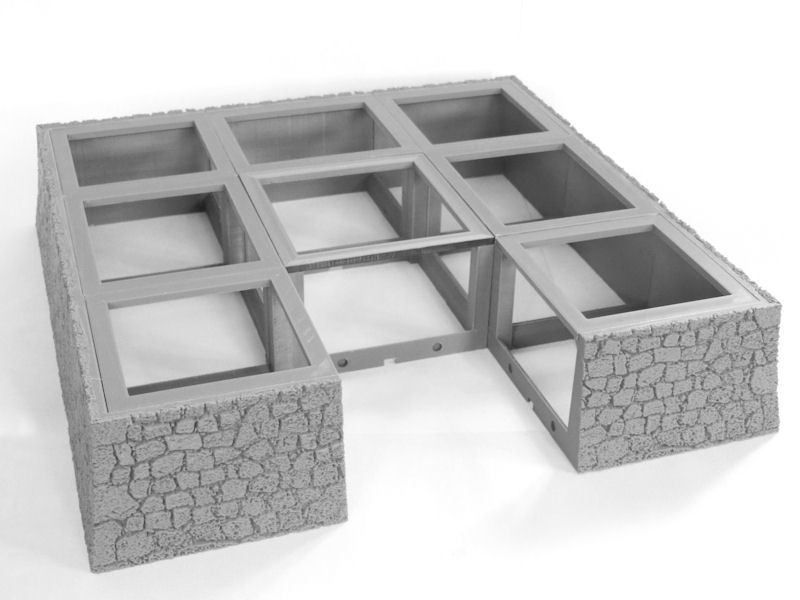
£ If you really want to lord it over your rivals, why not raise your castle up even higher by mounting it on this extra base? The castle will be designed with an underground entrance in mind, so that we can include juicy details like overhanging murder holes, but an alternative ground-level entrance will also be included in case you want to place the castle flat on the tabletop.
So once you've ordered plenty of rolls of 3D printer filament (I'll let you know how many later), you'll want to print 4 corner base sections, as well as 3 straight sections and one central block.
In the image above you can see a large block missing from the front, which is where the steps and underground entrance will be placed. More to come on that soon!

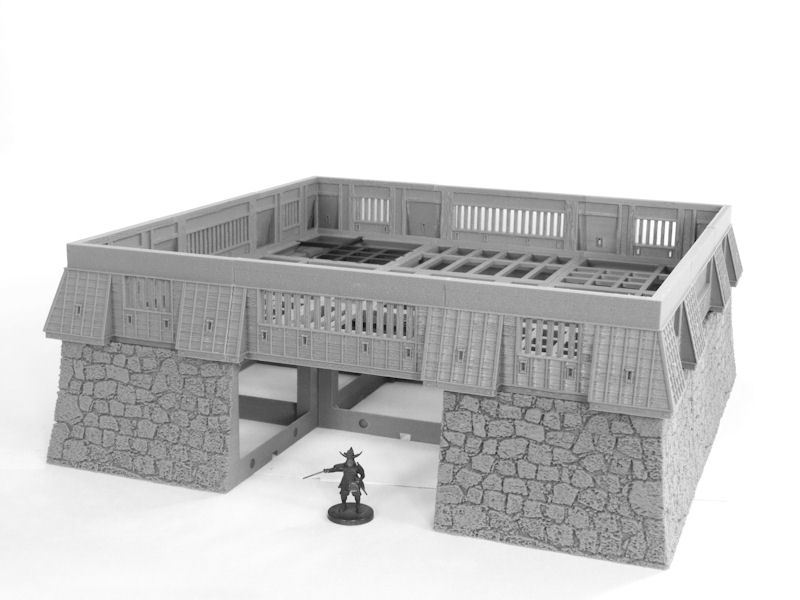
£ Then we're on to the first level of the castle! Each corner piece and straight section is identical, so you simply glue them together using the joining clips for some added strength.
In the picture above, you can see the entrance piece missing from the far side. This is where you can either place a front door section, or have a solid wall with steps leading down to a subterranean entrance.
The floor supports are printed separately, and simply slot in to place in each section. These should give ample support for all the interior flooring and walls, which in turn will support subsequent levels.
£ I've chosen to use the underground entrance in my castle, so I printed a solid wall section for the first level. A stepped base section will slot into place underneath that, with a solid door halfway up and then a tunnel leading up inside the castle.

£ This would be an attacker's view of the castle. Just look at the size of it - it's HUUUUUGE!!!!
Not to mention all those murder holes and archer windows....

£ One last pic for today, just to give you some idea of the scale. The corner tower is going to look pretty darn tiny next to this mammoth castle! I'm definitely going to have trouble fitting this on my small photo table.
The interior sections for the first level are printing now, and we'll have some more pics to show you in a few days. Watch this space!
We haven't been able to do our regular monthly game days here in Japan recently, so we've been playing a few games via Skype! As long as both players have the dice and tokens with them, it works pretty well. The 3'x3' play area for Test of Honour games is just about right for playing via webcam, so here's a battle report of scenario #3 : "The Spy"!
"A spy has been uncovered in your lord's household, and they have fled carrying who knows what information that your enemies would benefit from knowing. Your master has tasked you with finding the traitor and returning them, unharmed, for questioning and punishment."
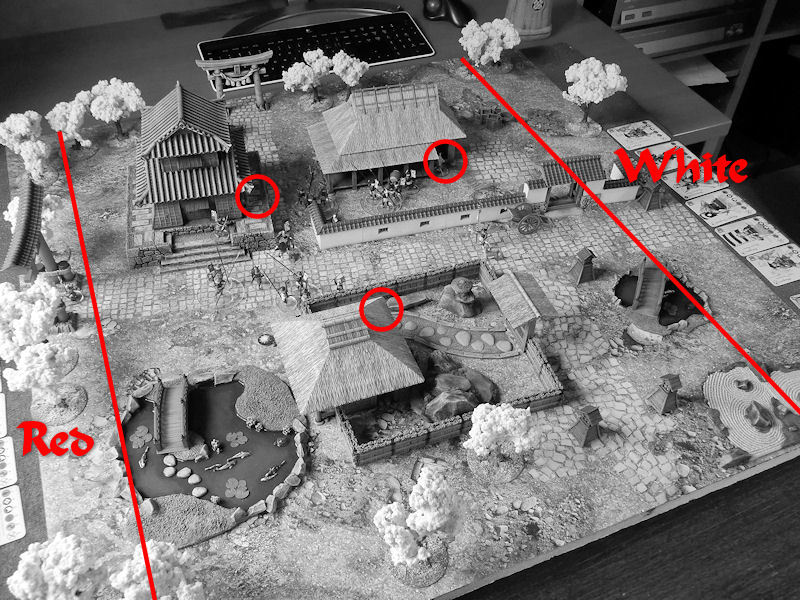
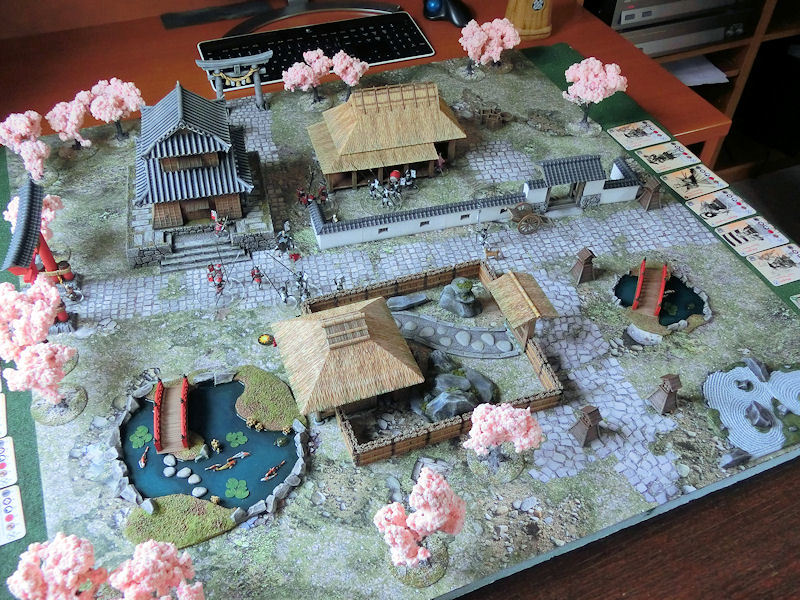
£ Here's the gameboard for this scenario.... and sorry for forgetting to take a picture BEFORE the game, so I've tried to disguise the flow of the game by turning this pic black and white! Don't look too close!
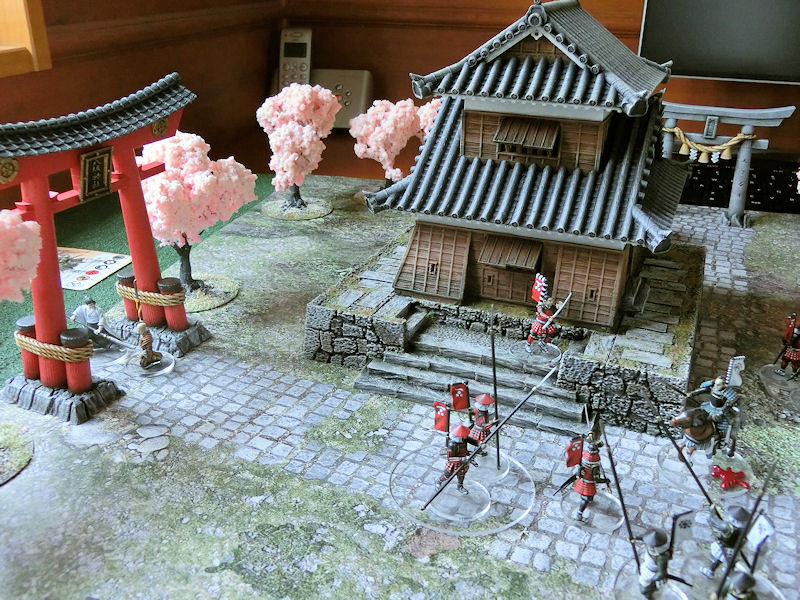
Samurai Lord Liam-sama chose to place his troops on the left of the board, having rushed through the nearby shrine and torii gate in their pursuit of the treacherous spy. His troops are all dressed in red, from the Mori-clan.
I chose to group my rescue force on the central road, on the right edge of the board. My troops were all in white, except one mounted samurai dressed in blue.
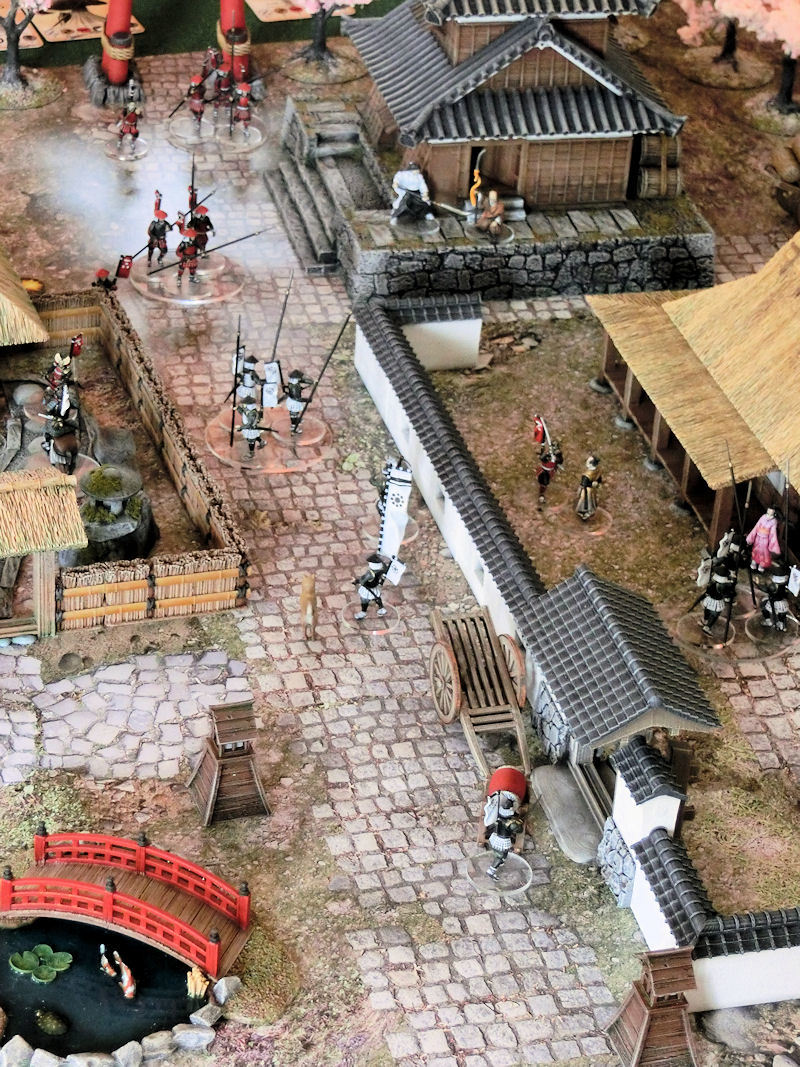
The mysterious spy, choosing to use cunning tricks to distract the pursuing force, has taken shelter in this small village. The exact identity of the spy is unknown to the small force tasked with the capture, and in fact is also unknown to the majority of the rescue force.
There are 3 suspicious characters lurking in the village, and they are located in the red circles in the photograph above, at the entrances to 3 buildings; a geisha at the teahouse, a wealthy landowner's daughter at the large house, and a humble priest at the door to the tall tiled house.
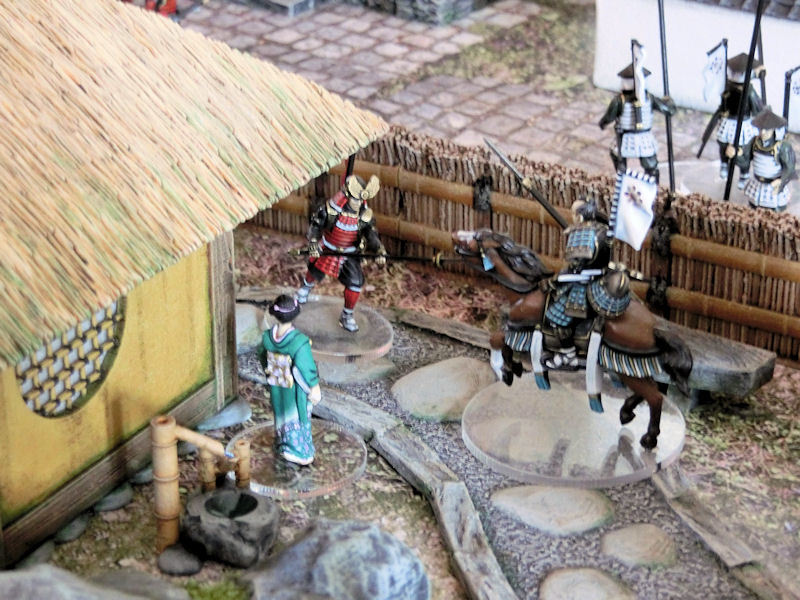
£ The rescue mission started with the blue-armoured horseman riding in at full gallop towards the teahouse, and skidding to a stop on the deep gravel path. Before he could dismount to check the identity of the geisha at the doorway, an enemy samurai leapt the bamboo fence and charged straight at him!
As his horse reared up to kick out at the sudden attack, the red samurai slipped on a moss-covered stone and fell flat on his face! The mounted samurai quickly tried to capitalize on this fatal error by slamming down his horse's hooves on the foolish attacker's head, but he nimbly rolled away and leapt back to his feet!

£ Ashigaru spearmen tried desperately to catch up and lend their aid to the mounted samurai in his counter attack, but for now the combat was a stalemate, with neither fighter able to interrogate the geisha.
*Quick scenario rule explanation is needed here: you can only identify the spy if there are no enemies also within 3", and so in this instance neither model was able to interrogate her.
£ The early gambit by the mounted samurai has failed to pay off , but there were still two other potential locations for the spy - the priest or the girl in the pink kimono (on the right of the photo).
The white samurai force had marched forward to the doorway of the large thatched house, where the girl was standing, but had a little argument about the best way to identify her as the spy! They would have to wait another turn before trying again!
Meanwhile Liam's red samurai hero chose to sprint forward around the corner of the closest building. Spotting the kneeling priest in the doorway, he hesitated for a moment in indecision, but instead chose to run onwards to the girl in pink - there was no way he would let his enemies find the spy before him!
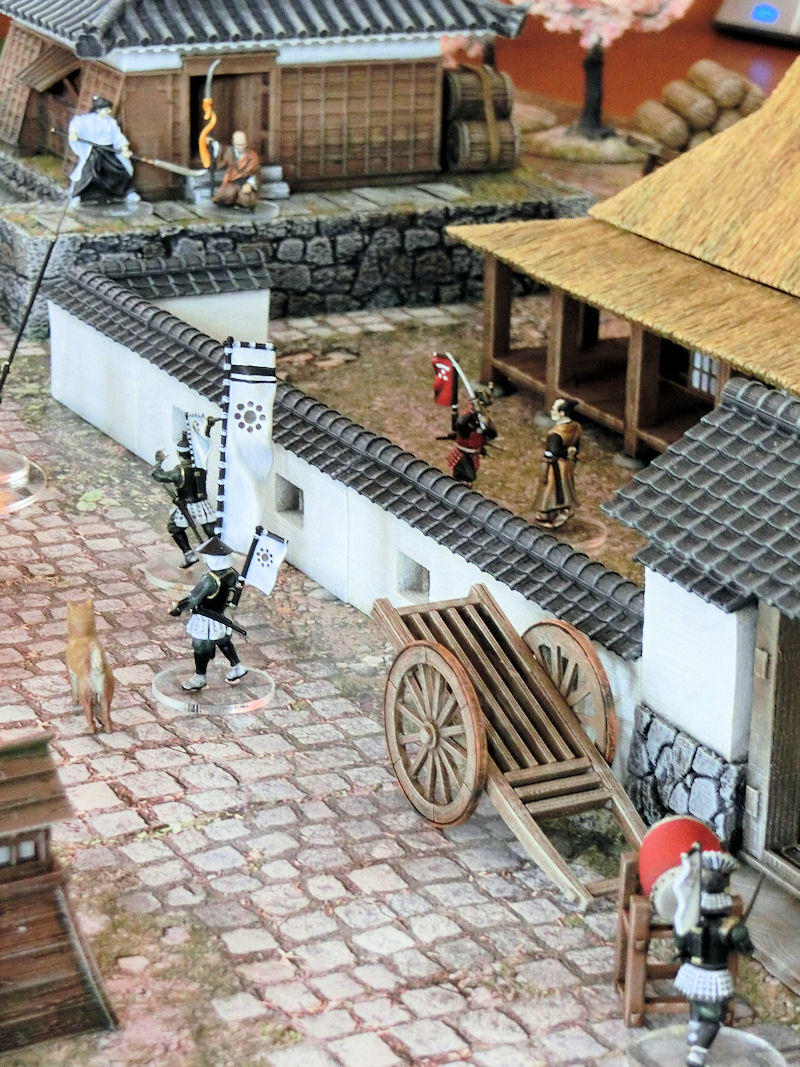
£ Leaving the priest far behind him, the red samurai ran forwards with a scream, hoping to distract the enemy guards from their prize!

£ As he closed in for the charge, a slim figure in a golden kimono stepped out from behind the guards and calmly paced forwards with a smirk on his lips.
The warcry of the charging red samurai faltered as he recognised the leader of the rescue force! With the smallest of sidesteps, the katana of the golden samurai blurred through the air, and sliced clean through the neck of the charging samurai!
* In our first proper combat of the game, the two heroes squared off and we prepared for an epic clash. To our surprise, the golden samurai managed to roll 9 (!) swords on his attack dice, and since the red samurai had chosen to use all his activation tokens on rushing forwards, had left himself wide open. He died instantly!!
£ With a deft flick, the golden samurai returned his katana to its scabbard, content to stand back and wait for his troops to advance in support.
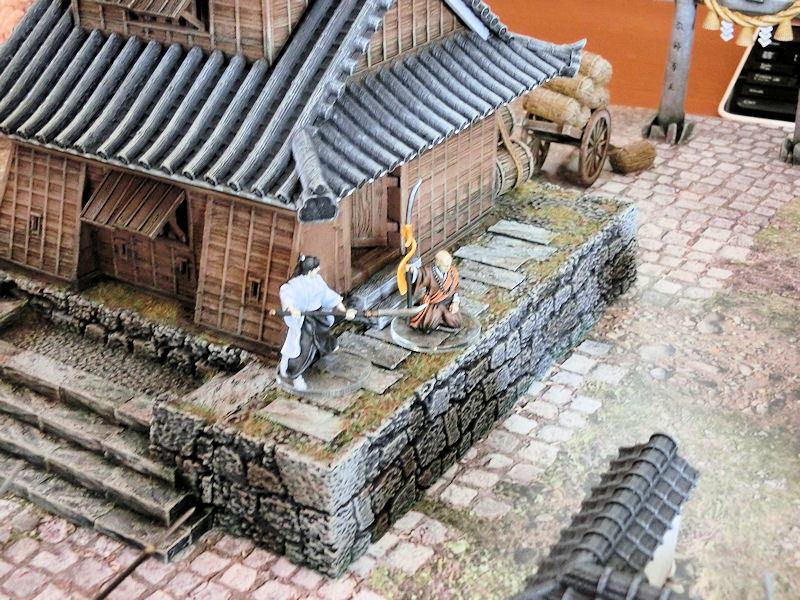
Seeing her impetuous uncle cut down in the distance, his niece (who funnily enough was using the "Wise Samurai" profile card) decided to perhaps stop and question the kneeling priest her uncle had earlier ignored.
Swinging her naginata down to rest at his neck, she barked an order at the priest, who quickly decided that the time for cunning was at an end. The sneaky spy had been identified!!
Now it only remained to drag the priestly spy back to the starting table edge nearby, and the mission would be a success......

£ Seeing that the priest had been uncovered as the spy, the samurai horseman abandoned the geisha at the teahouse and urged his horse across the low fence in pursuit of the captured priest.
As he dug his heels in and galloped to the charge, he found a solid wall of spears blocking his way! Turning to his left, he tried again to dash through a gap in the defensive wall but again he was foiled as an enemy samurai stepped forward to block his way.
Recognising the same red samurai who had so rudely interrupted him at the teahouse at the start of the game, he saw some chance to teach this young pup a lesson.
Entertainingly, the samurai horseman didn't get the chance to cut down the red samurai as he'd planned, as the inept fool once again fell over on his charge and disappeared beneath the hooves of his horse!
£ With a solid wall of red troops blocking any attempts to catch up with with retreating woman samurai and her prisoner, she finally dragged him off the board edge, and the game was hers!
£ Victory to Liam and his red samurai force! Well, not really his red samurai, as both of those guys performed terribly in combat!! But the wise niece was a game-winner.
But there will be a reckoning soon, as the golden samurai carefully plots his revenge.
He was ace fun, by the way. Only one chance for combat (because I kept pulling the wrong tokens), but thanks to his dishonourable actions he cut the enemy hero's head off in one go!
It's so much fun to be evil. Mwa-ha-ha.......
We have a new print partner to announce, WAY OF THE RONIN MINIS, from Florida USA. As you might guess from their store name, they are now selling print versions of our Samurai terrain on their Etsy webstore!


0 Comments :
Write a comment :