3d-printable terrain for all your samurai wargaming needs


Time for a game of Test of Honour!
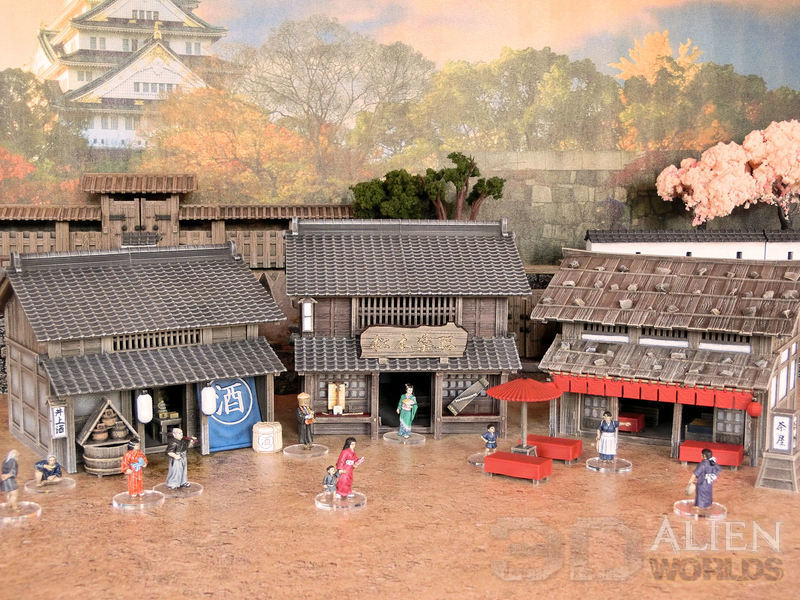
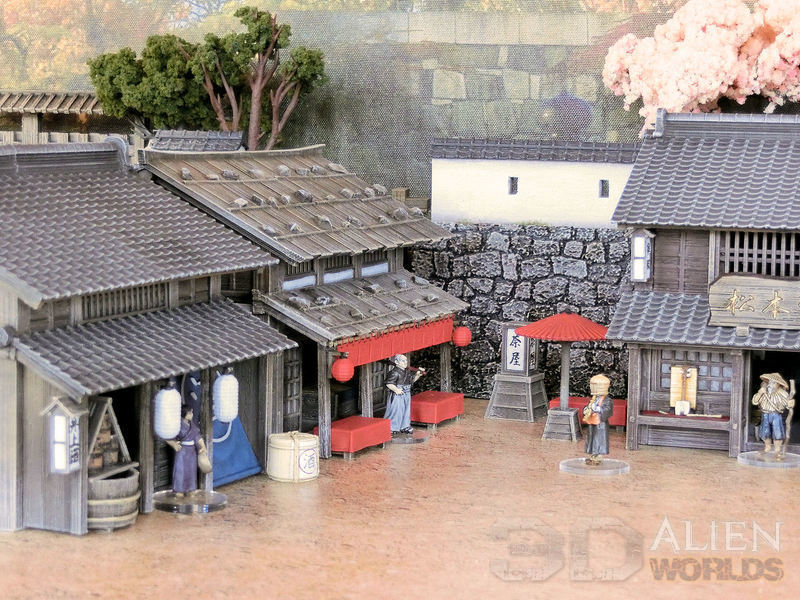
Still my favourite ruleset for skirmish games in a samurai setting, this time we decided to play the "Unexpected Clash" scenario from the rulebook. The temple and market board currently on display downstairs in the studio was the perfect place to play this game, where the two forces start the game randomly scattered throughout the board.
▲ The setting for this game would be the main street outside the town temple, with a variety of great market stalls dotted along the road.

▲ Lord Nobu's forces would be the troops disturbing the peace. As always, Lord Nobu was accompanied by his deadly geisha consort Tomoko, this time supported by a 3-member team of onna-bugeisha warriors.
A samurai marksman was a new troop type that I was keen to test out. He's quite an investment in points (7 points, compared to the normal 4 for a lieutenant), but does have a useful skill allowing him to boost the skills of other musketmen firing at the same target. To make the most of that skill, he was supported by 2 regular musketmen.

▲ The temple forces were led by a head priest (in the white hood) and backed up by 3 guards with naginata, and 3 archers. They were also supported by the calming presence of a kneeling priest, who acts as a banner bearer for the troops.
The lieutenants were a rather angry shrine maiden named Reiko, and a mounted samurai. Perhaps his extra speed would aid in getting him back to the fight, wherever he was needed?

▲ The two forces are randomly scattered across the board at the start of the game.
Lord Nobu's forces are circled in red. There was a concentration of his troops on the street outside the pagoda (Lord Nobu himself is the double circle), with the samurai marksman on his own at the other end of the street.
The temple forces are circled in white, and were split into two main areas - the head priest and his archers were in the top corner behind the pagoda, and the rest of the troops were near the bridge. The ever-angry Reiko was on her own underneath the temple gate building, and would have some serious ground to make up to get in the fight!
The victory conditions were simple - the first force to inflict 12 points of damage wins the game!

▲ Lord Nobu's samurai marksman immediately opened fire on the temple guards, but failed to take one down. His supporting musketmen, seeing his intended target, also fired down from the far side of the board, and managed to blast one temple guard from his feet. Obviously, the wide lines of sight from the pagoda roof were helping!
The surviving guards panicked from this explosion of noise, and almost ran off the board before gathering themselves to return to the fight.

▲ The mounted samurai charged his horse forward across the market street and attempted to skewer that deadly marksman. But even with an extra dice bonus from facing an enemy armed only with a dagger, he failed to even hit him!

▲ The nearby temple guards, angered by the death of their friend moments ago, also charged in to attack the outnumbered marksman, and successfully cut him down!
Lord Nobu : 0 points
Temple forces : 7 points

▲ At the other end of the table, the temple's head priest had charged over to the fish stall to quickly take care of one of those troublesome musketmen, but in his haste he slipped on the wet stones and managed to injure himself - Oops!
Lord Nobu jumped down from the pagoda's steps and quickly charged in on full attack against the head priest. Swords flashed faster than the eye could follow, but he was unable to penetrate the priest's defences.

▲ Before the shrine maiden Reiko could rush in to help the head priest, he was quickly surrounded by enemy forces. Lord Nobu seized his moment and grabbed a bucket of fish guts from the nearby stall (gaining an extra dice from this dishonourable act!), before throwing it all over the priest and rushing in to attack once more.
With the stinky fish guts splattered across his eyes, the priest was left defenseless and was mercilessly cut down! The victory points were evening up again....
Lord Nobu : 6 points
Temple forces : 7 points

▲ Lord Nobu, however, had underestimated the effect this disgraceful act would have on his troops! All that delicious food wasted!
His dishonourable action forced every model in his force to test their honour, and every single one of them failed their tests! They all fled directly away from the shameful act, and the closest musketman even ran off the board, never to return! This might cost Lord Nobu dearly....
Lord Nobu : 6 points
Temple forces : 9 points

▲ Lord Nobu's forces reined themselves in after their shamefaced flight, but this had brought them within range of the fast-moving samurai knight. He immediately charged the closest target, a lone ashigaru deserter, but failed to cut him down.
Meanwhile, the 3 onna-bugeisha warriors were moving up to charge the horse from the side!

▲ Next to the pagoda, the deadly geisha Tomoko suddenly halted in her flight from the atrocity at the fish stall, and spun around to charge into the shrine maiden Reiko. It had all been a sneaky trick!
Before Reiko could prepare herself, she found Tomoko's dagger stabbing out to slash across her arm. Ouch!

▲ The desperate fight at the other end of the street was hotting up, as supporting troops poured in to lend their aid. Even the normally calm priest tried a couple of charges on the onna-bugeisha, hoping to grab the 3 points needed to claim victory.

▲ But for now, things seemed to be locked in a stalemate of flashing blades and stamping hooves, as the two warbands slashed and parried.

▲ Instead it was the shrine maiden Reiko who finally broke the deadlock, by launching herself at the ever-sneaky Tomoko! Letting out all her anger at the disgraceful mistreatment of her master, she made a blistering attack on the geisha.... leaving Tomoko lying in a spreading pool of her own blood!
With that, victory belonged to the temple defenders!
Lord Nobu : 6 points
Temple forces : 13 points

▲ What a great game! After the early deaths of the expensive samurai marksman and the head priest, both sides were within sight of a victory, and it was then quite a struggle to inflict enough casualties while simultaneously keeping their own troops safe from harm.
Lord Nobu is no doubt looking forward to a rematch, especially now that the temple's head priest has been removed in such a callous manner. The defenders will surely fail next time?
But more importantly, will Lord Nobu ever learn to fight honourably? His underhanded tactics had certainly cost him dearly this time!
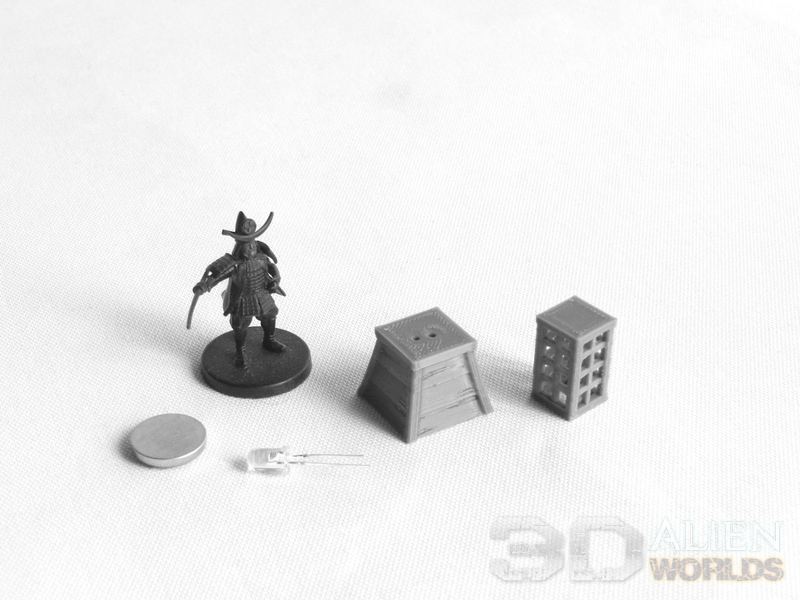
The Samurai Shop Set contains a new version of the LED lantern, which is in fact the 4th version we've produced. The first Wooden Lantern used a 20mm coin battery, as did the second lantern - the stone lantern from the Teahouse Set.
For the third version, the tall post lanterns from the Shrine Set, and this new shop sign version, we managed to switch out the size for a smaller 16mm coin battery. This meant that the size of the model required to conceal the battery was considerably reduced, as you can see in the next photo:

▲ You'll be happy to hear that the base of the new smaller lantern is interchangeable with the larger wooden lantern (it will need a smaller battery, though!), so you can choose to model a larger shop sign if you prefer, or add the roofed top to the smaller lantern base if you prefer.
▲ Here's what you'll need for wiring the shop sign lantern with an LED:
You'll find these in super cheap LED tealights, and if you're lucky you can get one that flickers! I bought a bag of 100 very cheaply ($6) here:
https://www.aliexpress.com/item/32782781815.html
Simply slot the bulb's two wires into the holes, and then slot the battery into the underside of the lantern. That's it!
Note that the bulbs usually only work with the + side of the coin battery touching the longer wire. They don't seem to be reversible, so you might want to make a note underneath the lantern to show which side is the +.
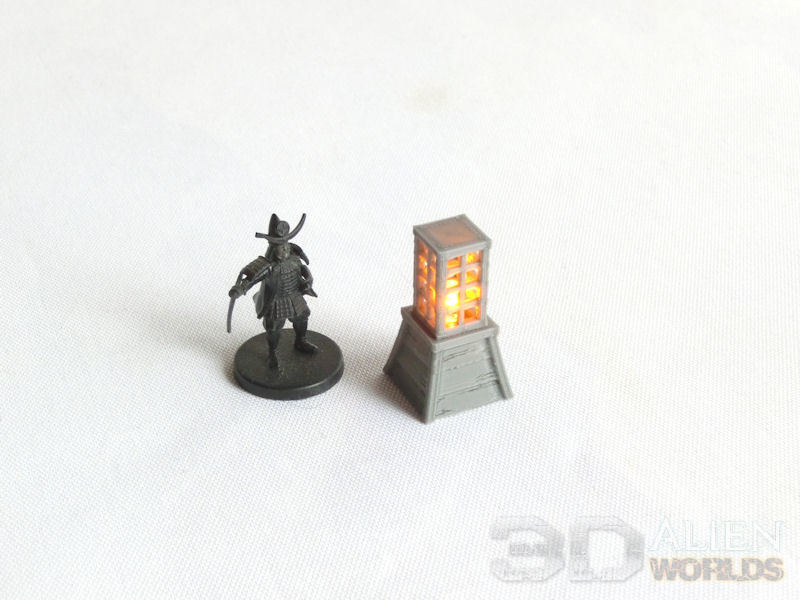
▲ I've found that kitchen paper (baking sheet) is ideal for modelling the paper insert in a lantern, with the right amount of translucency. You can add the paper inside the top section, or you can glue it outside the bars, if you're adding kanji characters or illustrations.
We'd like to ask YOU about what you'd like to see next from us!! It could be some sci-fi models for the Necrontyr, Eldari or Taui terrain collections, or we could add some new designs to our huge samurai collection....

.... perhaps a large KillBill-style brothel, scenic hot springs, or we could get started on the modular townhouse set? Do please let us know in the comments!
Our new terrain set is released today... 8 fully-detailed Samurai Shops!
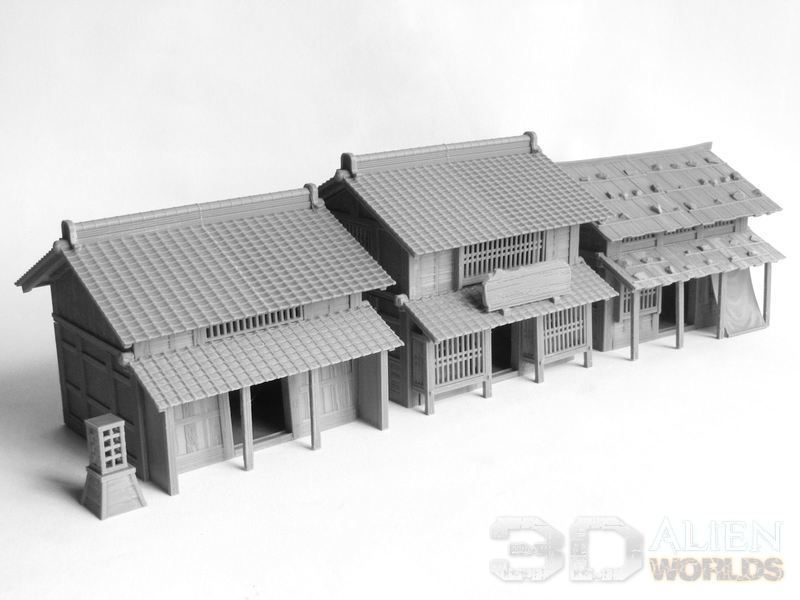
▲ These are the 3 shops I chose to paint up, from the 8 included in the set. Painting up all 8 would have taken quite a while - so please forgive my laziness!
▲ Here's a closer look at the 3 shops. Since the set is modular, with many, many different building styles, all three of these shops look quite different.

▲ Tea shops are usually decorated with bright red fabric covering the benches, and I also painted the paper lanterns, the large umbrella and the noren curtains in the same bright red.
I decided to use the solid version of the LED lantern sign (on the right of the photo), with the kanji characters for "tea shop".

▲ The musical instrument shop is probably the most luxurious of the 3 shops, with a tiled roof and a full-height second storey. The owner has also made large display windows at the front, with some traditional instruments to grab your attention. I will probably add some ornate grills over those display windows later, but I left them off for this photo.
This shop also has a large wooden sign over the doorway. These are often engraved with the name or type of shop and left as plain dark wood, but I decided to paint the kanji characters in gold to make it even fancier!

▲ The sake (ricewine) shop is a more functional design, and so I painted this building with more subdued grey panels. The blue and white sign makes it very obvious what they're selling, but they've also added extra signs and lanterns to the front posts, and several large barrels.
The town drunk is obviously a regular customer, sipping his sake in the sunshine.

▲ Let's take a look at the shop interiors.....
The sake shop has plenty of barrels and tubs, plus a few wooden cups and gourd bottles on the shelves and table.
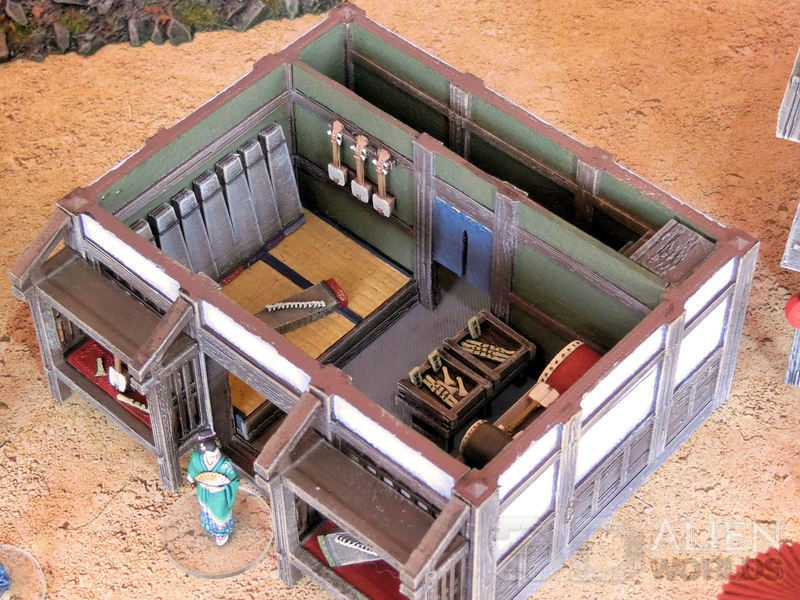
▲ The musical instrument shop has a special tatami mat area for trying out the many koto and shamisen on display....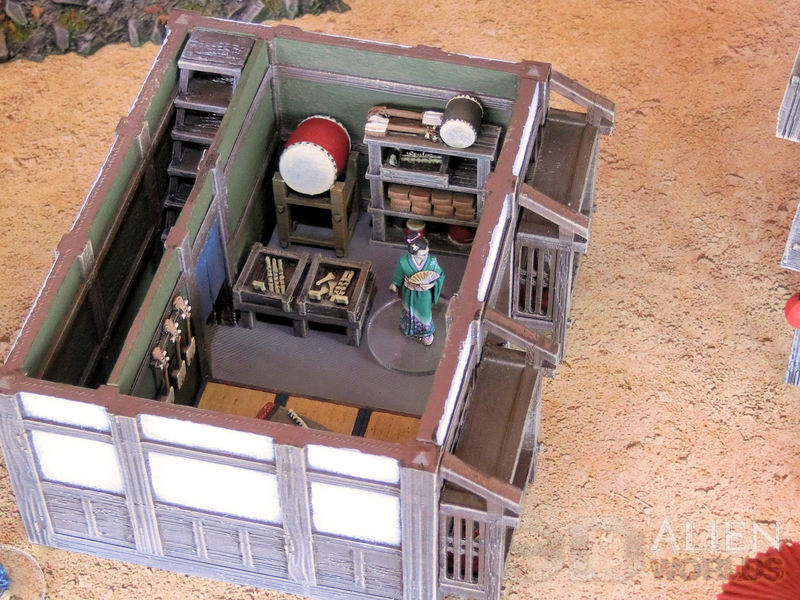
▲ .... plus even more instruments on the shelves and tables on the other side! The shallow boxes hold shakuhachi bamboo flutes, and those large picks for playing the koto.
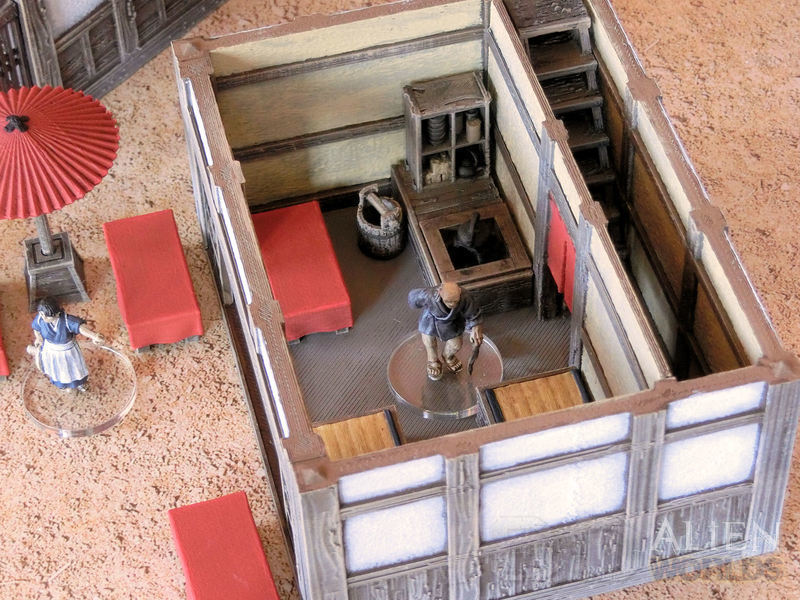
▲ The tea shop has lots of seating inside, with another red cloth bench and a small shelf and firepit area.

▲ Tatami benches were very common in tea shops, too, and we have a second kettle and firepit on the other side.

▲ The second storey of the musical instrument shop has a full-height room, and I've decorated it with simple tatami mats and two windows. Let's hope no snipers use those big windows overlooking the main street, eh?
▲ The new Samurai Shop Set is available to download from today!
For this painting guide, I'm just going to show you the basics of how the buildings were painted up, and then I'm going to assault you with plenty of reference photos of real shop interiors!
Let's get started with the shop buildings....
▲ To save time, I spray undercoated all the buildings and accessories in just 3 colours - light brown for two of the shops, a medium brown for the music shop (just to make it slightly different), and a dark grey for the roof tile pieces.
▲ I followed up the undercoat sprays with heavy black washes for the wood and rooftile pieces. These models are designed with washes and drybrushing in mind, so you should get great results very quickly!
▲ The roof pieces were then carefully drybrushed with a light grey, just to bring out the edges of the tiles. I used a 3cm-wide brush for this process.
▲ The wood pieces were similarly drybrushed with a 3cm-wide brush in light brown, and then a second drybrush in light grey was done on the bottom few centimetres of any exterior walls. This works well to simulate weathering and sun-bleaching on the most exposed parts.
To complete the buildings, I then filled in the exterior panels between the wood beams with lightgrey and then white, or medium grey and then lightgrey. The interior walls were finished in sand colours, or muted green. You'll have to wait another day to see how those turned out!
Now it's time for some accessories....
▲ The RICE shop has this awesome rice-cleaning machine accessory. You throw the rice in the top hopper, and turn the handle to separate the rice from the dirt and dust. This is a real example, in lovely aged wood.

▲ The interior of the RICE shop also has this brilliant rice-pounding machine, in dark old wood. You can also see the rice bails behind it, and the tubs of rice in the bottom right corner.

▲ The UMBRELLA shop has these racks of folded paper umbrellas, as well as opened umbrellas for wall decorations. You could go crazy with beautiful ornate versions like those shown above....
▲ ... or choose more simple one-colour versions, like these.

▲ The TOY shop accessory set has a simplified version of this doll display shelf, which looks great outside in the display window box. If your eyes can manage it, try painting lots of garish colours on the emperor and empress dolls!

▲ Here are a few traditional wooden toys, such as the spinning tops, kaleidoscopes, and the stacked hit-with-a-hammer doll on the right.

▲ The shelf accessories also include these two toys - the fat daruma doll, and the nodding cow figure.

▲ This is just an illustration, but shows all the common elements of a TEA shop exterior. You can see the large paper umbrella, noren curtain, and cloth-covered benches. These are usually red, but go nuts with whatever colours you like!

▲ Here's an interior of a simple TEA shop. Tatami benches to sit on, and plenty of kettles, buckets and bowls.

▲ The POTTERY shop would not contain much white china, but would contain lots of earthy colours for the bowls, dishes and vases.

▲ Here's a CLOTH shop interior, with the shelves full of fabric rolls, and those lovely display racks which make a great canvas to show off your freehands!

▲ This is a koto, a traditional stringed instrument from the MUSIC shop accessory pack. Note the bridges which can be moved to create different sounds, and the pretty fabric wrap on the bottom end. 
▲ The other MUSIC shop accessories include various sizes of drum (usually black, red, or varnished wood), and the banjo-like shamisen. You'll notice that the shelf model has a few rows of the soundboxes, like in the photo above, over which (white or cream coloured) skin is stretched to complete the shamisen.

▲ We're on our last shop model now - the SAKE (ricewine) shop. The photo above shows the traditional stack of buckets and giant tub that you can display outside. It also has some gourd bottles hanging outside....
▲ ... which look like this. A resin printer will probably work very well to show off the rope tassles on the 3D model.
▲ Lastly, these big sake barrels are also included in the SAKE shop set, as singles and a stacked pile of 3. These are heavy tubs wrapped in rough matting and rope, with a decorative design on one side. The 3D model has a simple "sake" logo on one side, but if you want to try painting your own design, just turn them around and paint on the other side.
That's plenty of photos for today. The photos of the finished shops are coming very soon, when the shop set is finally released tomorrow!


3 Comments :
Great AAR
2023-10-28 (Sat) 3:25AM
Great job with the combination after action report and illustrative photography! I am just getting into Test of Honour and reading this report helped me understand the rules better while enjoying one of the best tables I have had the pleasure to look at. What battlemat do you have underneath the terrain? Huzza for Reiko and her vengeance!
2023-10-28 (Sat) 6:26AM
Glad you enjoyed it! The mat is a 3x3 design from Playmats.eu called Treasure Land. I really recommend their mats, as you can choose any other design for the flip-side too, and this one is perfect for a Japanese feudal village!
Kurt Weihs
2023-10-30 (Mon) 4:34AM
Thanks! I’ve been looking for a good 3x3 mat for Test of Honour
Write a comment :