3d-printable terrain for all your samurai wargaming needs


The new Samurai Dojo is fully assembled, so here are some pics of the whole building and all the accessories!
* First, a quick apology for the strange look of the photos. I was running out of grey PLA, and had to use red for parts of the model. Red doesn't photograph well at all, it seems, so I promise never to use red PLA filament for pics again!!

▲ It's a large, imposing building, found in many settings in Japan, even today. Typically, it's used for kendo (swordfighting), kyudo (archery), and martial arts such as aikido, judo and karate.

▲ Most towns, villages and castles would have a training dojo (modern-day schools often have them, too), and they are usually non-religious. That's why this model features the simpler version of rooftile, instead of the fancier shapes found on temples and castles.
I've built mine with only one set of steps, but you could put more on each side if you wanted to, anywhere on the surrounding wooden balcony.

▲ Here's the fancy end of the dojo interior. There are paper scrolls on each side of the interior, with authentic calligraphy sculpted into the paper, and you can fit the interior with a variety of accessories.
In this photo you can see an empty weapons rack on the left, a weapons rack with bamboo kendo sticks on the right, and another weapons rack with naginata spears behind the central stage. There is also a samurai helmet on a wooden box on the stage, and two large taiko drums on display.
Note the flooring, which has tatami mats on each side, but a large wooden floor for sparring in the middle. You could replace a couple of wooden floor pieces with tatami mats if you prefer more karate or judo!

▲ At the other end of the dojo, I've added two weapons rack for bows, and four archery targets outside. Archers would typically stand inside or on the balcony, and shoot out towards the targets.
The bows are printed separately from the racks (they take less than 1 minute to print each!), and are glued into place in the slots. A little fiddly to not glue your fingers to the bows, but looks very realistic!

▲ Here's the set of accessories I chose to print for my dojo. This includes at least one of every type of martial art and decoration, and should help to bring the dojo to life!
The dojo is currently on the paint desk, and should be ready for release in a few days.
We have some great photos of the new Samurai Dojo building to show off very soon, but today we're going to be working through the assembly process, with some handy tips for you!

▲ This dojo has a large base, to lift it about 2cm off the battlefield, which is printed in 6 parts. However, the base is actually optional, so you can save time by skipping this step if you want to.
Each piece is printed upside down, and does not require print supports on an FDM printer.

▲ The next stage is to print the 4 pieces of the floor beams, and glue them down onto the base.
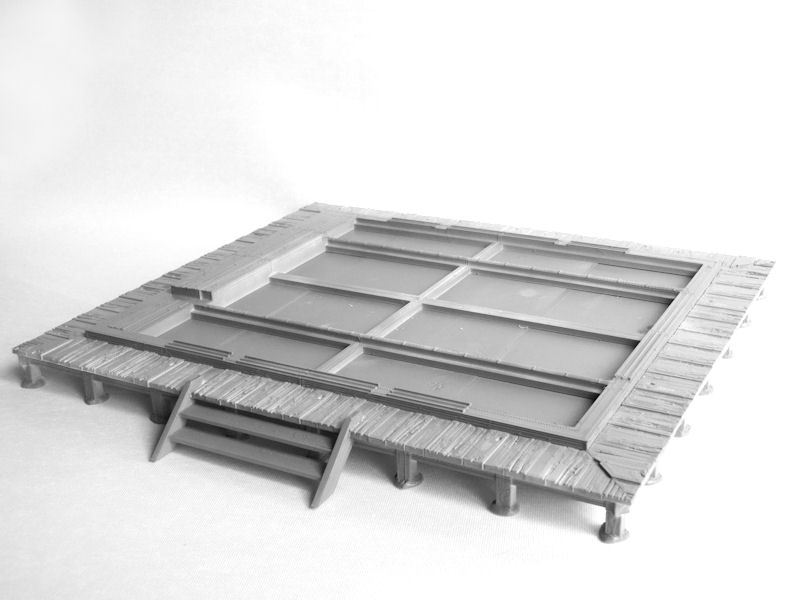
▲ The third step is to print the 6 pieces of the surrounding balcony, and glue those down around the edge. The balcony is also optional, but I think it looks great!
Steps are printed without supports, and you can print as many of these as you like. I only used one set of steps at the side, which will become the "entrance", but you could have steps on both sides, and even on one end if you want steps for an archery range?

▲ Next comes the flooring! There are 11 tatami mats required for each side, and these should be printed on their sides - the FDM printer will give it perfect tatami texture!
TIP: Print 10 tatami mats for each side and glue those down, before you print the 11th tatami mat. Depending on your printer, you might find that you need to make it a tiny bit wider or narrower to make it fit better. I printed my final mat 1mm wider, for a perfect fit!
The central strip of the dojo floor is made up of 4 large wooden sections, and I recommend gluing down 3 of those before checking the size of the last piece - just like for the tatami mats. I needed to stretch mine 1mm wider again, to get a perfect fit.
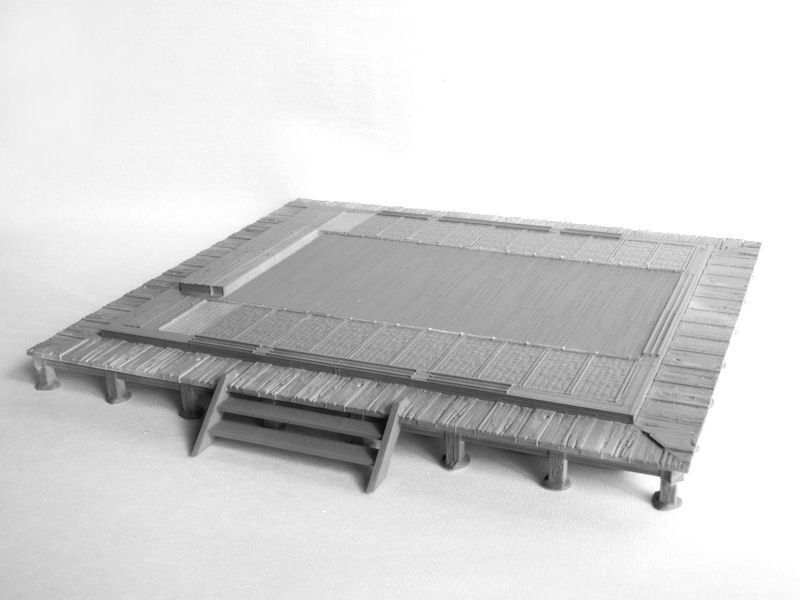
▲ Here's the floor all finished. The boundary between the tatami mats and the wooden floor is marked by a strip of bamboo, which looks very cool and is an authentic feature!
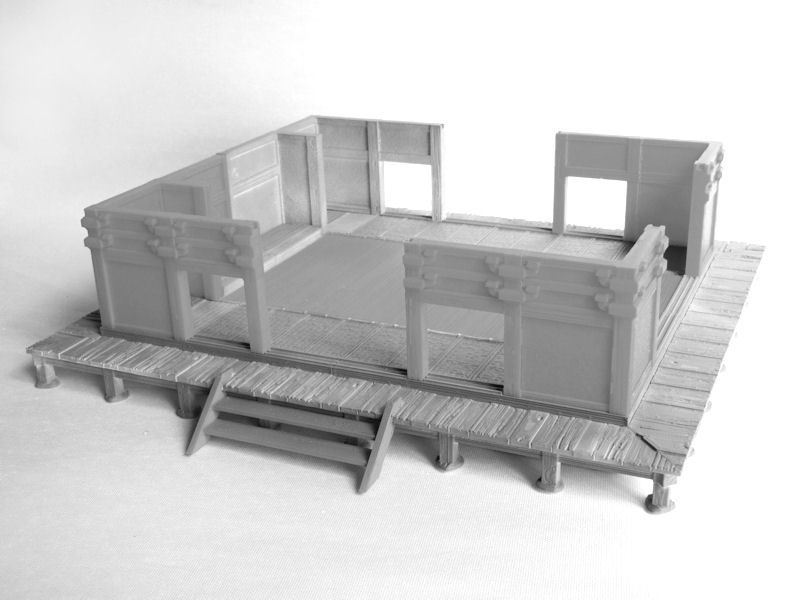
▲ We move on to the walls next, which have 4 sections - all printed upside down. Simply print each of those, and glue them down as shown.
TIP: Note that if you don't want to include the calligraphy scroll on the left of the stage area (it's built into the wall section), then you could just print a mirrored version of the opposite piece instead.
▲ The walls are completed with 3 middle sections, all printed upside down as well. These can then be slotted into place to connect the corner sections.

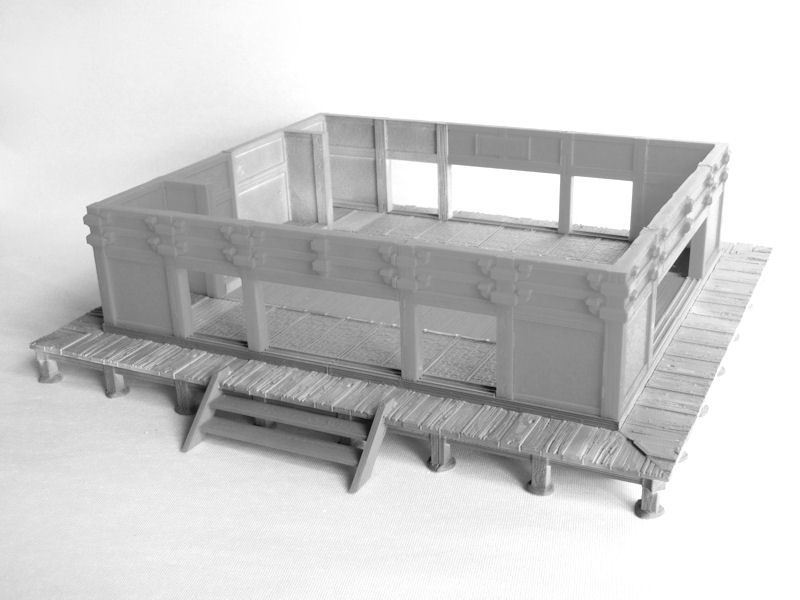
▲ There are two types of door, so you can print the version with holes (shown above) which are designed to be used with baking paper for that authentic paper screen door look, or the version with a solid back, which will need to be painted.
TIP: Depending on your printer settings, I recommend printing a pair of test doors first, just to check they fit and slide smoothly. If not, try thickening or thinning the doors a millimetre.

▲ The final step is to print the large roof, which comes in 4 pieces (or 8 pieces for smaller printers). Print supports are, of course, not required.
And that's it - your dojo is complete. Now go and choose what accessories you'd like to include.... we'll be showing those off tomorrow, so watch this space!
It's a good time to get some more European retailers, and today we have a new print partner to announce this week - ETSCENERY, from Italy. They are now selling print versions, and even painted versions, of our sci-fi ranges...... Taui and Necrontyr models!

Here's a quick first look at our latest terrain kit for the samurai collection.... the Samurai Dojo!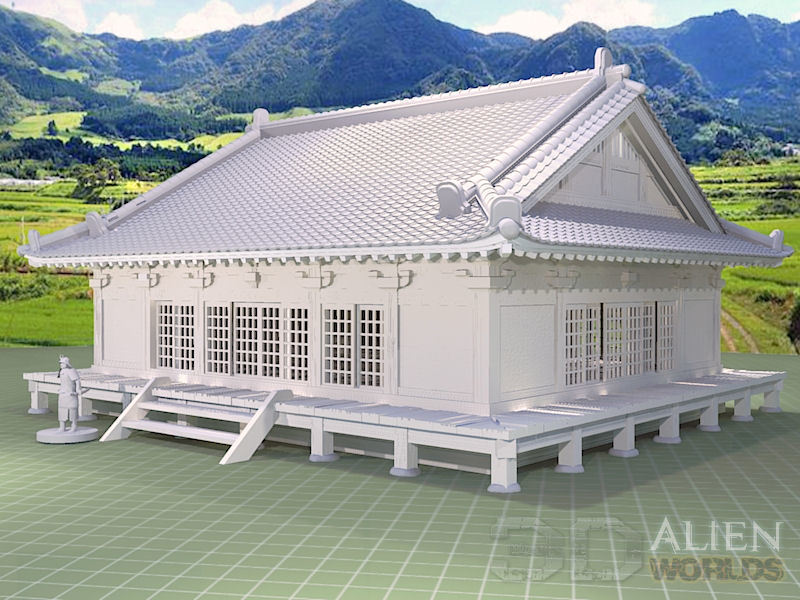
▲ This is a multipart kit for a large dojo building, used for training martial artists in a variety of techniques, including kendo (sword fighting), judo and karate, and kyudo (archery).
It has sliding screen doos around 3 sides of the dojo, and together with the wrap-around balcony covers almost a square 30cm (12 inches)! We'll be showing off the details of the interior and accessories very shortly, along with the printed model, so watch this space!
Brandon Heath Helms has been slowly assembling this massive castle complex over the last few months, and he was kind enough to set up a huge photoshoot..... complete with multilevel walls and towers, a grand castle and tons of cherry blossom trees and fighters!
Enjoy.....


▲ Hahahahahahaha


▲ Easily the most realistic castle layout I've ever seen, this is truly a dream board! Well done, Brandon!


0 Comments :
Write a comment :