
It seems this should be quite a popular release, as many of you have been looking forward to adding small-scale scatter terrain to your games. The new Samurai Market Stalls set is now available for download!
Let's take a look.....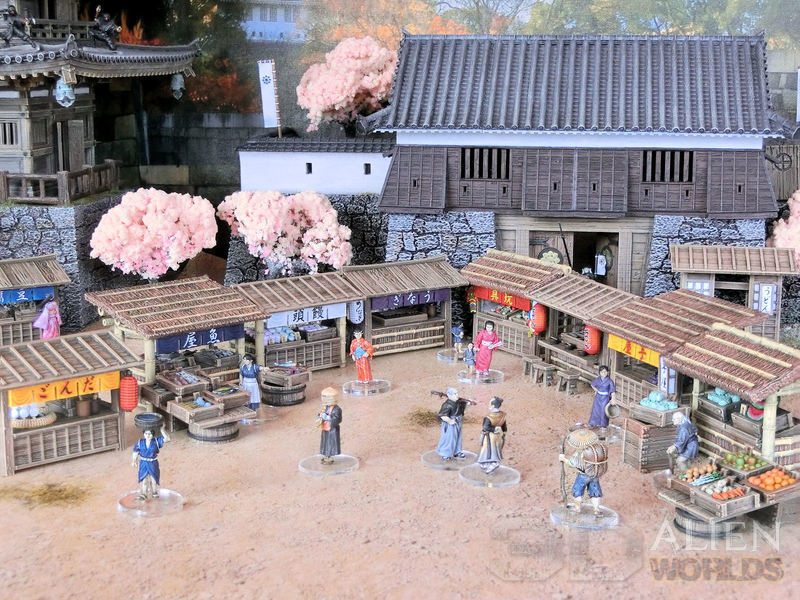
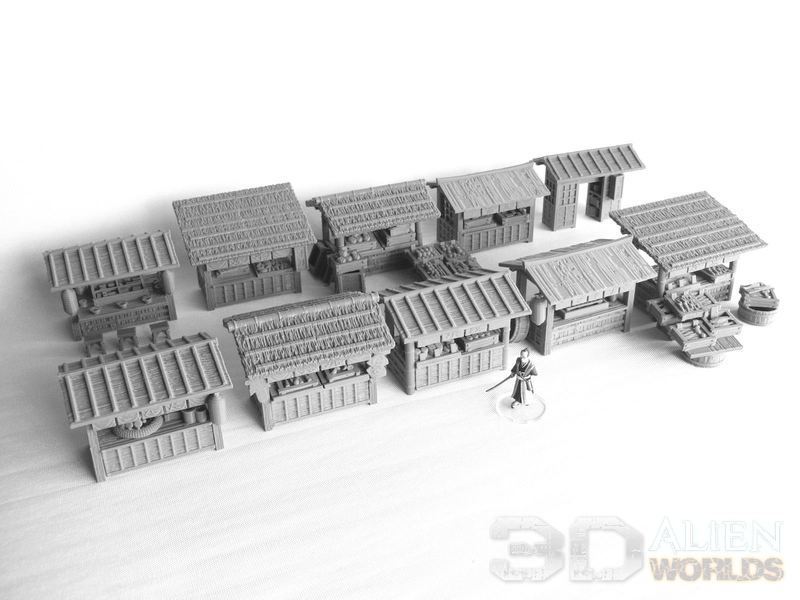
▲ Here are all 10 stalls included in the set - it was really hard to fit them all in one photo!
This would make a great location for an entertaining fight!
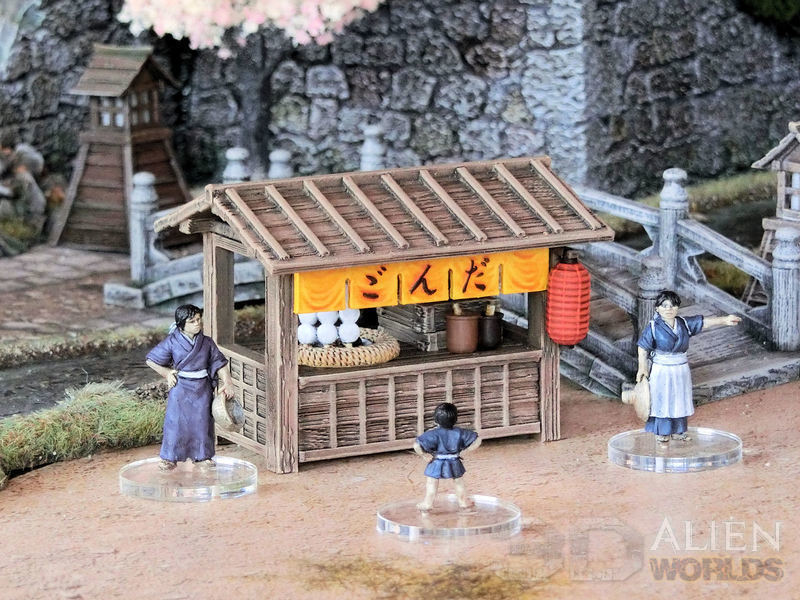
▲ Dango is mochi (pounded rice) on sticks, grilled on a small countertop firepit and slathered in sticky sauce. Yum!
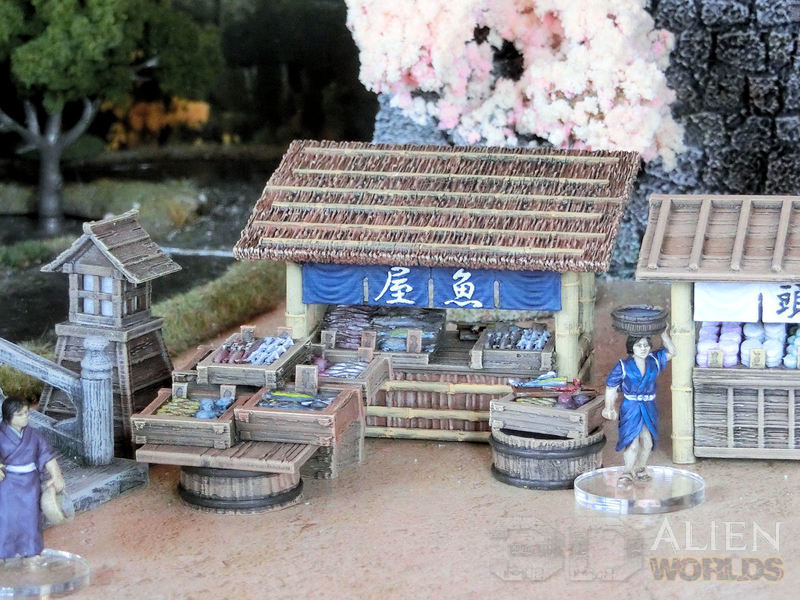
▲ Fish shop, with a variety of seafood on display - fish, squid and octopus.
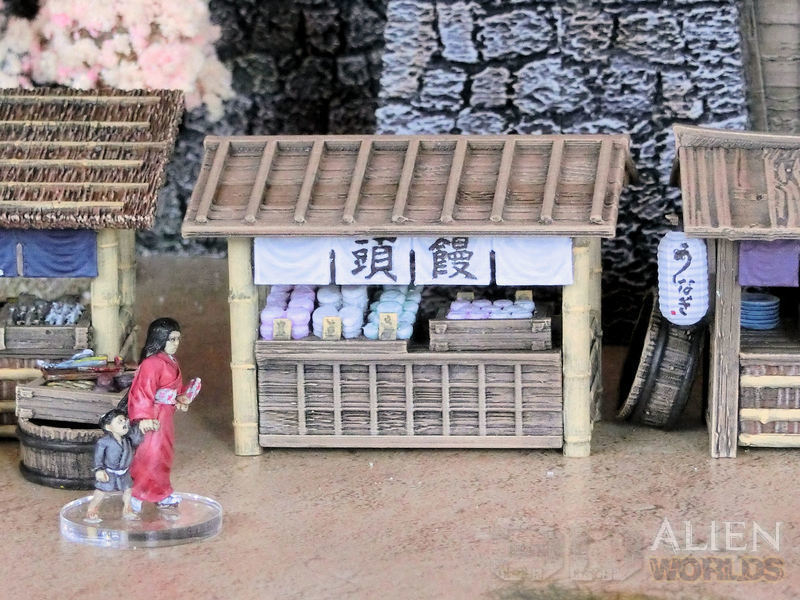
▲ Manju are rice-cakes, usually produced in gentle pink or white colours.
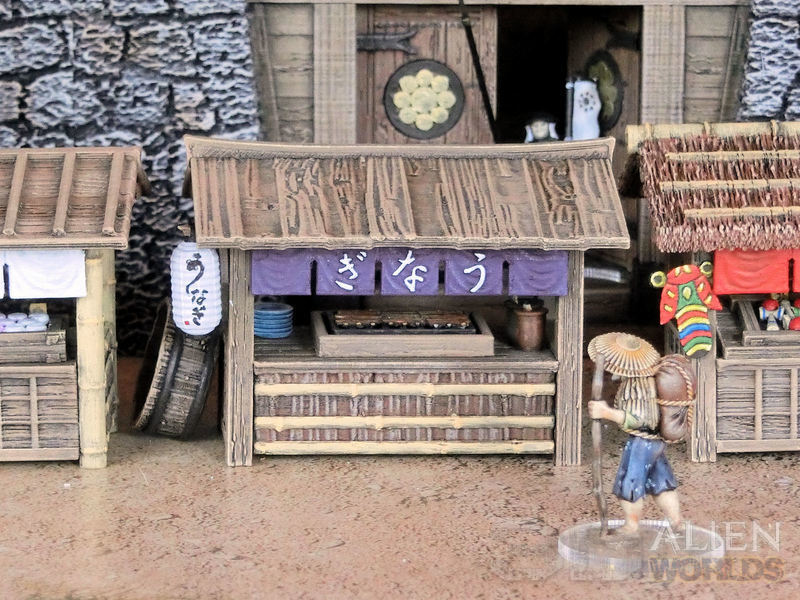
▲ Grilled eel is tastier than it sounds, trust me! Slices of eel are grilled on a countertop fire on bamboo skewers, and covered in yummy sauce.
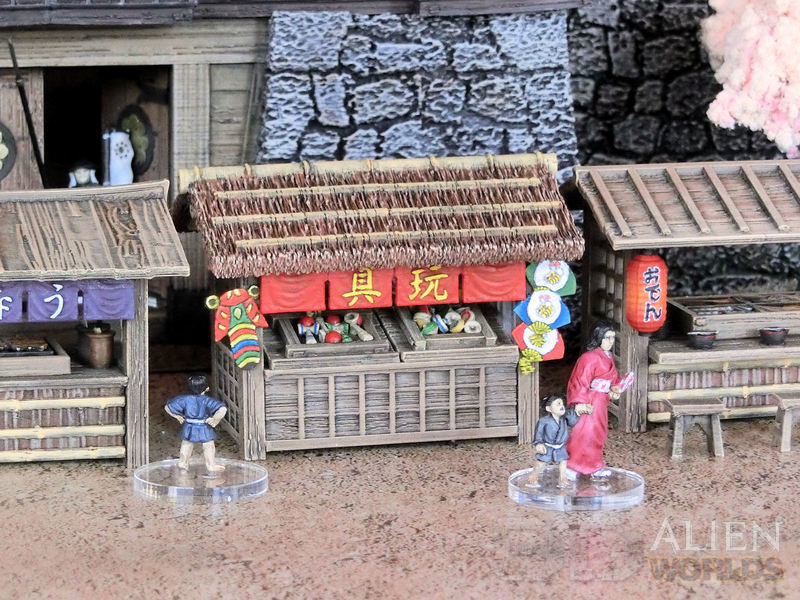
▲ The toy shop is a very cute design, and the bright colours of the kites and toys seem to be attracting plenty of onlookers!
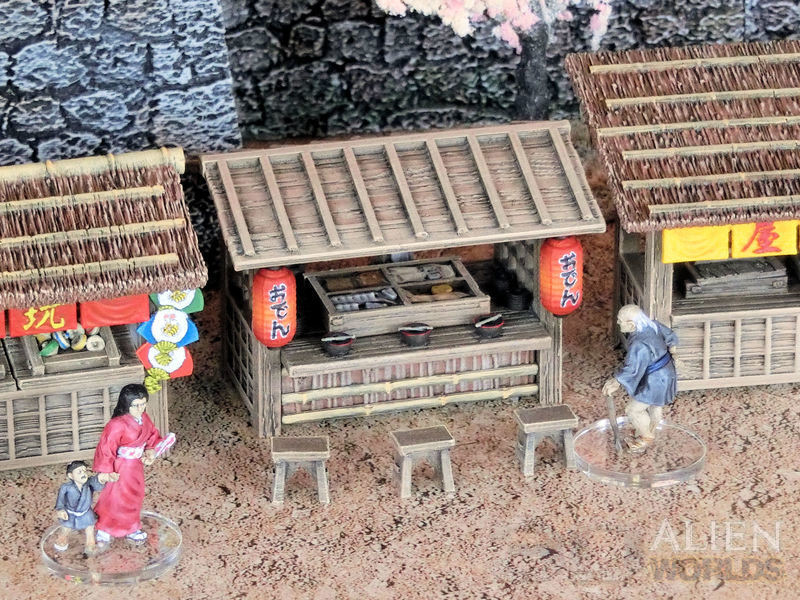
▲ A sit-down oden (hotpot) stall, with various items heated in broth in the large tray.
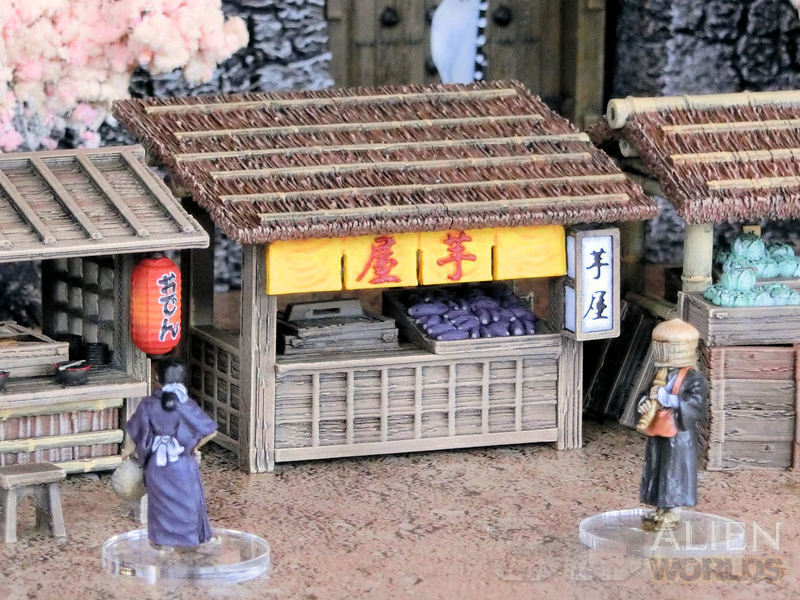
▲ Sweet potatoes are served here, eaten hot after being steamed in the small countertop oven.
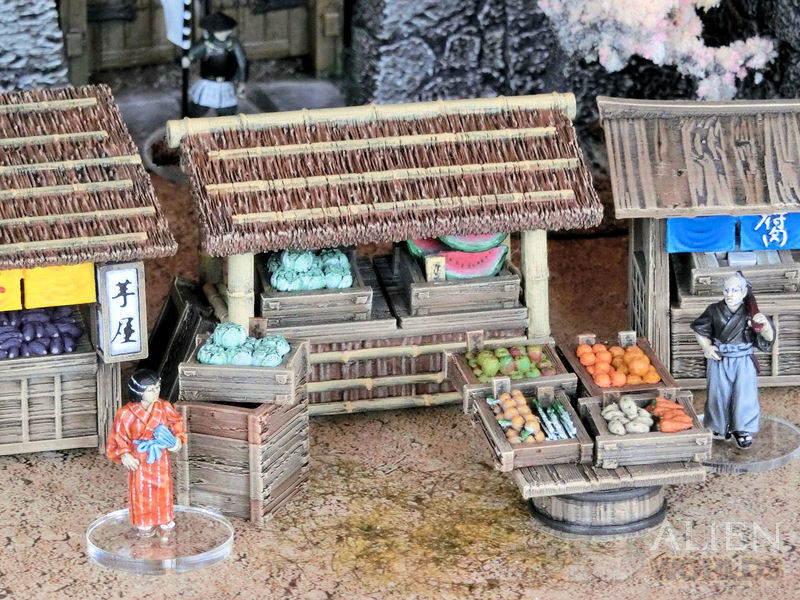
▲ Fruit and veg stall, with cool slices of watermelon for the summer, as well as other fruit such as apples and oranges, and a variety of common vegetables.
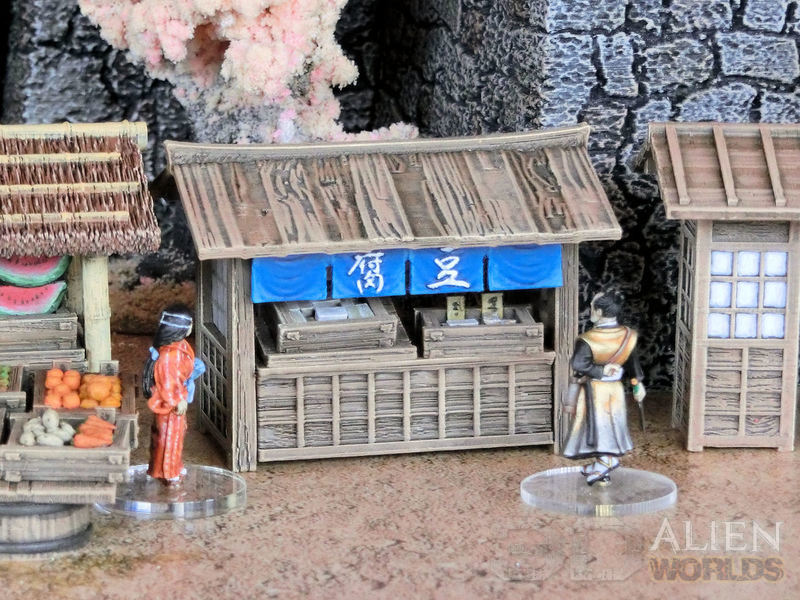
▲ Tofu stall, for the hipsters.
Just kidding!
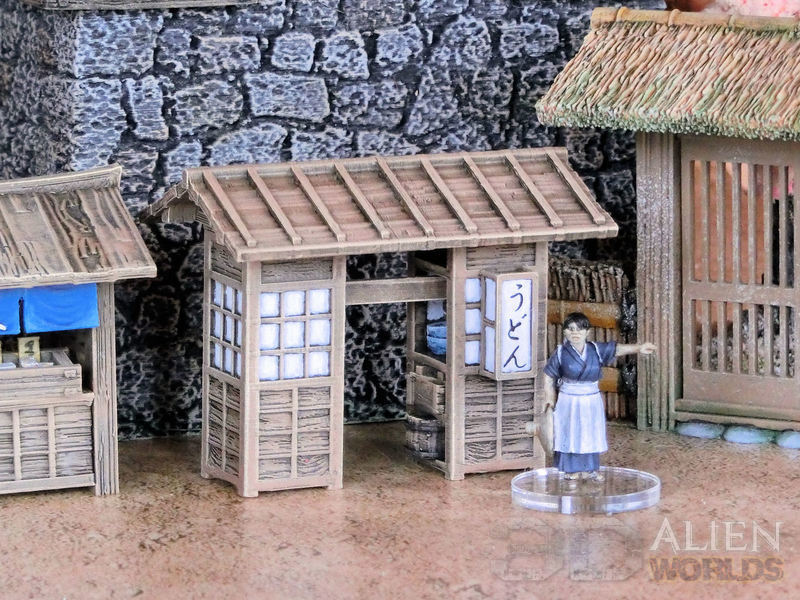
▲ This enterprising lady has carried her mobile udon stall here, and set up shop for the day at the end of the market street. She serves hot noodles cooked in the small hotpot inside.
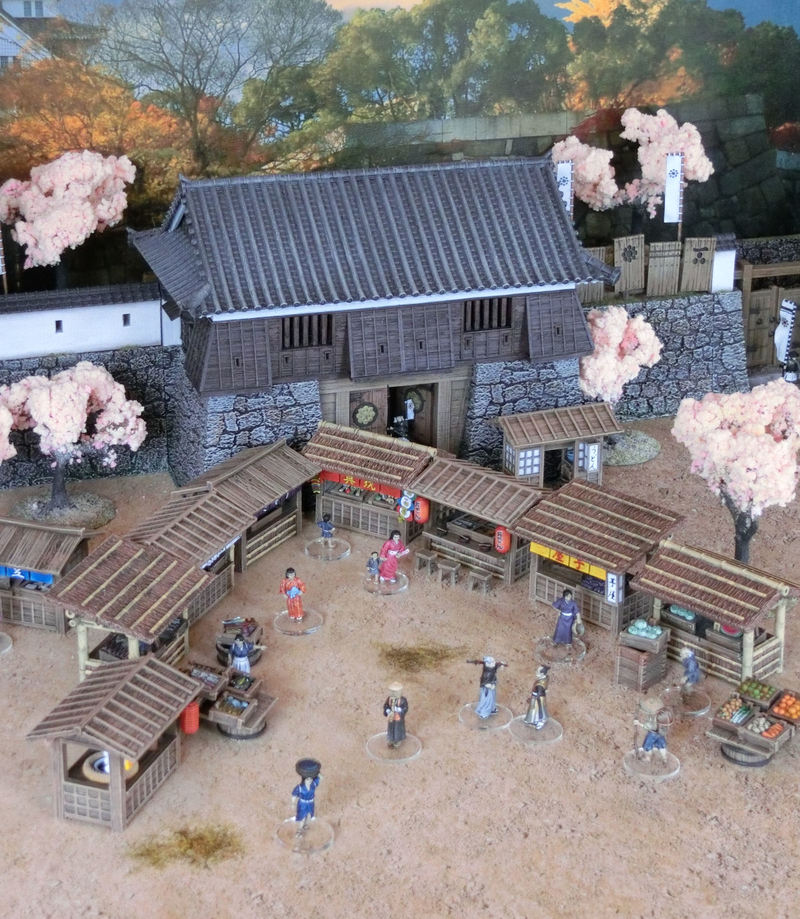
The new Market Stalls set is available for download from today!
It's time for a painting guide - this time it's for the new samurai market stalls set!
This is quite a long blog post, but it should contain lots of tips and real-life photos to make your stalls as realistic as possible! Ready? Here we go......

▲ I started by spray undercoating all the pieces in a light brown, and many of the accessories were still separate from their stalls. The roofs made from rushes were painted a red-brown, and then the bamboo pieces were painted in a light sand colour.
▲ Here's the process for one of the wooden stalls. The undercoat is the light brown spray.....
▲ .... and then a heavy black wash to fill in the wood grain patterns and shadows.
▲ Once the wash has completely dried, it's carefully drybrushed back to light brown....
▲ ... and then a final light drybrush on the edges, with a flesh colour. You can see this on the edges of the boxes in the photo above.
The rushes on the roof and front sections are similarly given a heavy black wash, and then lightly drybrushed with the same flesh colour.
The bamboo sections were washed with black, and then roughly highlighted with a sand colour again.
▲ Here's a quick tip on the wooden side pieces with the window frames - you can add some baking paper (kitchen paper/sheet) on the sides, to make great Japanese screens. You can put the paper on the inside if you like, or you can glue them to the outside and decorate them as extra signage, like in the photo above.
Time for some accessories....

▲ Let's start on the first of the accessory sets - DANGO! The dango are mochi (pounded rice) on sticks, which get toasted by the coals, and then covered by that sticky brown sauce, before being eaten hot. Yum!
The lady in the photo is actually my neighbour, who runs a traditional stall in a tourist town nearby. You can see the straw ring around the fire, with a heat-blocking porcelain ring inside that, and then finally the hot coals in the middle.

▲ Here's my miniature version, with the same straw ring and hot coals in the middle.

▲ Next up is the GRILLED EEL stall. This photo shows what they actually look like - sections of eel fillets grilled on bamboo skewers.
▲ After painting the coals separately, I glued the grill on top, and roughly painted white and yellow stripes on the eel pieces.
▲ Then I slapped on a heavy orange wash, which looked about right to me. A gloss varnish on top should look good, too!

▲ Eel shops sometimes have these awesome signs outside, where the "u" in "unagi" (eel) is shaped like an eel, and I wanted to add that little detail on my stall, too.....
▲ ... so I glued a small lantern on one side of the stall, and carefully painted on the eel-shaped sign in black. It was pretty hard to keep my hands steady enough at that size, but I'm happy it worked!!

▲ Here's a colourful photo, showing some traditional Japanese kites. The two kite designs included in the TOY STALL set (which will even print fine on a slow FDM printer!) are the large cicada kite in the middle, and the little fan-shaped kite on the left.
▲ I carefully blocked in the colours on the kites, before adding some black wash along the lines between the colours. Those lines are inset into the design, so your washes should flow neatly where they are supposed to go.
▲ Here are the finished kites after highlights have been added to the coloured sections. Note the absolutely tiny mouse motif on the smaller kites! Yes, you can bet that my hand was shaking for those!
▲ The toy stall also comes with two trays - kendama and spinning tops. I tried to make these bright and cheerful with simple stripes of primary colours.

▲ The ODEN (hotpot) stall has a central tray with four sections, and the photo above shows what you typically find inside it. Daikon radish slices, miscellaneous chunks of meat, blocks and slices of tofu etc, all submerged in a rich broth.
▲ After painting my tray's contents, I poured in some UV-activated resin to act as the broth. I found this small tube of resin in the craft jewellery section of my local 100-yen shop (dollar store).
▲ Instead of a large curtain sign, I decided to add two lanterns to my oden stall. This photo shows what they normally look like (sometimes the letters are in white, too), but you could also paint them lit up, for a night scene.
▲ Oh boy - this was hard! After painting the lanterns bright red, with a brighter orange near the middle, I painted "oden" in thick black letters on the side. Then I very carefully painted tiny dots around the edge of each letter in white. I found it gave me a more regular width line, by using dots instead of a painted line, but I had to do it twice around each letter. I was a nervous wreck after finishing these!

▲ The last few stalls are much simpler. Here's the SWEET POTATO stall. The key to getting those sweet potatoes looking right is to add a dot of cream or beige to both ends of the potatoes. The ends are cut off before being put in the steam oven.

▲ The VEGETABLE STALL has common fruit and veg - onions and spring onions (left), potatoes and carrots (right), and then apples and two types of orange at the top.
▲ I used larger items on the stall itself - cabbages and watermelon slices.

▲ The FISH STALL has various types and sizes of seafood, which I basecoated in silver and then decorated with colour washes. The white ones are squid.

▲ Lastly, the MANJU stall has various sizes of rice cakes. These are usually made in light pastel colours, so I used creamy whites, light green and light pink.
And that's it! We're done. The new market stalls will be available in a few days, so watch this space...
At long last we have some printed previews to show you, for our new Samurai Market Stalls set!
This is a modular set of market stalls (called yatai in Japanese) and accessories, which were often found along busy main streets and are still seen today at markets and festivals.
There are three different types of market stall structures included in the set, and 10 different accessory sets. By mixing and matching wall and roof pieces with the various accessories and decorations, many variations can be created.
* All these models were printed on an Ender3 V2 printer (a cheap and reliable FDM printer), at 0.2mm layer height. The accessories were mostly printed at 0.1mm layers, because the details are quite small!
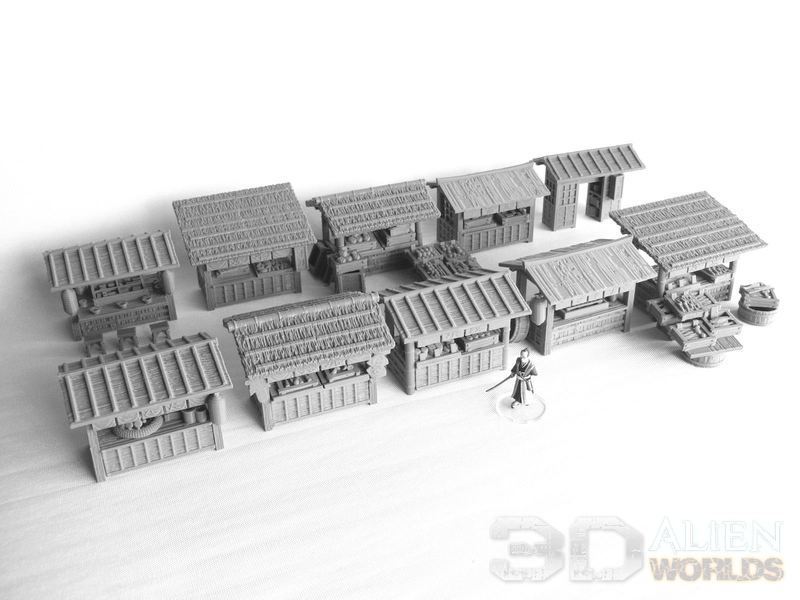
▲ Here's the full set of 10 stalls, with a variety of roof and wall types. It's possible to make 10 unique stall shapes, and then you can start adding all the accessory sets!
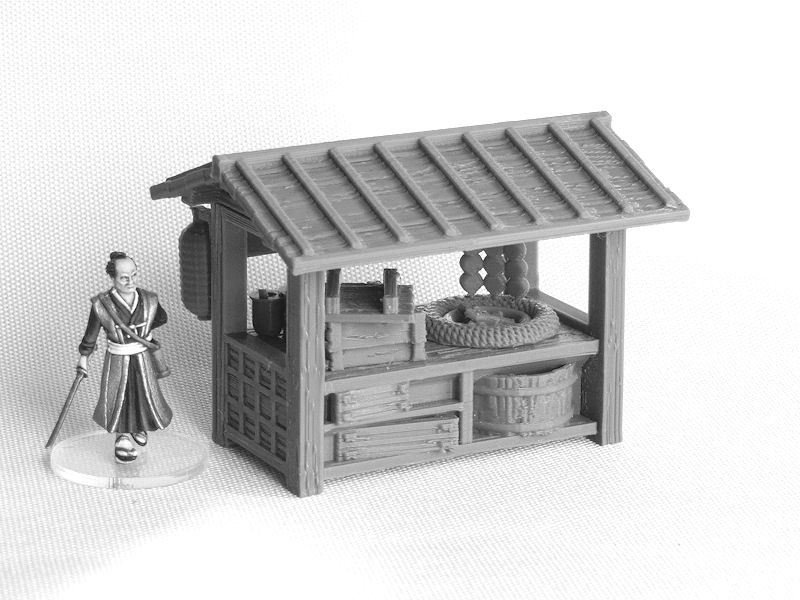
▲ Before we take a look at the different stalls, here's a quick picture of the back of a stall. You can see that some basic boxes and tubs have been included on shelves, but every part of this 80-file set can be printed without supports.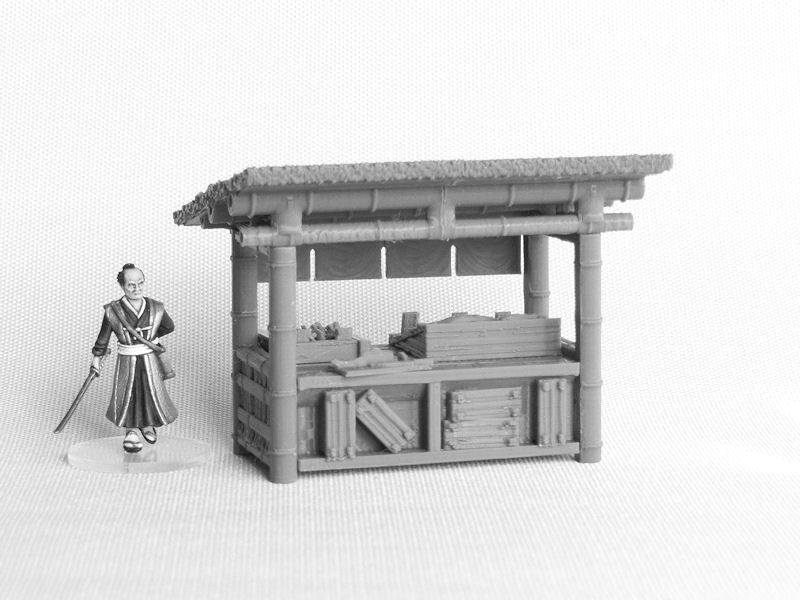
▲ Here's an alternative version of the back. With 2 versions, you can always mirror the designs too.
Anyway, let's see what the front of these market stalls look like.....
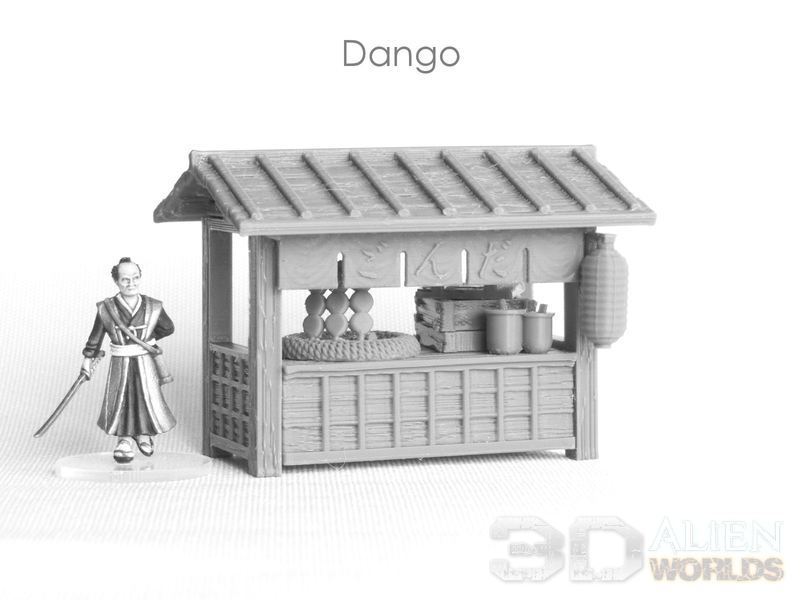
▲ Stall #1 is for dango, which are balls of sticky mochi, grilled by a circular firepit. This model also features a curtain with "dango" written on it (reading right to left, as would have been the style in those days), extra boxes and sauce pots, and a paper lantern on the right.
Blank versions of the curtains are also included in the set, along with individual text-versions for an authentic look.
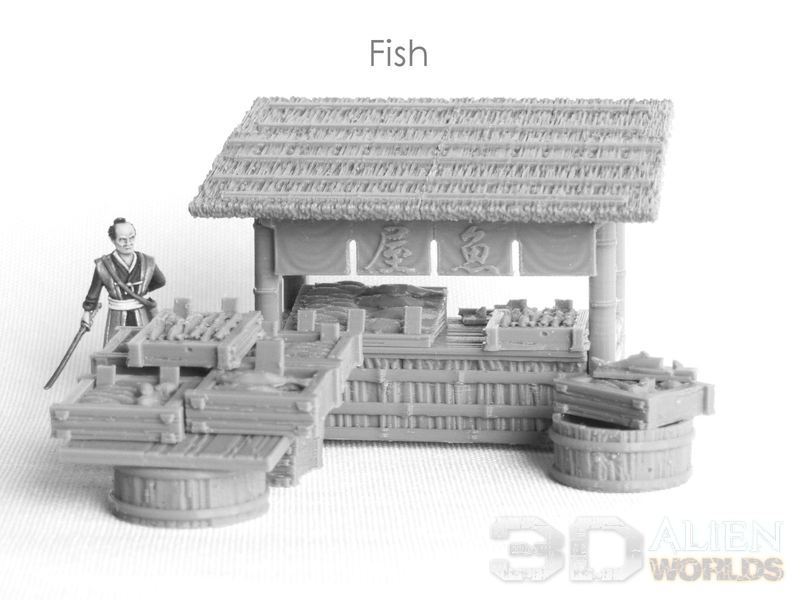
▲ #2: The fish stall is quite a big one, with so much seafood on offer that the stallholder has expanded display space onto extra tubs and boxes. Various sizes of fish compete with some cute little octopus in the boxes, and there's a cutting board and knife nearby too!
This stall is made from bamboo, with a sloped roof made of sticks or rush matting, held in place by long strips of bamboo.
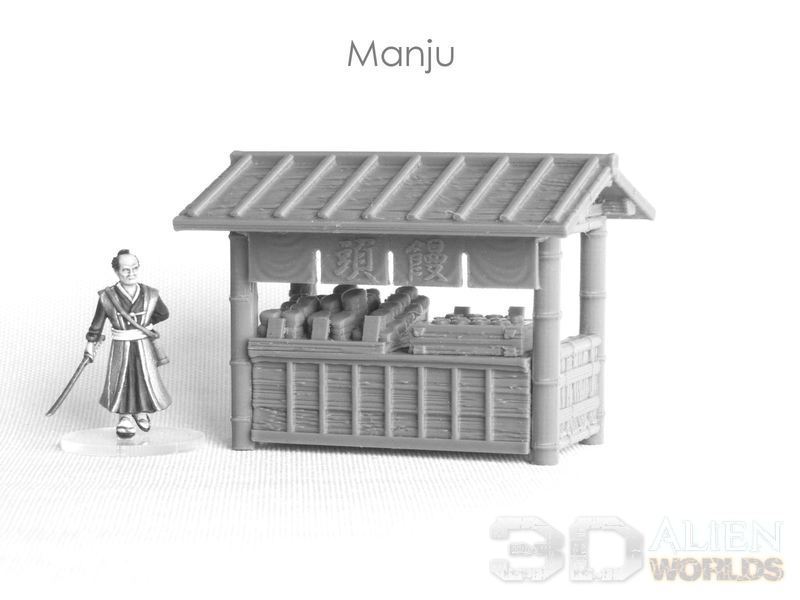
▲ #3: Manju are rice cakes made of mochi (sticky rice), and are traditionally eaten as snacks or offered as gifts. You often find them at festivals and religious events in modern-day Japan, where the white and pink rice cakes are sometimes produced by shrines.
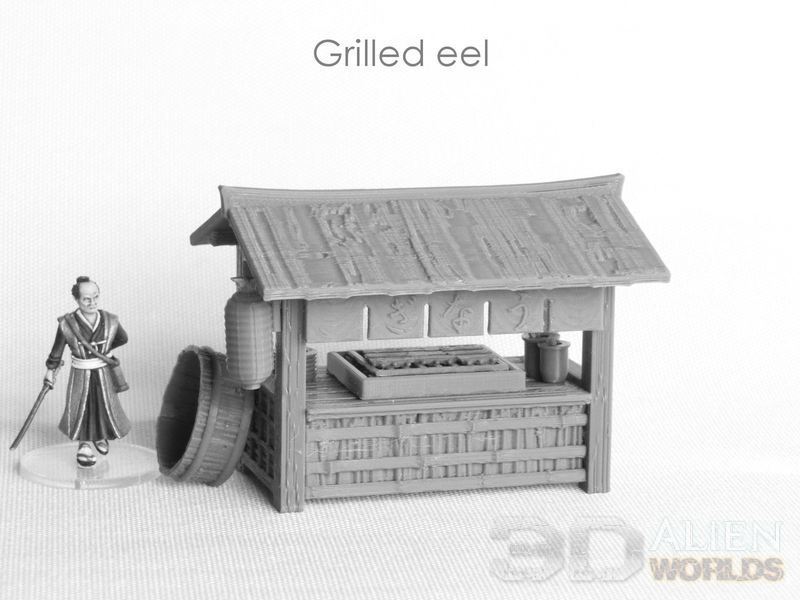
▲ Stall #4 is another hot food stall, selling strips of eel grilled over coals. I added an empty (and probably quite smelly!) tub on the side, plus dishes and sauces on the countertop. Another paper lantern, often found on food stalls, is hanging on the side for some extra advertising.
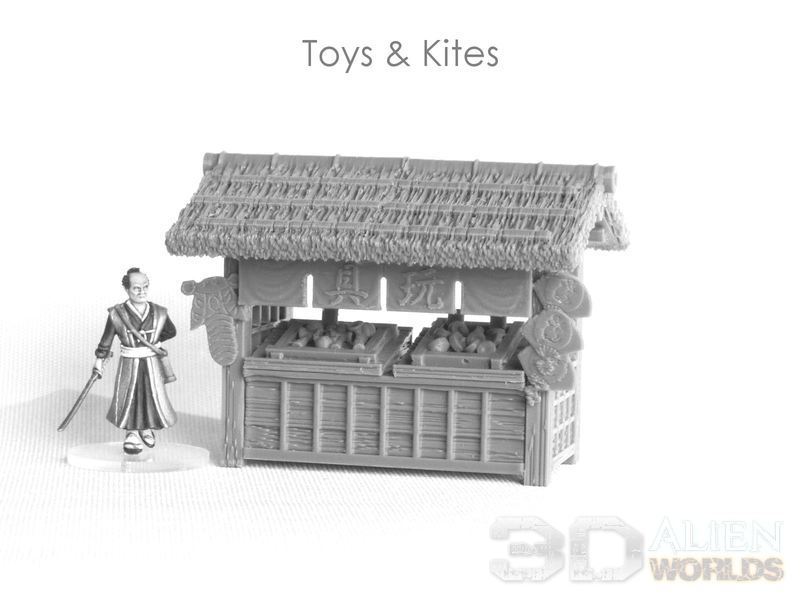
▲ #5: Toy Stall! This is the only non-food stall in the set, and features some cute little toys in trays, traditionally found in Japan. The left-hand tray contains kendama, which are cup and ball toys, and the other tray contains some spinning tops.
The stallholder has also added some colourful kits to the front of his yatai stall.
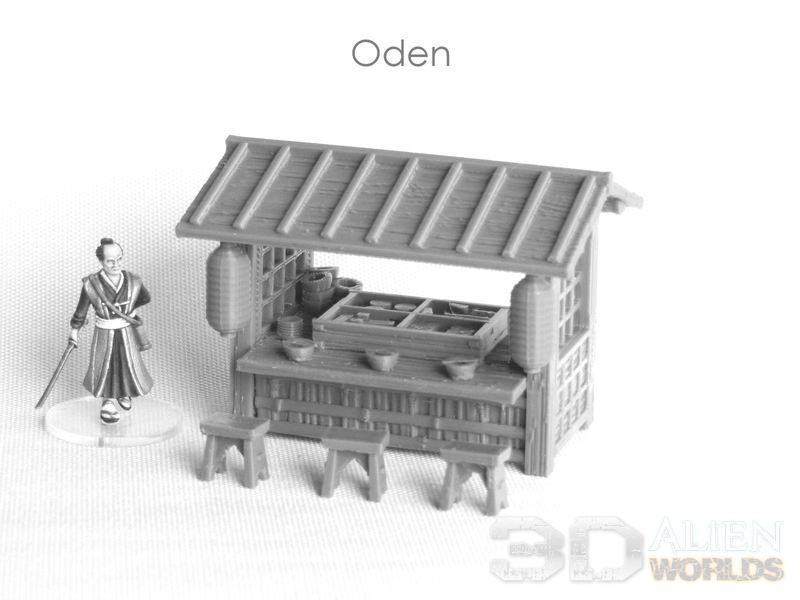
▲ #6 is probably my favourite of the stalls, because I can easily imagine myself sitting on a stool munching away on some oden hotpot with friends. The central tray is filled with broth and heated from below, and contains an assortment of radishes, eggs, tofu and other items.
I didn't add a front curtain to this stall (although there is one in the file set), because I wanted to show off the food tray - I'm planning to use a few drops of clear resin as water there!
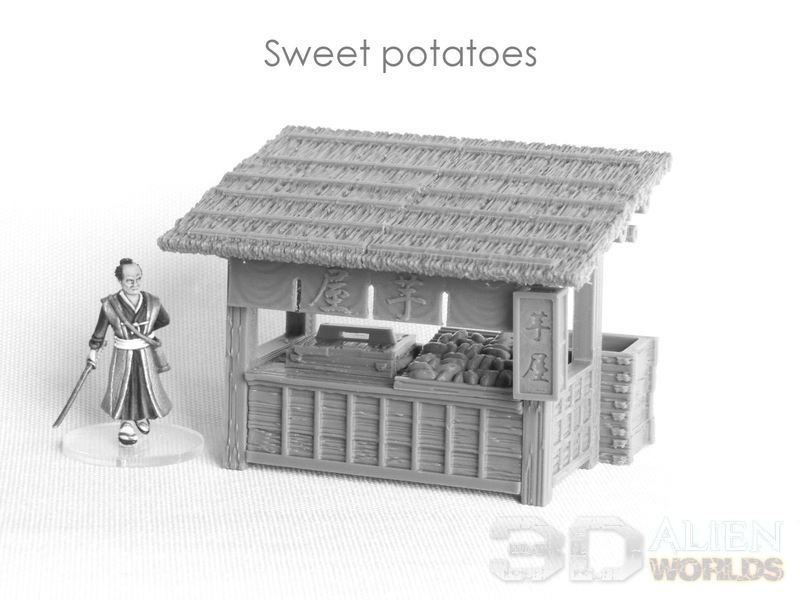
▲ Stall #7 sells sweet potatoes, which are steamed in the small oven on the left, and sold hot. I added some extra boxes to the back of this stall, and a vertical lightbox on the front right. The kanji characters for "potato stall" are inset into the sign, and should work well with a light touch of ink or black wash.
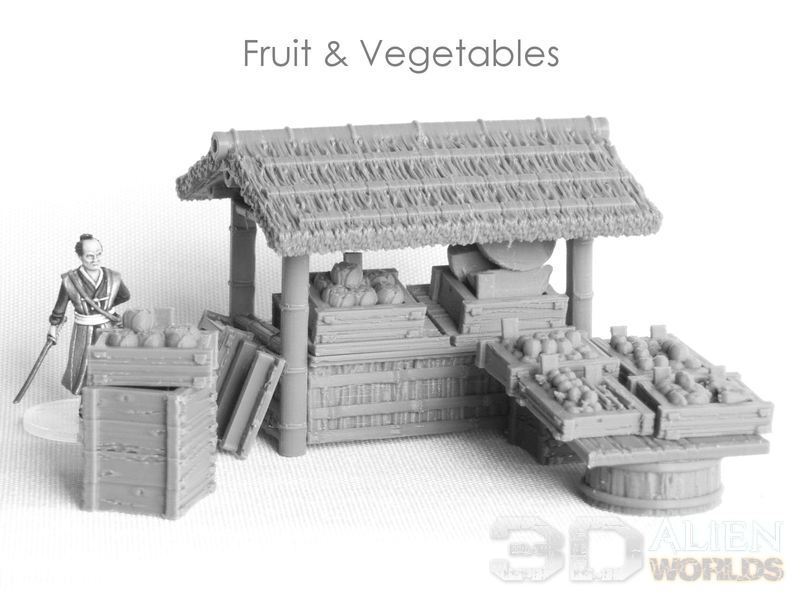
▲ Another big stall, #8 sells an assortment of fruit (apples, oranges, watermelon slices) and plenty of vegetables (onions, spring onions, potatoes, carrots and cabbages). Like the fish stall model, extra display space has been created using upturned tubs and boxes.
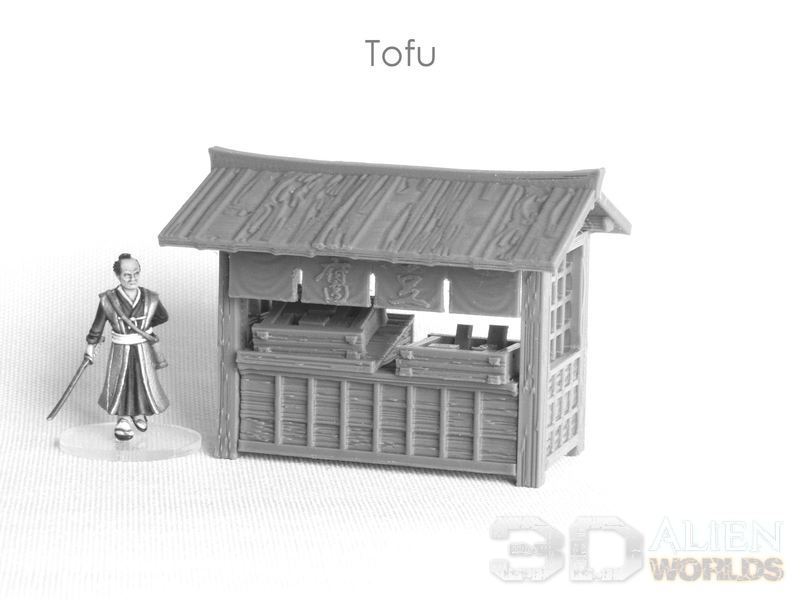
▲ Stall #9 sells tofu, which is bean curd pressed into blocks. I'm not a huge fan of tofu myself, but it's a staple ingredient in Japanese cooking.
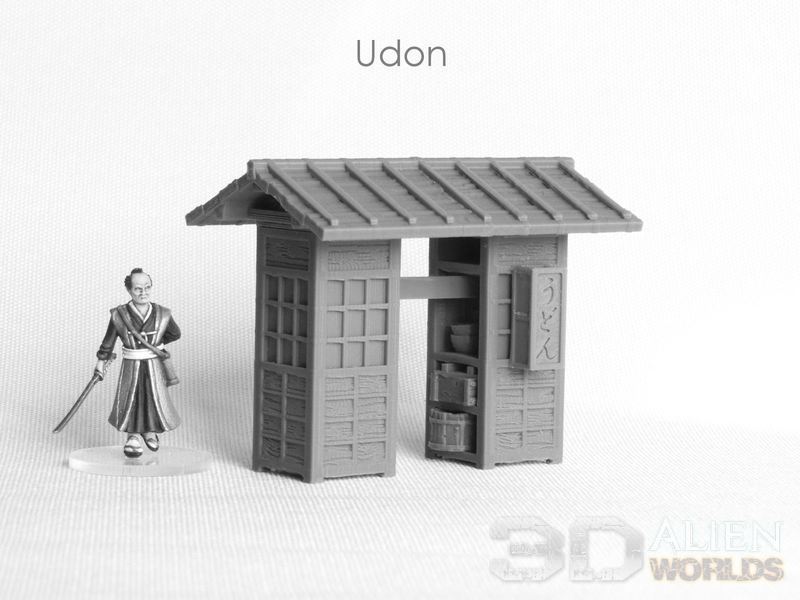
▲ Stall #10 is an unusual udon (noodles) stall, in a unique design that became common from the Edo period. The two sides contain a small stove and coalbox underneath, and plenty of shelves. In the photo above you can see a small bucket, box and bowls....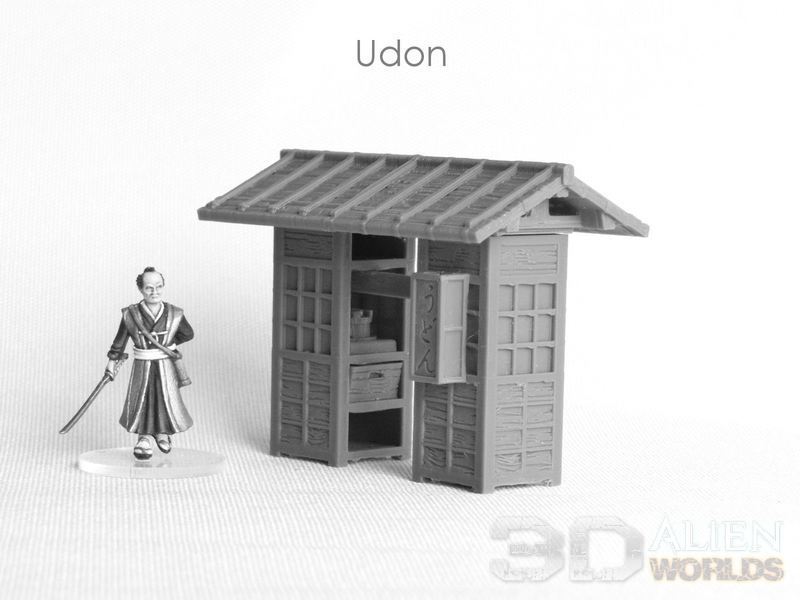
▲ .... and in this photo you can see the stove and firebox. There's a vertical sign on the right, which would be lit from the inside, but you could also choose to attach a curtain sign to the front.
The unique thing about this stall is that the stallholder would actually carry it around using the central beam (on his shoulder), before temporarily setting up shop for the evening in a busy location! Such an awesome idea!
These stall will be hitting the paint desk this week, and will be released shortly.
It's been a while since the last new designs, but today we have a little preview to show off for our samurai range - a set of market stalls, known as yatai in Japanese.

▲ Yatai stalls are temporary market stalls, and you would have typically found them along main streets and at local festivals. They usually sold foodstuffs, although occasionally you'd see yatai stalls selling craft items and toys. They make great small scatter terrain for wargames, too!
So we're working on a set of fairly modular stalls, which can be mixed and matched to create a nice variety of shapes and styles. Of course the set will also contain a selection of typical accessories, so you can decorate your stalls with the following themed items:
Today we're going to look at some of the stall types included in the set.....

▲ First up is this simple wooden stall, found all over Japan!

▲ All these pieces will print without supports, and this image shows the first roof type for the wooden stalls.

▲ This second wooden stall has a different roof type, and also features different windows at the sides. The idea for these is that you can use them as shown in the picture, or you could add some thin paper to give the effect of shoji paper screens.
In addition, some stalls would have used paper on the outside of the windows, decorated with kanji characters, as an advertising sign for their business.

▲ Stall type number 2 is this bamboo version, with a couple of roof variations. You could use a gable roof shape (on the left) or a simpler sloped roof (on the right), and both have thick rushes as thatch, held in place with strips of bamboo on top.
The pieces are modular, so you can even add bamboo sides on to a wooden middle section, or vice-versa.

▲ Stall style number 3 is probably the weirdest! This is a lightweight food stall, that was designed to be mobile!
You see that beam connecting the two halves? You can put your shoulder under that, and lift up the whole structure! So you can carry your entire food stall to a prime location each evening, and serve up some hot cooked food.

▲ The two sides would contain bowls, cooking utensils and buckets, even a small stove and hotpot, allowing the enterprising owner to serve up such hot food as udon noodles.
This kind of mobile yatai stall is perhaps more commonly found from the Edo period onwards (so later in time than the others), but still makes a great characterful addition to any board.

▲ One last image for today, of a noren curtain that can be hung at the front of the stall. The set will contain blank versions of curtains, and also versions with letters for various types of stall.
The image above shows the curtain from a stall selling dango (grilled mochi on a stick), and is written right to left DA-N-GO..... which was the normal way to write at the time. The slightly raised lettering should help those wanting to paint on some realistic signs.
We'll be test printing these stalls over the coming days, and should have some assembled photos to show off shortly!
A while back the lovely folks behind the new Eldfall Chronicles game got in touch, asking if they could use our samurai terrain to show off their awesome models. Of course I was happy to oblige, and sent a bunch of terrain files their way..... and yesterday I finally got to see how it all turned out!
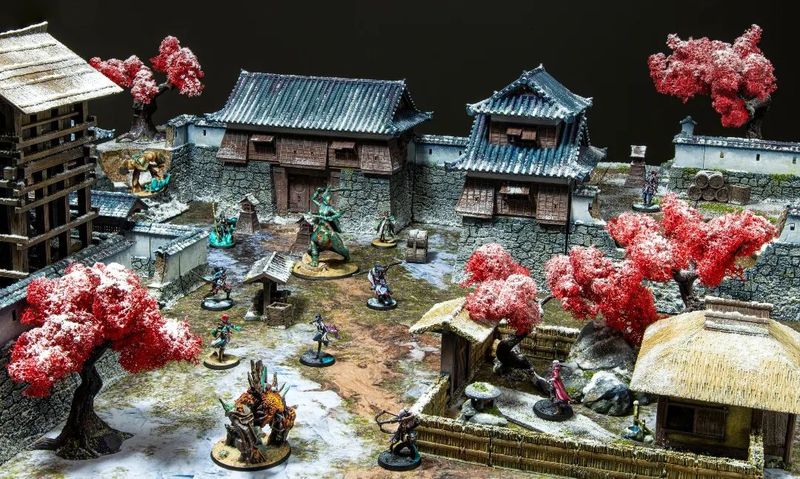
▲ In their own words.....
"The miniature terrain inspired by the Empire of Soga is finally finished! Aaaa so happy!
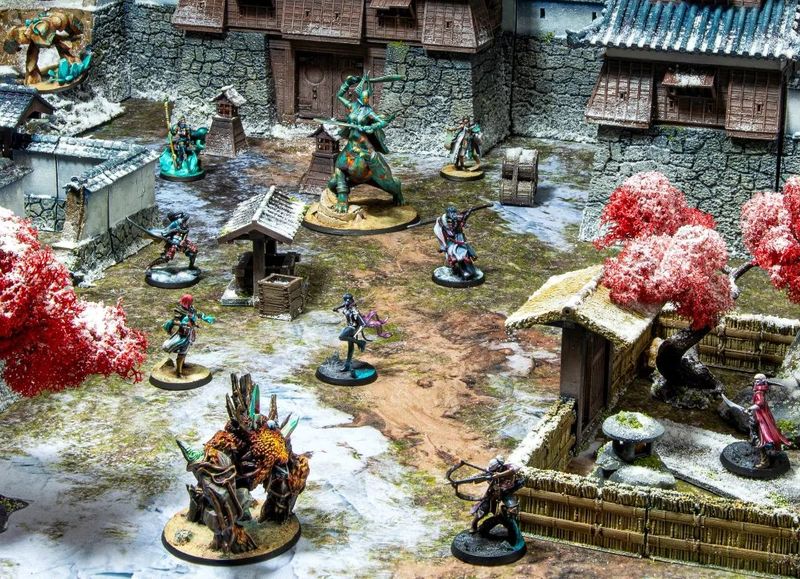
▲ Well done! It looks sooooooo good!

0 Comments :
Write a comment :