3d-printable terrain for all your samurai wargaming needs


The third of this month's new samurai terrain pieces is ready to test-print, so we should have some nice assembled photos to show you in a few days.
In the meantime, let's take a look at the design for the upcoming Temple Bell ...
£ This is the real-life shōrō bell at Goshoji Temple, which has a very similar roof shape to our model. As you can see, the ornamentation on the roof is stunning!
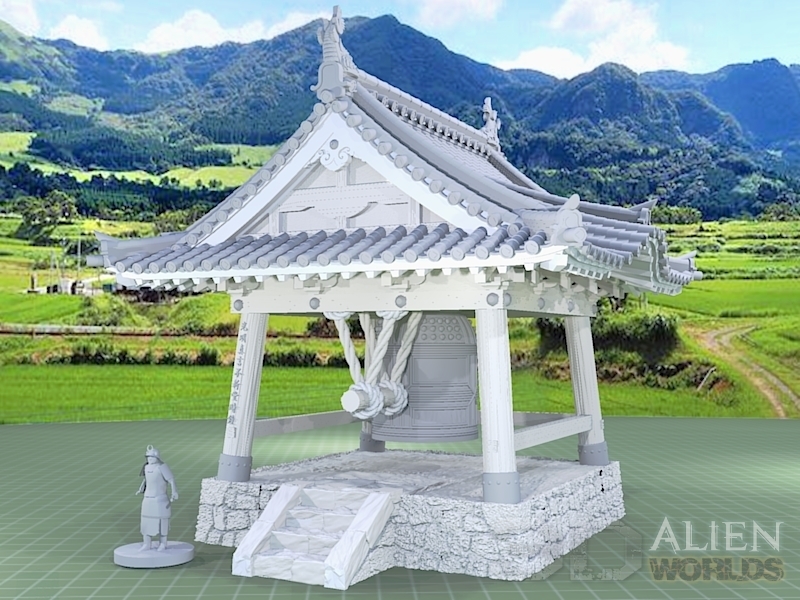
£ And here is the completed render of the new design. The roof is a modified version of the big castle's top level, and features those awesome mid-roof curved sections.

£ The frame and base are based on the sumo ring's design, with some alterations. The left front post also features some engraved kanji characters, taken from an actual Buddhist temple bell. Funnily enough, my son Euan (16, and goes to a Buddhist school) was the only one able to identify which branch (sect?) of the religion it belonged to!
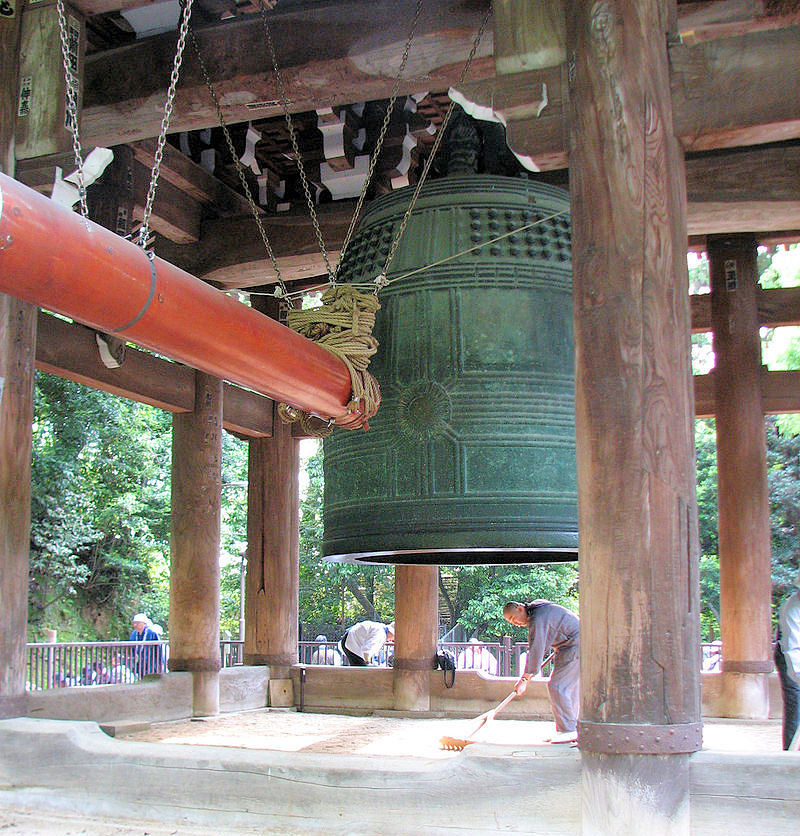
£ The design of the large central bell is based on this real-life one, from Chion-in. This one features some great authentic details, such as the studs, piping and striking plate.
Our striking beam, however, required some thicker ropes than the real-life version, to be able to print properly. The striking beam and ropes are printed in two easy parts, and it should even be possible to print without supports! Fingers crossed....
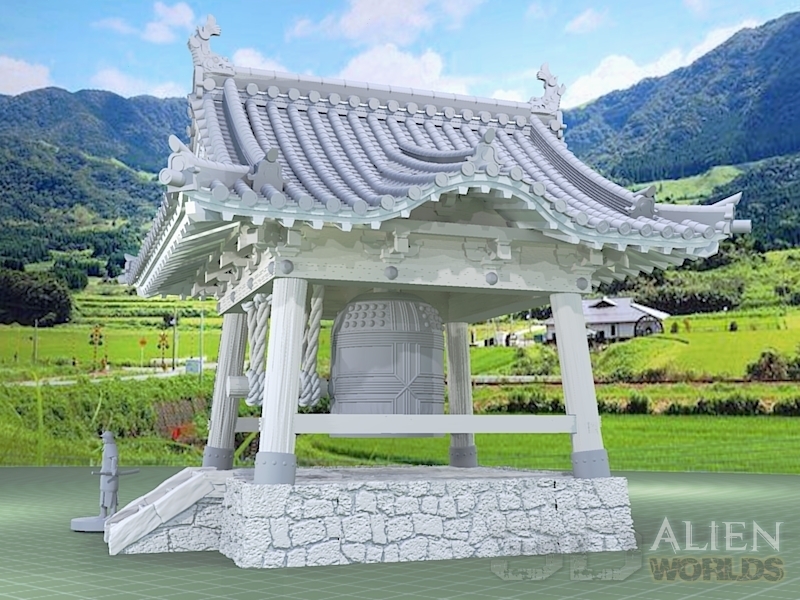
£ Here's the side view of the structure - as you can see, the ornamentation and detail on this model are highly realistic, and this will make a great addition to my growing temple complex board.
It's been a few months since we had a new store to welcome to the family, but we have a new print partner to announce this week - BADGER 3D CREATIONS, from Yorkshire in the UK. They are now selling print versions of our sci-fi Taui and Necrontyr modelson their store!

While the Sumo Ring is being painted, we have a second design to show off today - the new Dice Tower Pagoda!
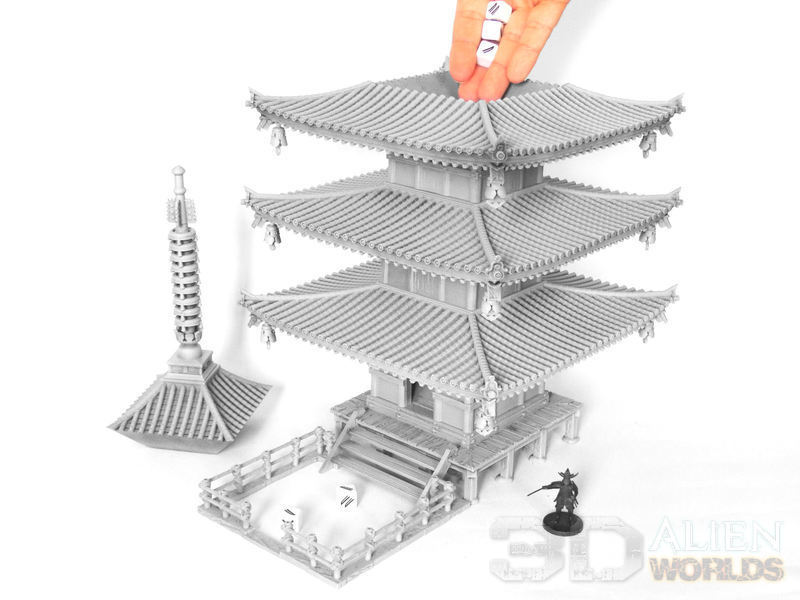
Printing this awesome dice tower takes a little time (there are some big roof pieces), assembly is very easy, and the whole thing can be printed without supports! So here we go with a printing and assembly guide for you.....
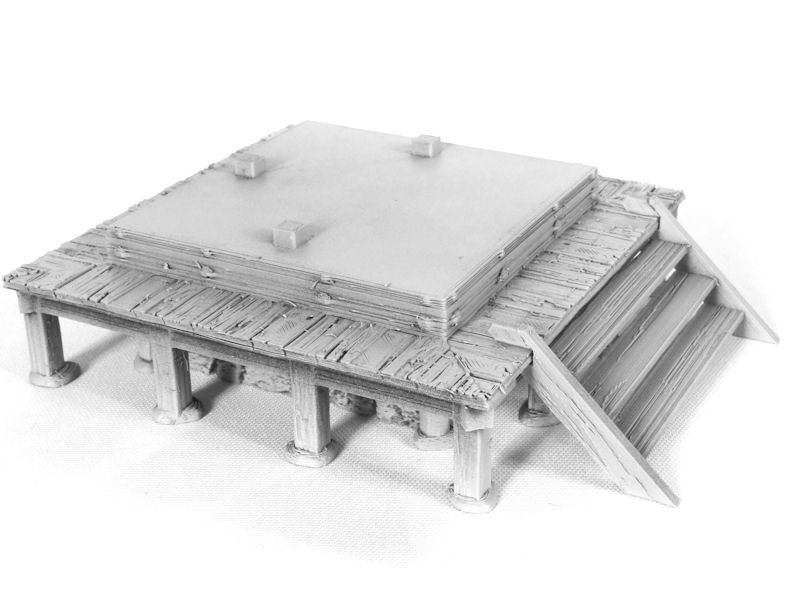
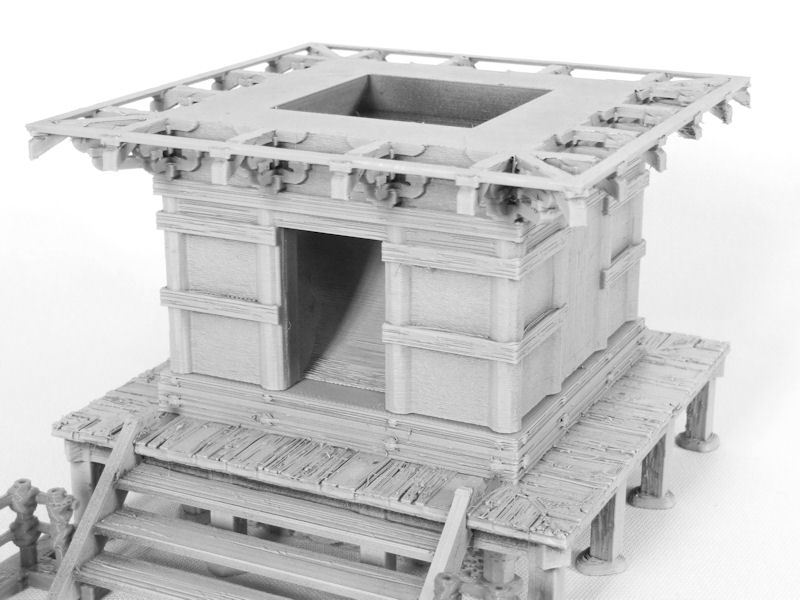
£ The base section is where we start, and this consists of 4 pieces. The small stone base makes up the bottom piece, and then the wooden post frame (printed upside-down) simply slots on top, then the wooden surround slots on top of that, and then the steps slide in from the side.
I'm planning to paint my stone section separate from the wooden pieces, so I won't be gluing them together just yet.
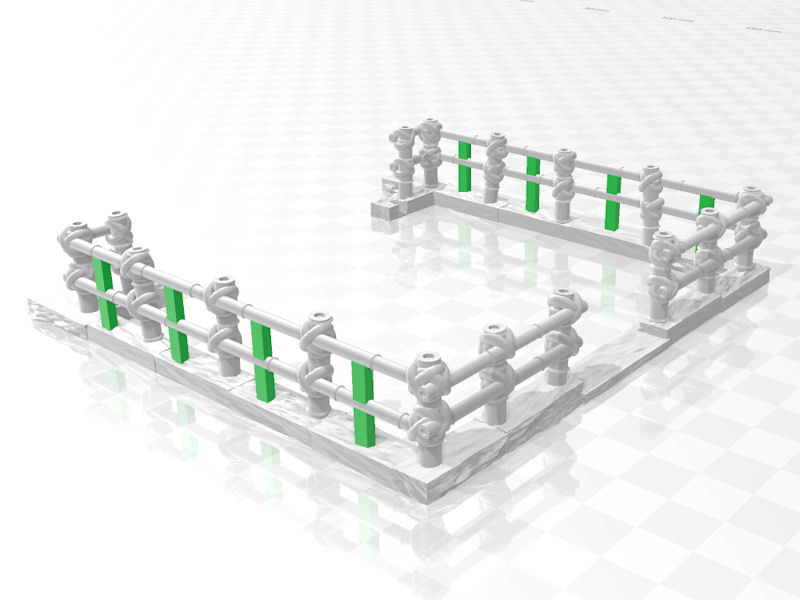
£ This cute little bamboo fence is in fact the dice tray for catching dice as they roll out from the tower. It doesn't need to be glued on, as there are small slots to fit the bottom of the steps.
If you print the normal version it includes some built-in supports (marked in green in the image above), and you should carefully remove these with clippers. My advice would be to grip with the clippers, then rotate around the piece from side to side. Take your time. This should neatly grind away at the support and then you can snap off the last strands.
A second version of this fence enclosure is also included, without any built-in supports. If you think your printer can manage the longer bridges, then why not try it and save yourself some time in clean-up.
£ With the base and tray completed, we can move onto the pagoda itself. The first level is printed upside down, and does not require supports. Simply slot into place on the base.
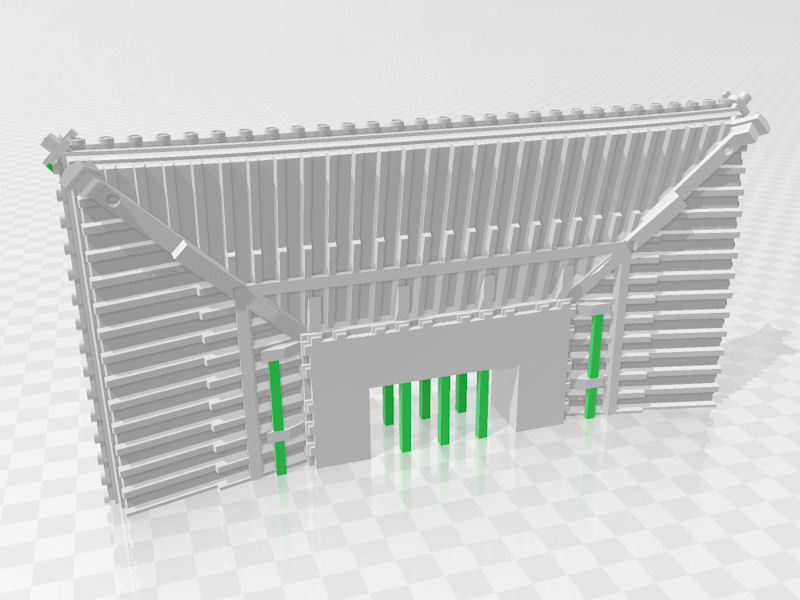
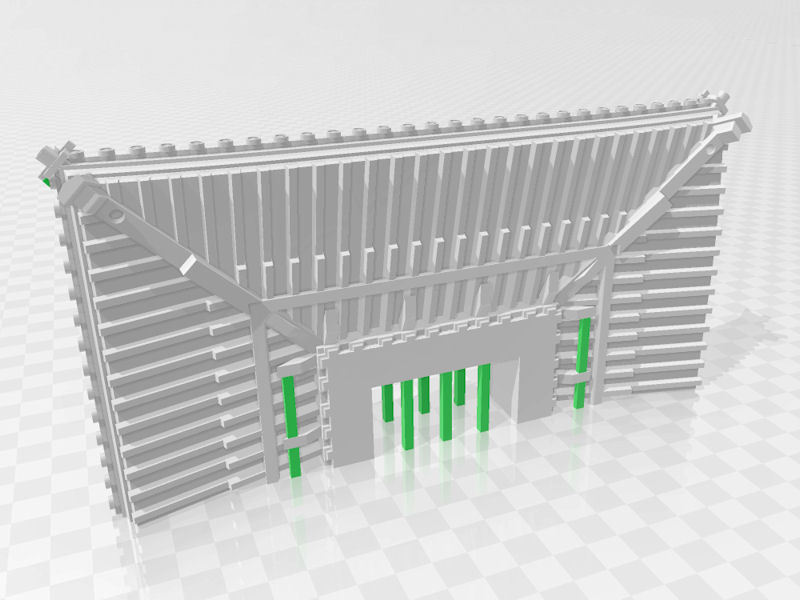
£ The roof for the first level is printed in two halves, or 4 quarters for smaller printers. The image above shows some built-in supports (shown in green), which should be removed with clippers.
£ The second level is similar to the first, and is also printed upside down.
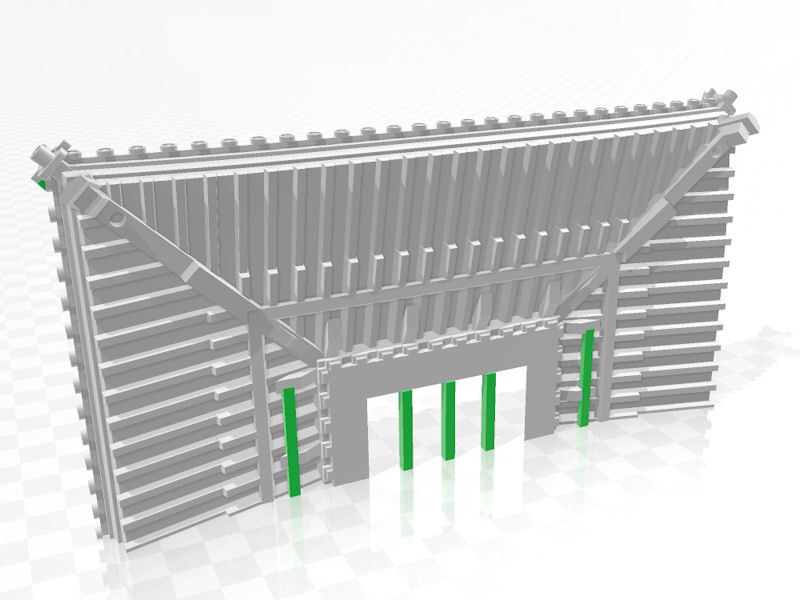
£ The second level roof is almost identical to the previous level, and also includes some print supports (shown in green) which should be snapped or cut off during assembly.
£ Yes, you guessed it! The third level is another easy upside-down print!
£ The third and final roof level is comprised of two identical halves, which will form the dice bucket, and then a third smaller piece which forms the top.
Obviously, you don't want to glue the top piece into the dice bucket - it's designed to be easily removable during gameplay.
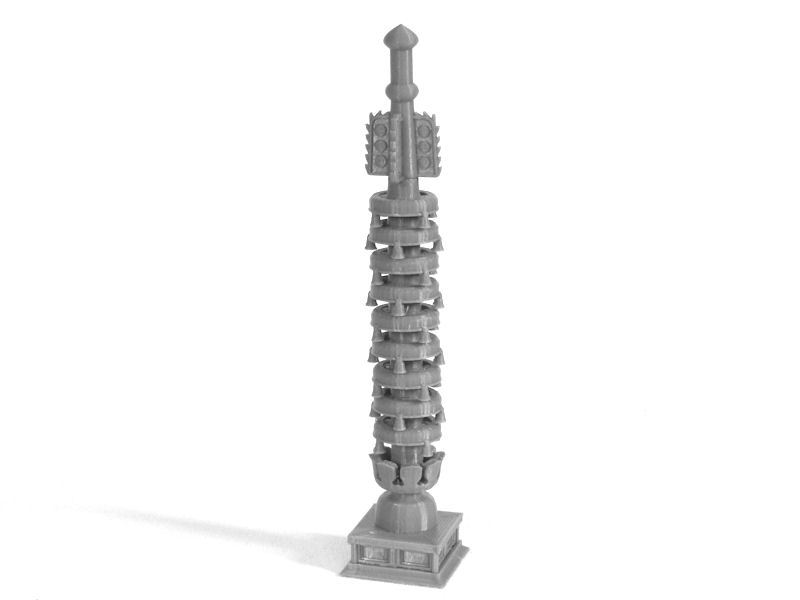
£ We're almost there now! The top spire has a base piece and top piece, and then 9 identical rings which print upside down. They glue together as shown in the photo.
Lastly, you'll need to print 12 of the bells which attach to each corner of each roof section. I'm going to paint mine separately, and glue on later.
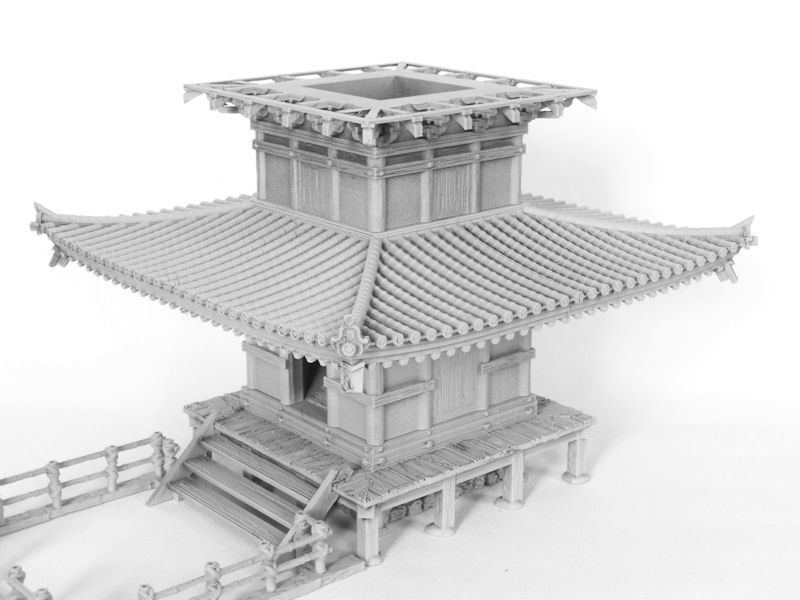
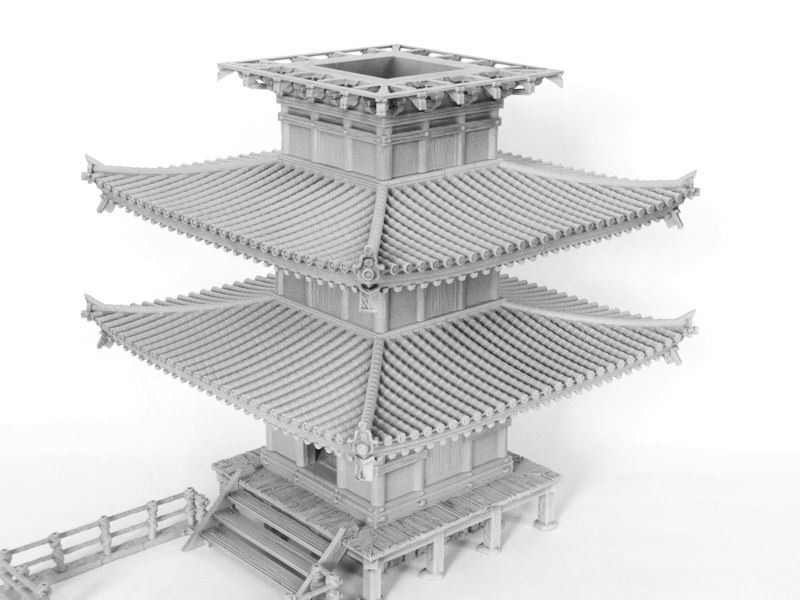
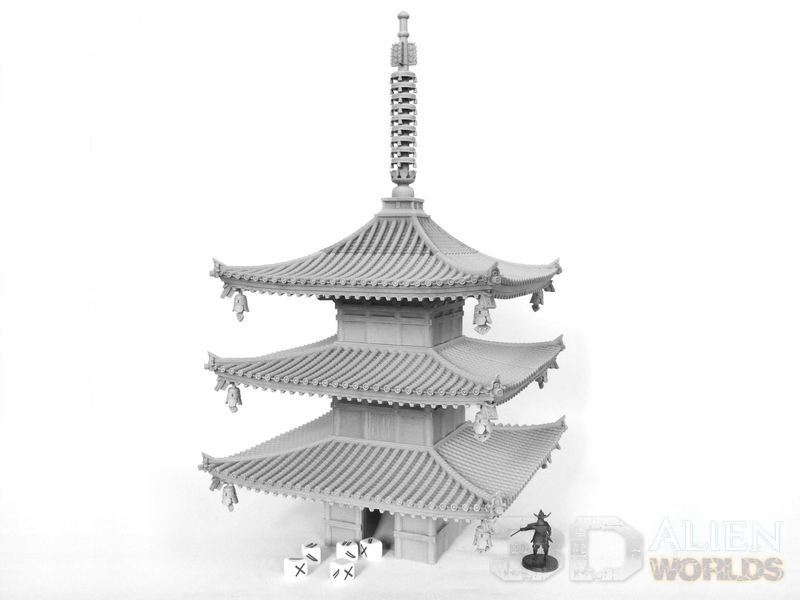
Let's take a look at the finished dice tower...

£ It's not quite as imposing as the bigger 5-level Temple Pagoda, but would still make a fantastic centrepiece to any board! From base to spire tip, it's an impressive 430mm (17") tall, and is completely functional as terrain, too!
£ You can quickly pop the top off during gameplay, to roll dice down the centre! They'll roll neatly out of the door into the bamboo fence area.
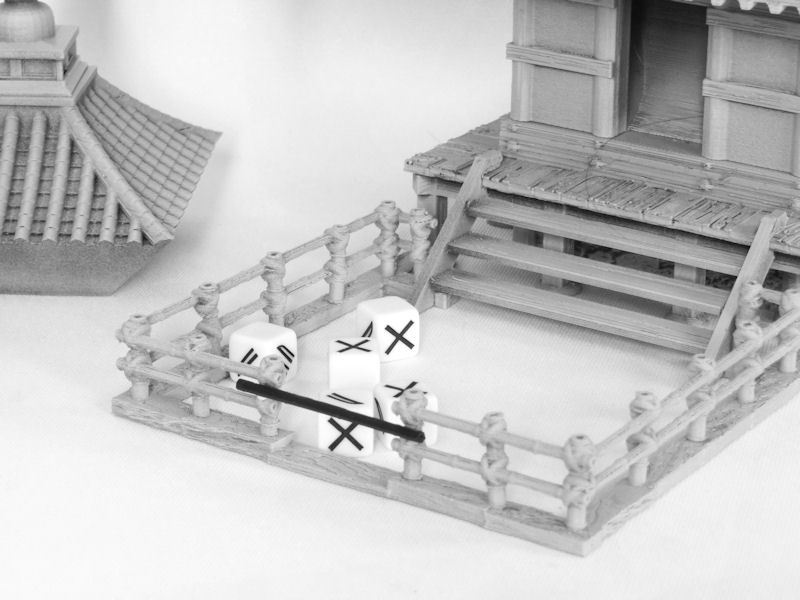
£ If your tabletop is hard wood or some other surface that makes dice bounce and slide more than normal, you also have the option of printing an extra bamboo stick or two (included in the set), which can be glued across the fence's entrance. You'll often find this done in Japanese gardens and temples as a simple way of telling people to stay out, so it's quite an authentic touch.
£ Finally, you can use this model without the base section, both as a dice tower or just a terrain piece with a smaller table footprint.
This dice tower will be hitting the paint desk this week (special paint job planned for this!), and should be released later this month.
With the new Sumo Ring terrain piece coming very soon, I really wanted to buy or print some awesome sumo wrestler models to go with it. After a bit of research, I found quite a good variety of likely miniatures available, so hopefully this short guide should save you some time in finding the models you prefer?
Let's start with the offerings on Thingiverse.....
£ Sumo Wrestler by massigrn
https://www.thingiverse.com/thing:3141632
This is pretty much the only free 3d-printable sumo wrestler model I could find on Thingiverse. It's not bad, but I didn't like the head so much. It was a little too cartoony for me. Plus the model has a finger/toe missing from each hand and foot. But it might be worth trying as a free print for your sumo ring project?

£ Sumokassu by Almewa
https://www.thingiverse.com/thing:3534798
Funnily, somebody has already tried a head swap on the previous sculpt, but I thought this just made it look a little like a giant baby. Perhaps if you could model some hair in a topknot shape, or even just grab a spare samurai model head, it would look awesome? Still has missing toes and fingers, though.
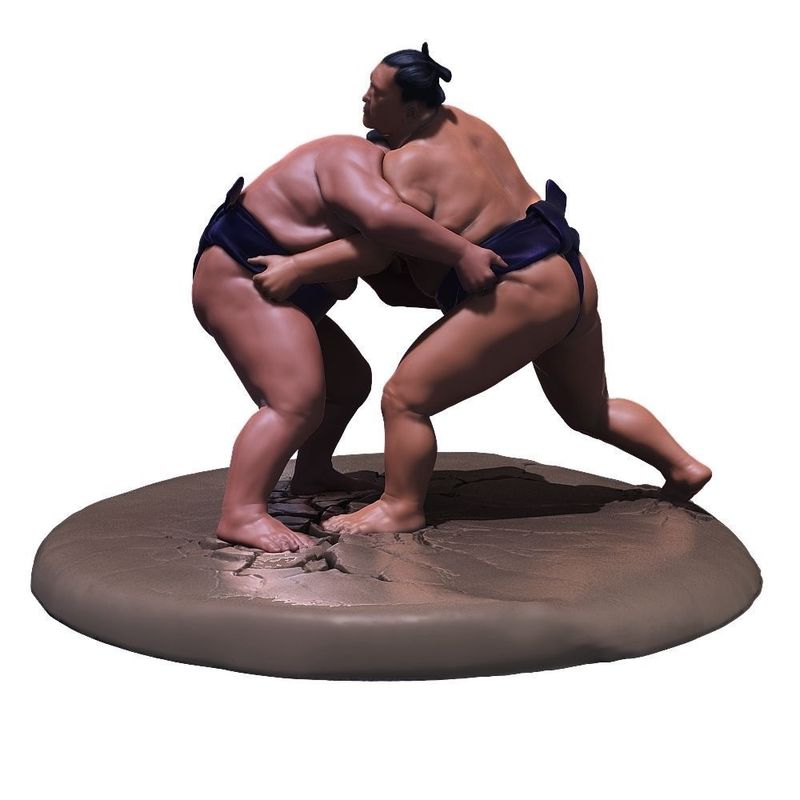
£ Sumo Fight Scene by jokermax ($3)
https://www.cgtrader.com/3d-print-models/art/sculptures/sumo-fight-scene
This is a paid file, but good value and realistically sculpted. A resin printer would probably do a great job of this, but I'm not sure how an FDM printer would manage with those fine details. Not certain if the base is separate or not. If anybody tries printing this one, I'd love to see a photo!
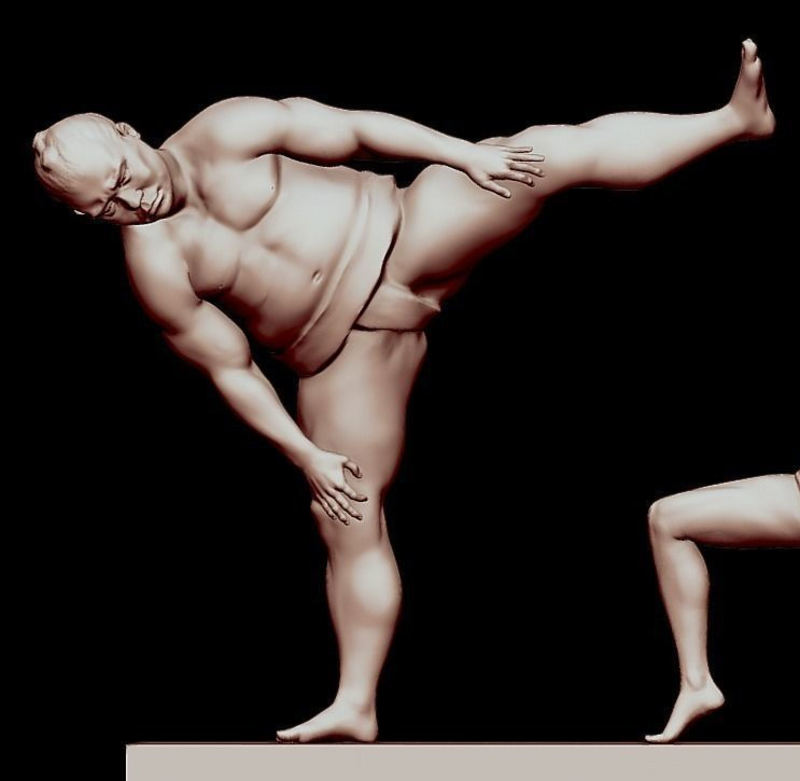
£ Sumo Ballet by PaulMarx (free)
https://www.cgtrader.com/free-3d-print-models/art/sculptures/sumo-ballet
This is actually a set of one sumo wrestler and one ballet dancer, and is a free download. It's a realistic sculpt, although perhaps the face could be a little heavier and/or younger? Again, if anybody prints this please send a photo!

£ Bushido has several sumo models in their range, and some of these would probably work well with the sumo ring. I think the scale is 32mm, whereas our Sumo Ring terrain model is 28mm - so might need a little adjustment.
£ Unlike the previous Bushido model, this one doesn't have any extra clothing - so it would look right as a historical model, I think. The one thing I didn't love was the head/neck of this model - I'm not quite sure what it is, but something looked slightly off?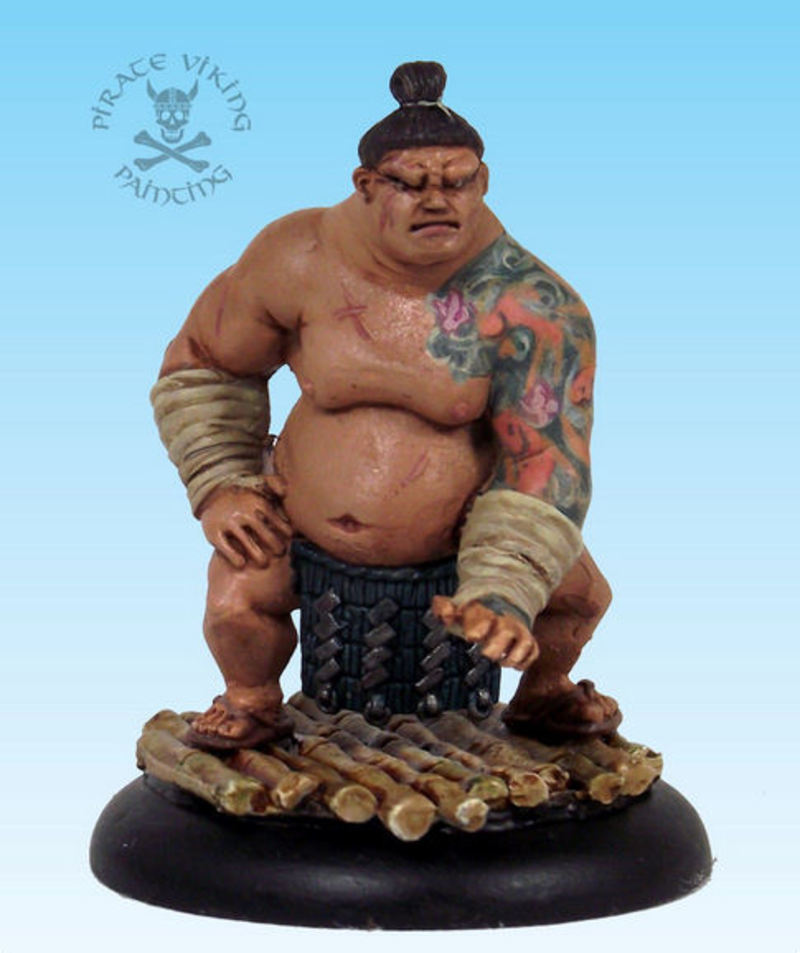
£ Having said that, this is the same model painted by somebody else, and it doesn't have quite the same problem. Perhaps it's just the different paint job? Anyway, this looks great, I think!
£ One more mini from Bushido - again, I assume this is 32mm, and does of course have that big axe. Is it just me, or would he look just like Fat Bastard from Austin Powers if you gave him ginger hair?

£ Sumo Wrestler, by Dixon Miniatures
I think this is 28mm scale, but I'm not a huge fan of the faces of some Dixon minis.
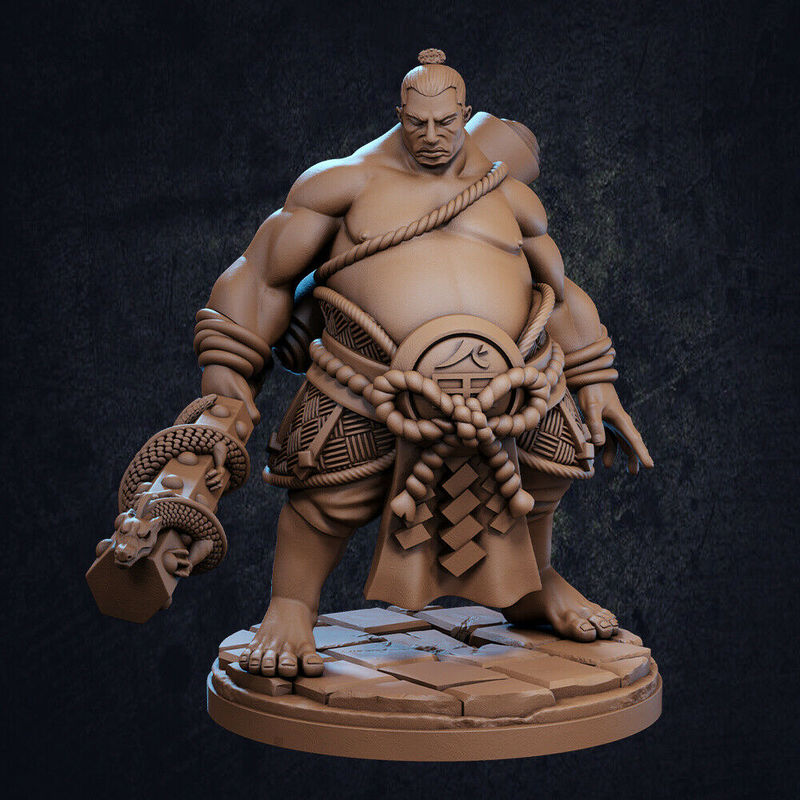
£ Takuma Sumo, by Dragon Trappers Lodge.
I believe this is a 3D-printable model, with a few weapon variations. You can also find ready-printed models on Etsy and Ebay. It's gorgeous, and full of lovely details, but the weapons didn't fit for my project.
READER COMMENT from David Shore:
"I have this model and am happy to say that it was really easy to slice/mirror his left hand, and then print it so that both of his hands are free, which is what I did!"

£ Sumo Hero, from Shadows of Brimstone
This is another armed sumo model, from a recent Kickstarter. A brilliant realistic sculpt, and you may be lucky enough to find it available separately?

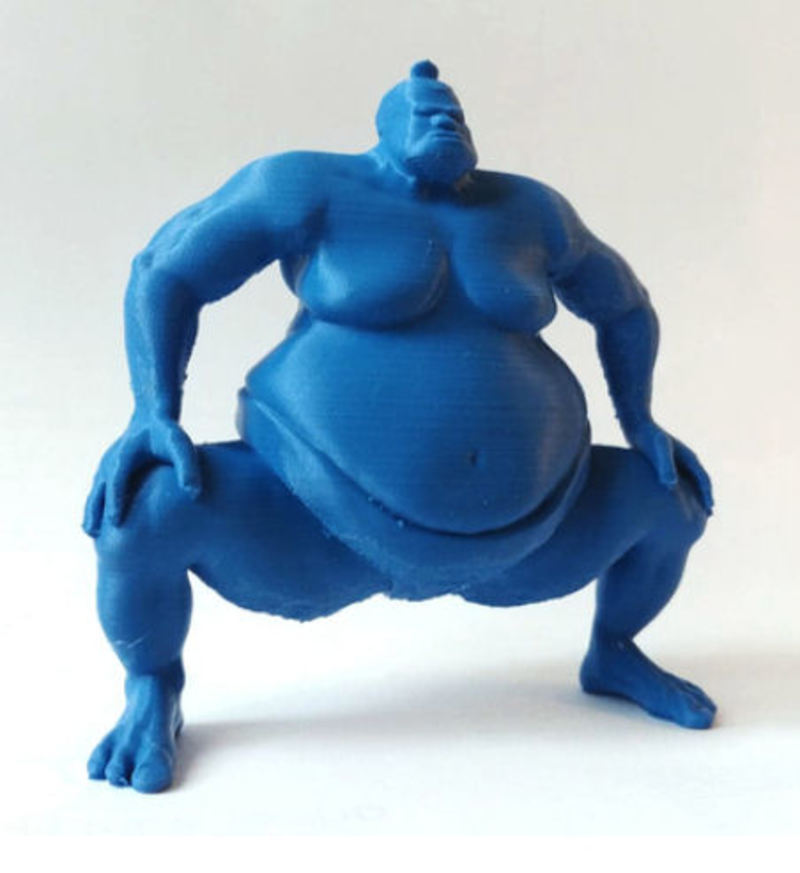
£ Hasslefree Miniatures
A good sculpt, I think, but I wanted a bit more flab on my wrestlers and a little less visible muscle.
£ The Bruiser, by NorthStar Figures (KungFu set)
This clothed wrestler is part of a kung-fu gangster set they offer.

£ Reaper Miniatures
The body on this one is good, but I'm not really liking the neck and head. It seems to be quite a small model, comparatively.

£ Yokozuna, from the Takkure game
Something a little unusual here - a sci-fi punk sumo wrestler! Nice mini, and a great sculpt, if you're using the sumo ring in something like Infinity, maybe?
So, we have a wide variety of sculpts and printable models out there. But here are the ones I've chosen for my own project......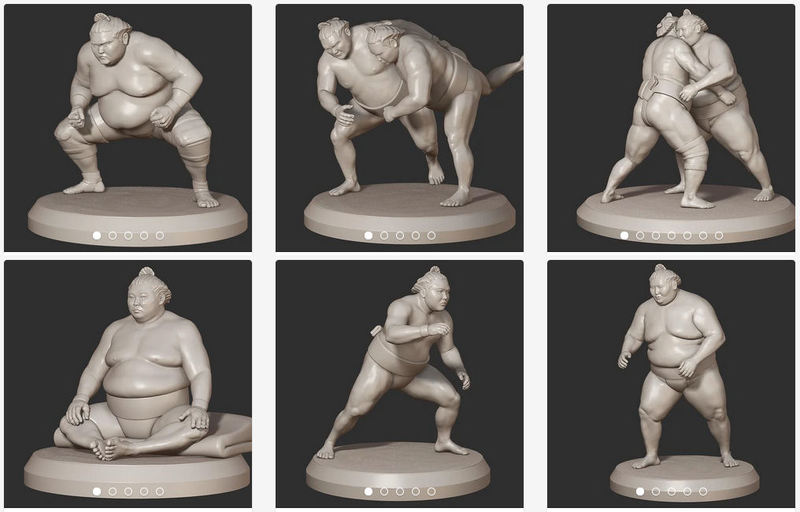
£ Sumo Wrestlers by Fish Creek 3D
https://fishcreek3d.gumroad.com (STL files for printing)
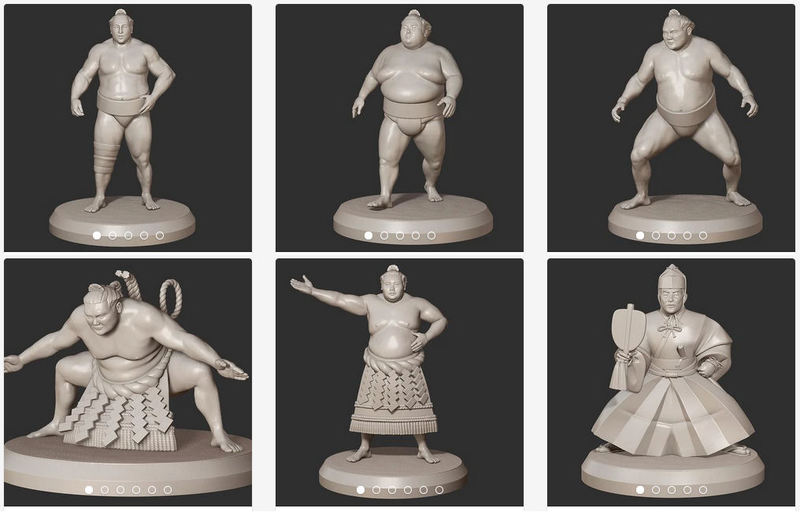
These stunningly lifelike sculpts were the subjects of a recent Kickstarter, and are now available from FishCreek3D's online store for about $6 and up. They were modelled after real wrestlers in a variety of action poses, and even include the referee model and wrestlers in ceremonial garb.
However, I don't trust my old, shaky FDM printer to do a good enough job on these, as they are designed (and pre-supported) for resin printers. So, you'll be happy to hear that FishCreek3D actually offer some printed models on their Ebay store - I dropped them a line, and they were kind enough to accommodate my request for specific models:
https://www.ebay.com/sch/fishcreek_3d/m.html
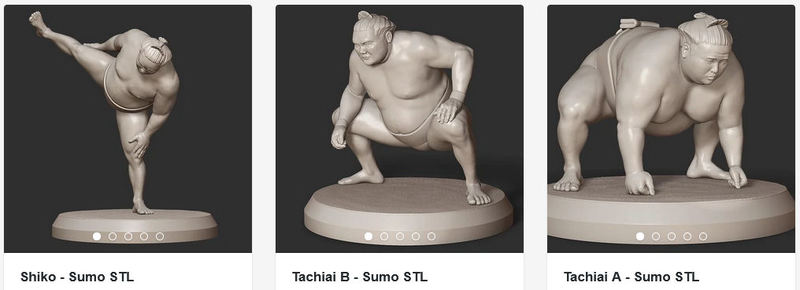
Bear in mind that these models are actually 32mm scale sculpts, but hopefully the scale difference won't be too obvious when they're on the terrain. After all, sumo wrestlers are usually taller than average when compared to other Japanese men. I ordered 2 resin prints of the last two models, Tachiai A & B. Both of those models are crouching, which should help hide the scale gap, and they also lack any modern accessories such as knee supports and braces.
Those two models are hopefully winging their way here in the post as we speak, and we'll show them off to you just as soon as they arrive! In the meantime, I'd urge you to all go take a look at FishCreek3D's beautiful sumo wrestlers (or go like their facebook page), as I think they are all perfect for the sumo ring model.
Ooh, we have a new shiny thing to show off today - the first of 3 terrain pieces for our ever-growing samurai collection, all coming out in October. Today's print is the new Sumo Ring, due to be released in a week or so!
This building would be the pride of any feudal-era town or village, and is often found near shrines or community buildings. It makes a great atmospheric addition to any board, and is a very simple, support-free 4-part print.
£ This is the first piece to print - the base. To print this all together requires a print bed 187mm long, but a multipart version is also included for smaller printers. Those little rice-bails making up the ring are cute, huh?

£ Next you'll need to decide if you want to print the frame version with decorative curtains, or the version without curtains. Again, this part does not require print supports. Then you can easily slot the legs onto the posts on the base, although I recommend not gluing it yet - to make it easier to paint the interior.
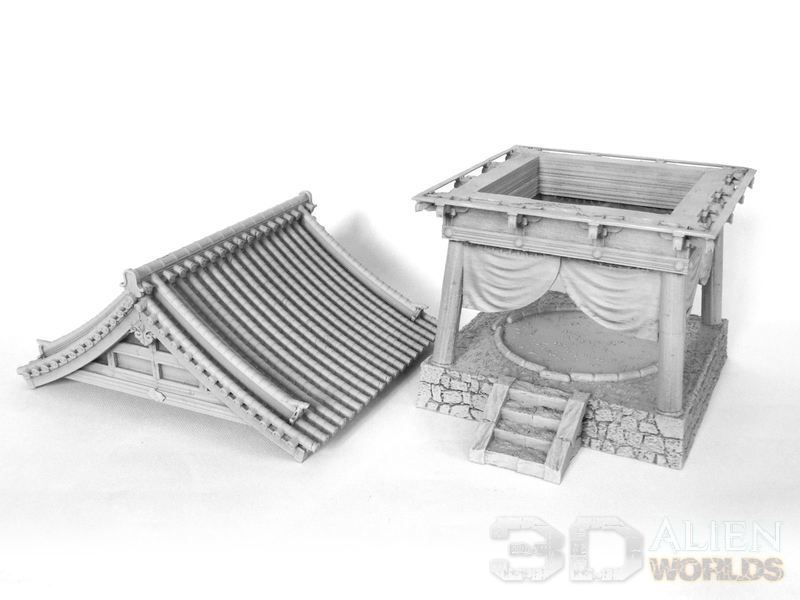
£ Lastly, you'll need to print the roof, in two halves (or 4 quarters for smaller printers). It prints without print supports, to make life easier. That's it - you're finished!
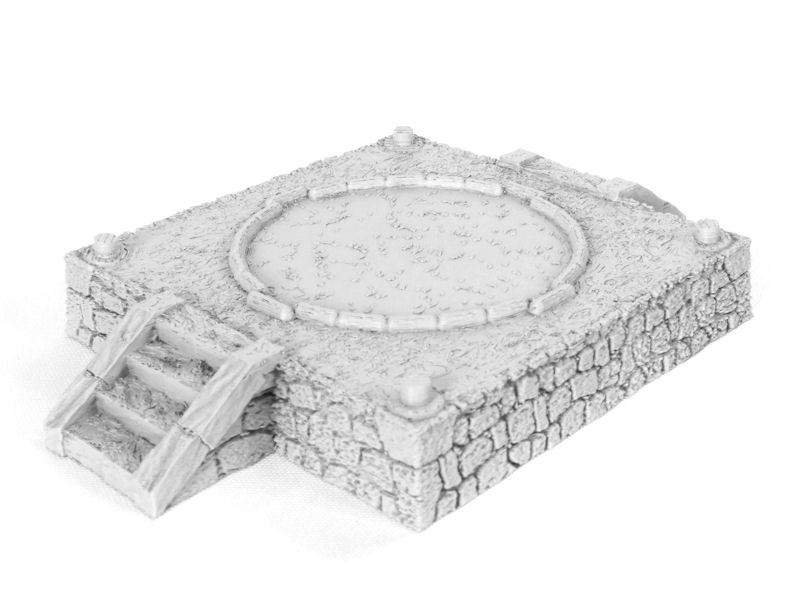
Let's take a look at the finished model....
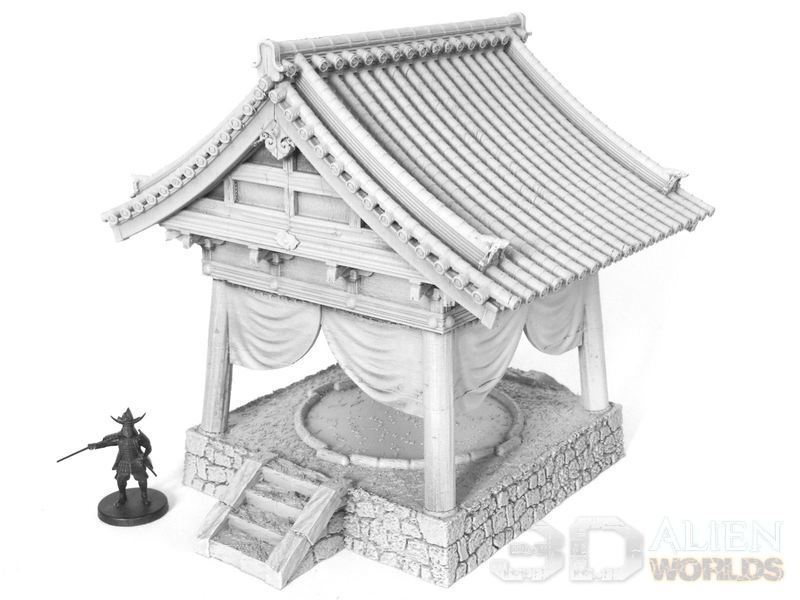
£ Here's the assembled sumo ring model, with a 28mm samurai for scale. I'm looking forward to adding some serious colour and bling to those curtains!
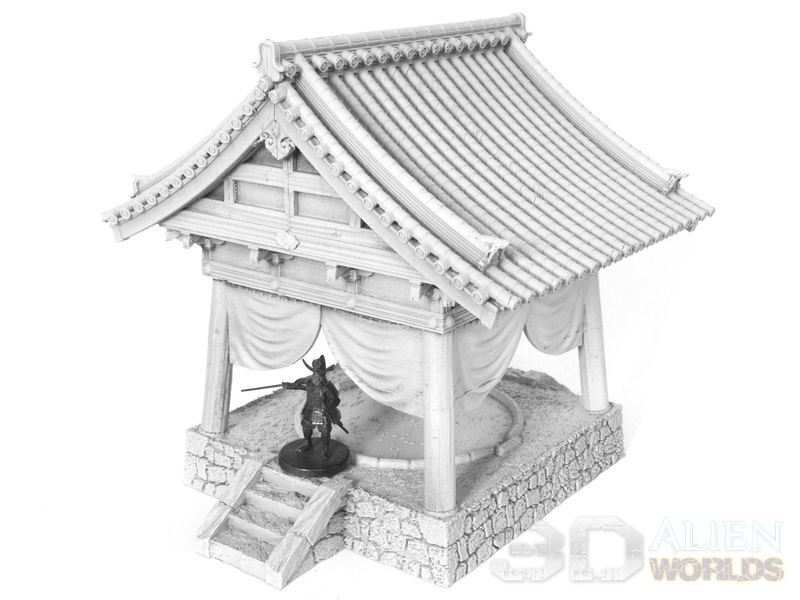
£ Lastly, here's a pic of the same 28mm samurai model standing beneath the curtains. Even with his tall helmet, there's enough space to enter the ring, so I'm planning on accessorising my ring with some realistic wrestler models.
This sumo ring will be hitting the paint desk this week (and I'll need your help choosing the curtain colours!), and should be ready for release very shortly.


0 Comments :
Write a comment :