3d-printable terrain for all your samurai wargaming needs


Today we're showing you how to print and assemble the two guesthouses from the new Samurai Lord's House set. Both of these models can be printed without slicer-created print supports, and are both stand-alone buildings, separated from the main residence via a covered walkway.
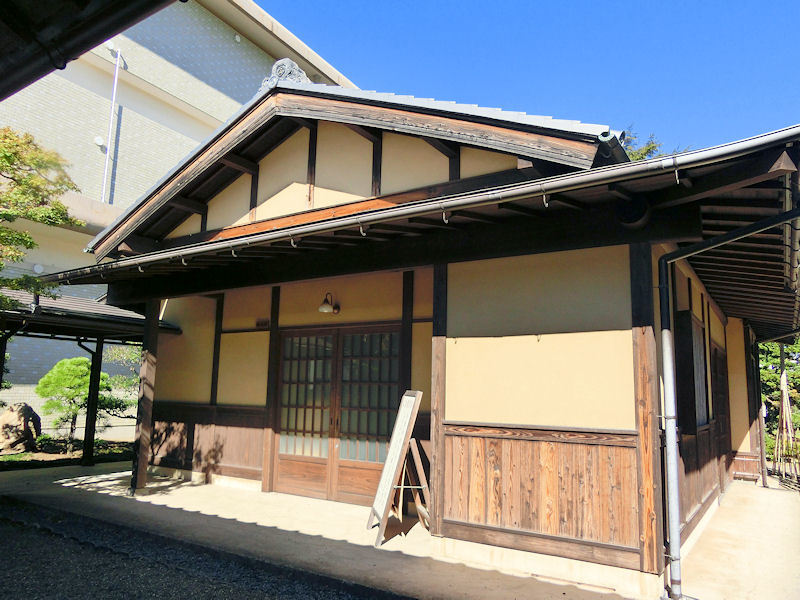
▲ Let's start with Guesthouse #1, which is perhaps the more functional of the two. This guesthouse is, like the rest of the set contents, based on an actual samurai residence in Oita prefecture (please ignore that horrible modern government building next-door!).
▲ The building itself is printed in one piece (split sections are also included for smaller printers), but does include quite a few built-in print supports in the doorways and window, which can be easily removed during assembly.
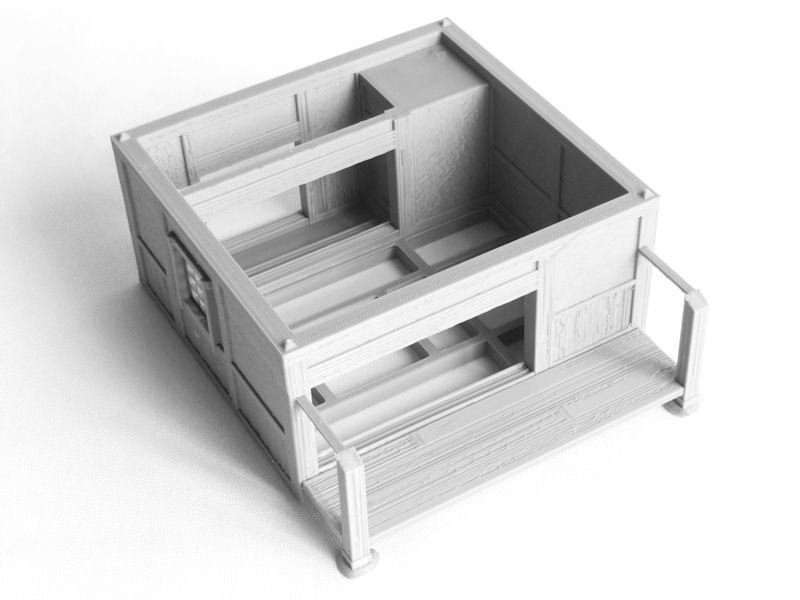
▲ Next we print a small group of extra pieces, which includes the balcony floor decking and 3 small sliding door strips, plus a choice of windows. These should be glued into place as shown in the photo above.
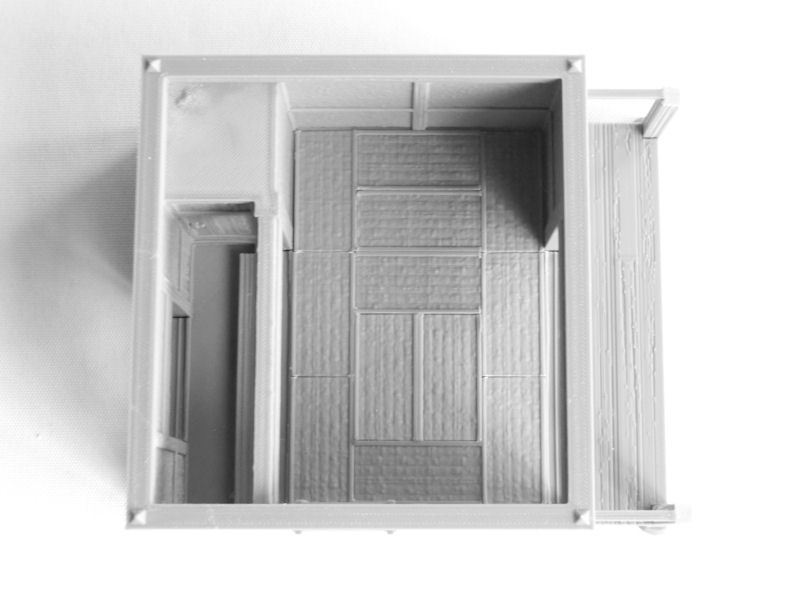
▲ This guesthouse needs 12 tatami mats, which can be squeezed into place in the layout shown above.
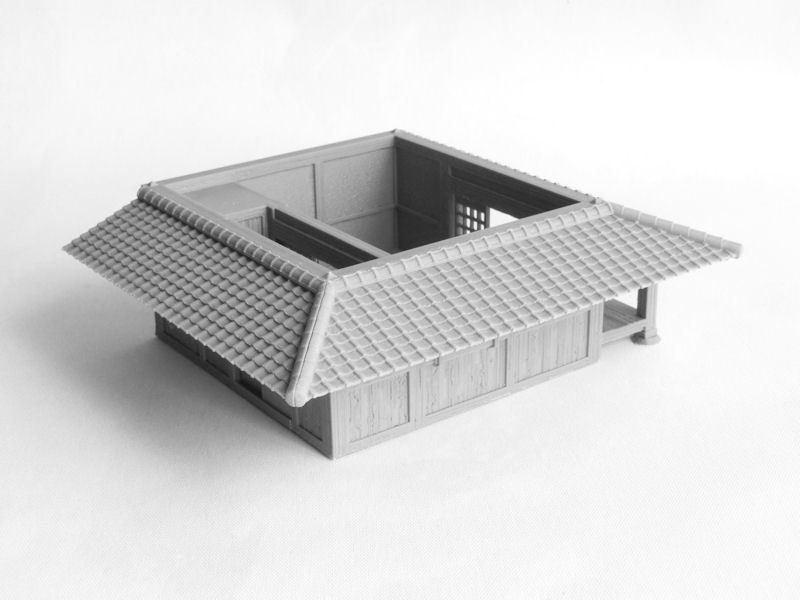
▲ There are 3 subroof pieces (and split sections for smaller printers), which should be glued into place as shown.
TIP: Glue the balcony's subroof first, as it will help to locate the other two sections properly.

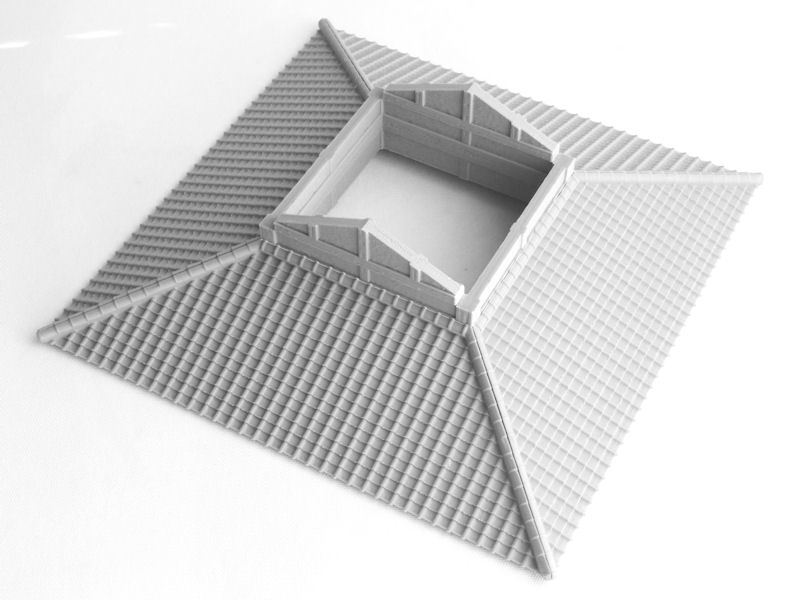
▲ The main roof is printed in two halves, and there are a couple of built-in print supports on each piece (as shown in red in the photo above), which should be cut off.

▲ The last step for Guesthouse #1 is to print a couple of sliding front doors, and then decide how many sliding screen doors you'd like to include in the interior. You could use up to 8 sliding doors inside, or none at all. As always, there are two versions of each door design - the version with holes (shown above) is designed to be used with semi-transparent paper such as baking sheet.
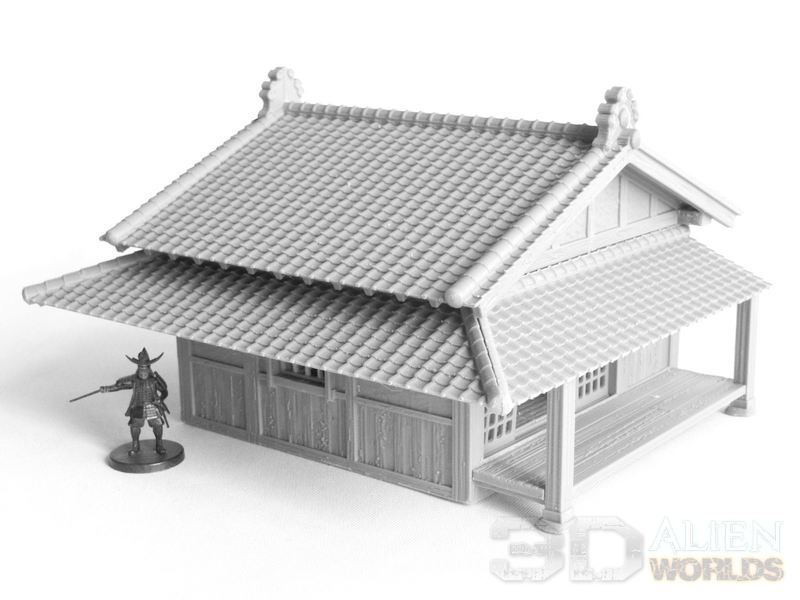
▲ This balcony faces the garden in the real-life version, with the front door closest to the main house.

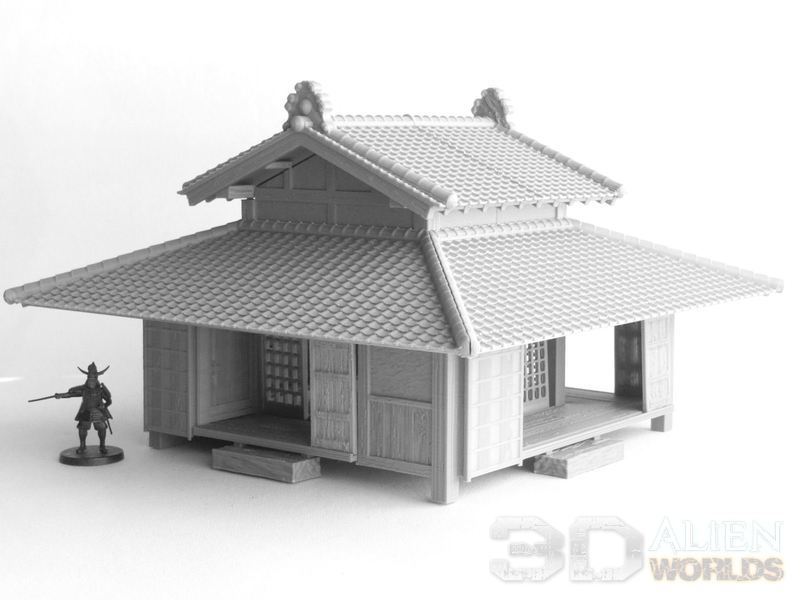
▲ The interior of this first guesthouse is pretty normal, and can serve a variety of functions.

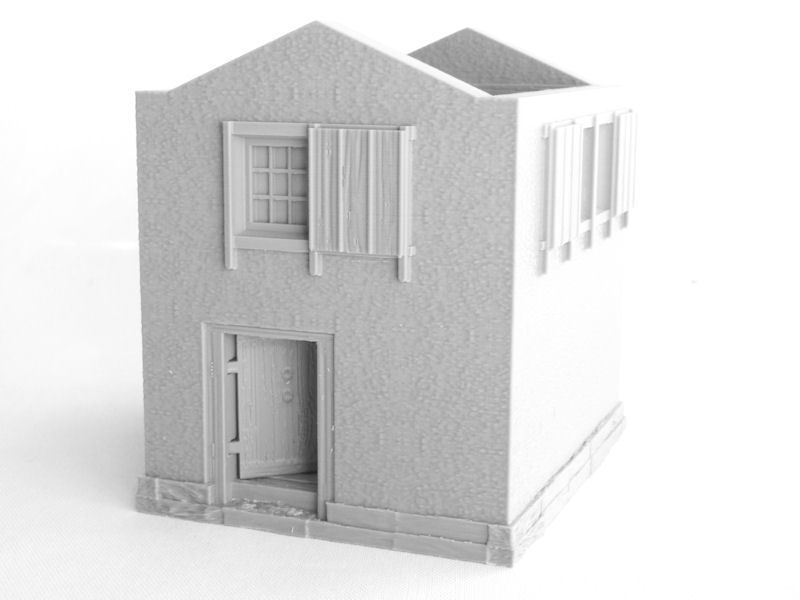
▲ Guesthouse #2 is altogether a more interesting building, and has a smaller interior room but a large wrap-around balcony on 3 sides. It also features sliding storm shutters on 3 sides.

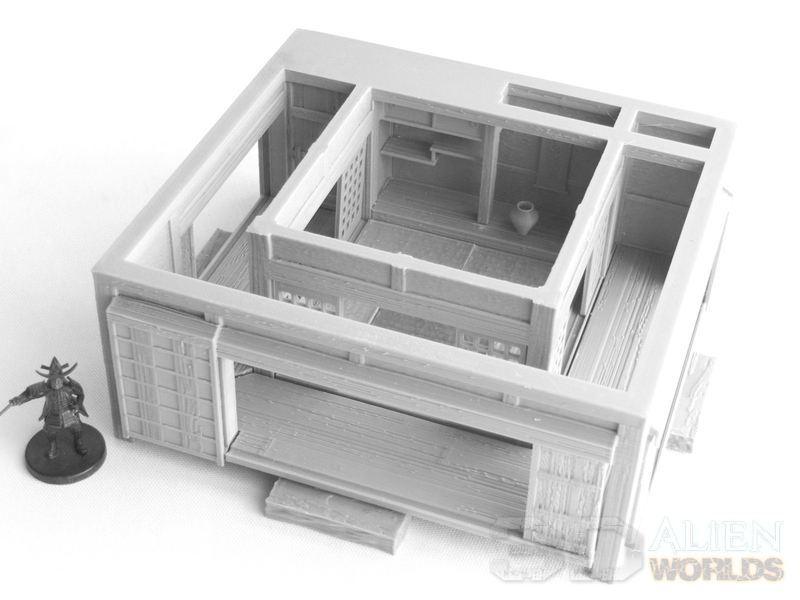
▲ We start by printing this base section for the interior room, and gluing on the 3 sliding door strips and 8 tatami mats. The vase is part of the base piece, by the way.

▲ The main frame of the guesthouse is pretty cool, and prints completely upside down! Therefore it doesn't need any supports at all. It simply slots in place over the central base section. You should also print that little shelf piece, which can be glued into place in the alcove.
TIP: Setting your slicer to print walls "inside-to-outside" will help to ensure those overhangs will print cleanly!
The interior of this building is lovely, with that uniquely Japanese style split shelf, the small cupboard at the top with sliding doors, and the wall scroll and vase. I'll have to find something suitable to drop into that vase after I paint it!

▲ Next we will need to print the 3 floor sections and slot those into place for the internal balcony. There are tiny pegs on the frames to help you locate them properly, but you should also glue a stone step underneath each balcony to give proper support.
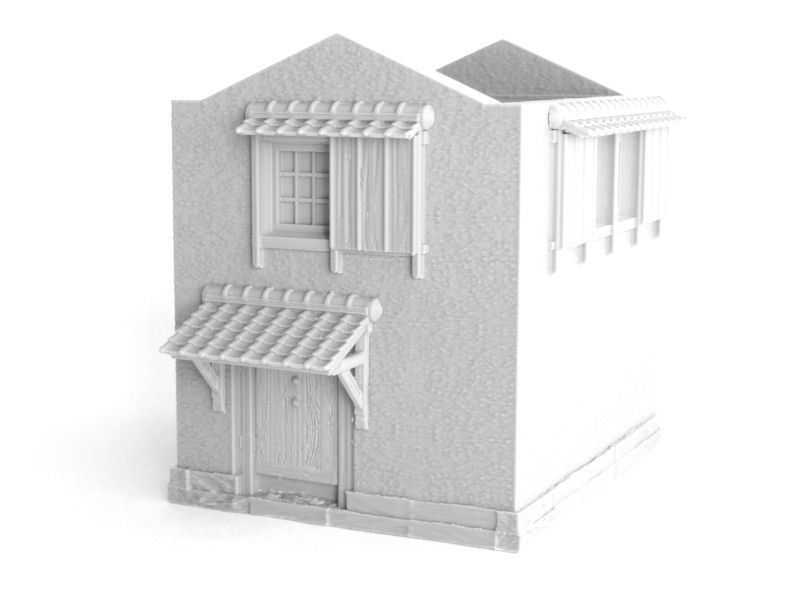
▲ The upper section of the building needs 4 subroof pieces glued in place, and I recommend gluing the side with beam supports first, as it will help to locate the subroof at the correct height.
▲ The top roof prints as two halves, and has a couple of built-in print supports which need to be cut off during assembly. Then it's just a matter to deciding how many internal sliding screens (up to 12) and exterior storm shutters (up to 16!) you'd like to print. I'm only using one storm shutter on each side, I think, so that models can run through the guesthouse easily and the interior stays visible.
▲ Isn't that a nice interior? It's very typically Japanese, and conjures images of graceful strolls to and from the garden on a summer's night.
Work is already well underway on the main house and attached residence and kitchens, so watch this space for updates!
Last time we looked at how to assemble the outer and inner walls and gates, and this time we're moving on to some of the ancillary structures around the grounds of the new Samurai Lord's House.
These include a fancy roofed water well, 2 thick kura storehouses, and a long storehouse.

▲ Let's start with the water well! As you can see from the photo above, the water well has a pretty fancy roofed structure surrounding it, and I was able to replicate this nicely in the printed version...
▲ The structure is printed upside-down and then the two-part roof is added on top and finally the two-part well itself is placed underneath. None of these require print supports, and it's a quick and easy print.

▲ Next we are moving on to the two big storehouses. These are solidly-built, thick-walled storehouses traditionally used for keeping the possessions of the household safe from theft, and they also helped to keep the house itself relatively free from clutter. The walls are the normal wood-framed construction used on other buildings, but the exterior walls were gradually covered with up to 24 layers of clay, and the roof eaves were also similarly enclosed in clay. All of this helped to keep the storehouses safe from fire, and so the lower level was often used for rice storage, and the upper level might be used for prized possessions - furniture and ceremonial items.

▲ The print starts with a single piece (the photo example shows Storehouse #2, by the way), which includes some built-in print supports in the doorway. These print supports, highlighted in red in the photo above, should be removed with clippers.
TIP: A few of the windows have overhanging shutter boxes. These print best, I've found, if you set the slicer to print walls "Inside-to-outside" instead of "Outside-to-inside". That pretty much holds true for all of our terrain models, since dimensional accuracy of a print is less important to us than the appearance. Just a handy tip for you!

▲ Next we need to print 3 floor sections, and the stairs. These simply slot into place, but you might want to glue them into place later on rather than now, for better access when painting the interior.

▲ The doors are next, which can be connected to their hinges using spare filament (maybe clean the holes with a 2mm drill bit first) or brass rod, as shown in the photo above.
▲ Again, you might want to paint the doors before permanently attaching them to the model.

▲ You could, if you wanted, simply add a roof at this stage and call it finished, like in the photo above. But I recommend adding the small window and doorway roof pieces too, as shown in the next stage.
▲ These kura storehouses have small roof pieces to protect from rain over the doors and windows (called 'water-cutters' in Japanese!), and these look really unique when glued into place. 
▲ The interior of the storehouse is playable, although it's not particularly spacious. I'm planning on leaving the upper floor unglued, so it can be removed for better access during games. The rice bundle stack is included in the files, by the way.

▲ The roof prints in two halves, and completes the storehouse model. Even the roof of this very functional storehouse is pretty fancy! This version of the storehouse (Storehouse #2) has two hinged doors, one on each end of the building. Technically those were sometimes also covered in clay to make them more fire-proof, but that's a bit boring to paint, so I modelled the storehouses with wooden doors.

▲ Storehouse #1 is assembled in a similar method, but this version has a big double-door to the front of the building instead.

▲ This is the finished model of Storehouse #1. In the actual Inaba Residence that this layout is based on, this storehouse is the one right outside the kitchen, and would probably contain more foodstuffs.

▲ Our final building for today is the long storehouse shown in the photo above. This isn't as thickly-walled as the other two buildings, and has timber-beamed walls instead of clay covered ones. It's only a single-level building.

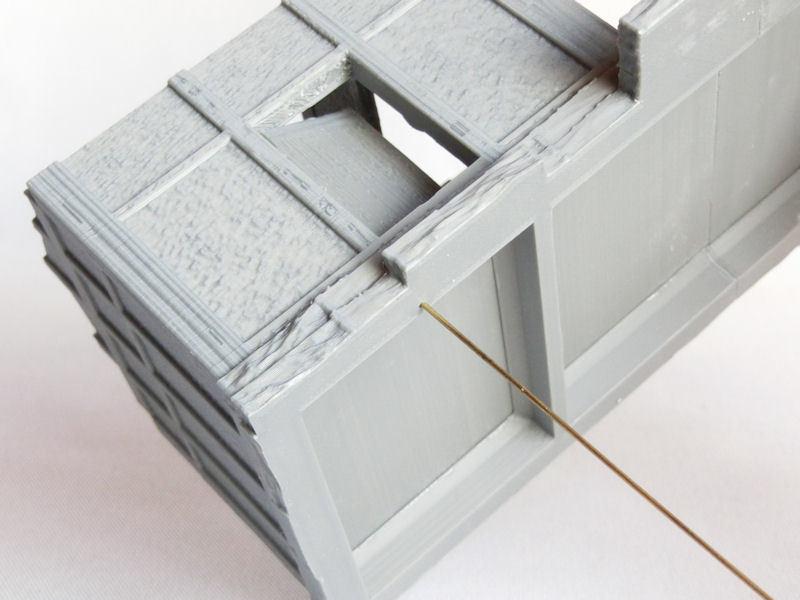
▲ The building prints in two halves, and there are three doorways that have built-in print supports (shown in red above), which should all be removed.
▲ There are 4 floor sections, and the slightly shorter one should be placed in the small room on the left. Again, you might want to leave these unglued until after they've been painted.
▲ The small door on the left is another hinged design, which should be connected using filament or brass rod.

▲ The other two larger doorways are both sliding door types, which can be slotted into the frame and opened and closed during play. The small grooved beams should be glued into place at the base of each sliding doorway.

▲ The long storehouse also has those cool roof pieces over the big doorways and the window at the front.

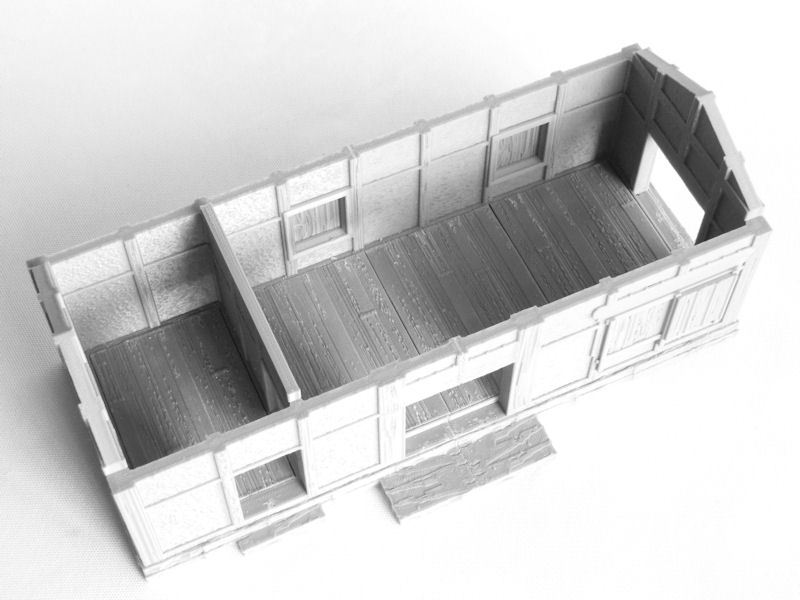
▲ The interior of the long storehouse is quite spacious, and makes a good contestable game objective, with all those entrances and exits.

▲ Here's the completed storehouse model. The roof prints in two large pieces, and includes built-in print supports for the fancy end pieces, which can be snapped off before assembly.
None of the buildings in this article require extra slicer print supports.
▲ One last photo to show you today - the work-in-progress pic of the whole residence layout. That's where the storehouses and water-well are located in real-life, near the outwer walls. It's looking pretty good so far, yes?
Next up will be the two guesthouses, and we'll be showing pics of those as soon as they're ready! Watch this space...
We have a new Australian retail partner to introduce to you today - OzWargaming, from Victoria.
They're offering our entire samurai collection of terrain, plus the sci-fi Necrontyr and Taui ranges too. Most noticeably, due to some very high-speed printers, they are able to offer some our bigger terrain pieces (the samurai castle and pagodas) at very reasonable prices! Take a look and see what they have for you!
The next big project for the samurai collection, the Samurai Lord's House, is moving closer to completion. The outer and inner walls, and the 3 gates to go with them, are all completed and have been test printed.
There's a photo at the end of this article to show how they look on the table, but for today let's start with some assembly notes about printing the new main gate....
▲ The new main gate starts with a one-piece frame, which is printed upside down and therefore doesn't require any print supports. In fact, all of these wall and gate sections don't require slicer supports.
The large double gates are printed side on, and simply slot into the top pegs. Then you'll need to slide in the two small peg blocks, into the slots at the bottom. That will hold the doors in place, and allow them to swing open and closed.
The photo above shows this construction from the back, so remember that the metal studs go on the front of the gate.

▲ Step 2 is to print the two halves of the beautiful roof structure, which are glued together and slotted into the frame. At this point you'll have a functioning gate, and you could use this model as is for your games (or customised models), but there are a few more bits which can be added to make it even larger.
▲Step 3 is to print the side door sections. These glue into the slots on the side of the frame posts. Note that the small wooden locks should be placed at the back of the gate. These door sections don't open, by the way.

▲ Finally, you can complete your main gate by printing these zig-zag wall sections. The bases are one-piece prints, but each side of the zig-zag wall is actually made from 4 small pieces which should be glued together. The wooden sides should be to the front of the gate model.

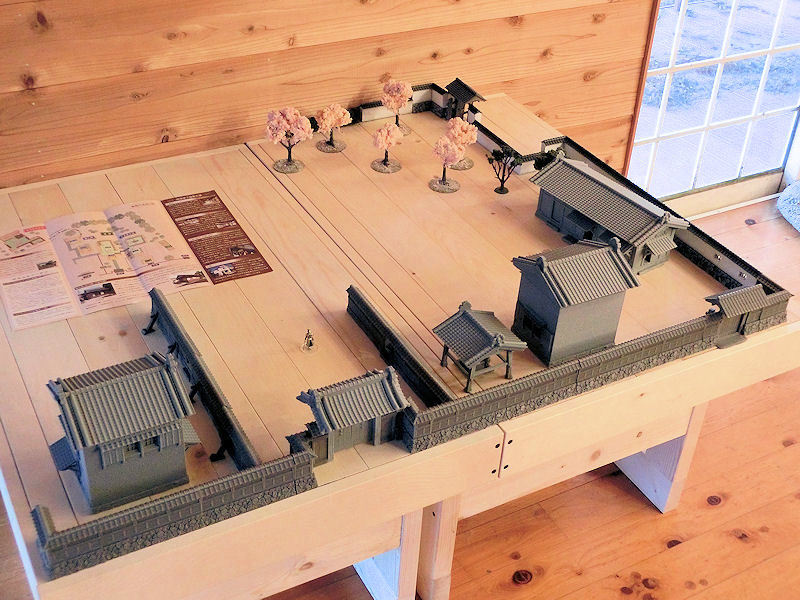
▲ Just a quick work-in-progress shot of the walls being modelled, in relation to the main house and buildings. It's quite an imposing entrance!
Okay, let's take a look at the wall models in the set....
▲ We obviously have new straight sections, on the same stone bases. The new walls have a wooden lower half and a plaster top part to the front, and a plaster and timber beam design to the back. These walls are fully textured, and include magnet holes as on many of our other walls designs.

▲ A wall set wouldn't be very useful without corner sections, and the upper walls are again printed in two parts and glued together.

▲ The outer walls (on the left) should be used with those big stone bases, but a lower stone base (on the right) has also been created to work with inner walls of the residence. You'll find that the inner walls butt onto the outer walls quite well, with the two heights of roof tiles fitting neatly.
One feature of the real-life historical residence this is based on, is these great heavy timber supports for the inside of the walls. These print well at 90 degrees to the print bed, but do require a little bit of support for the stone. They're not essential, but I think they're great little details that add some realism to the models. They've been designed to work with both heights of wall, as shown in the photo above.
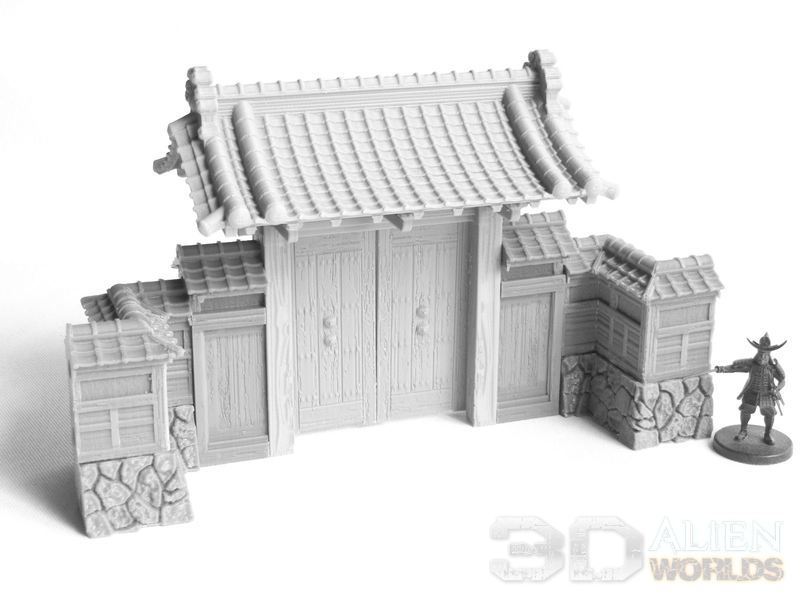
▲ Okay, it's time to look at the gates included in the set. You've already seen the big main gate above, and usually you'll only want to print one of these, to be located right in front of the main house entrance. The roof is curved and ornate, and intended to intimidate visitors and act as a display of power and status.
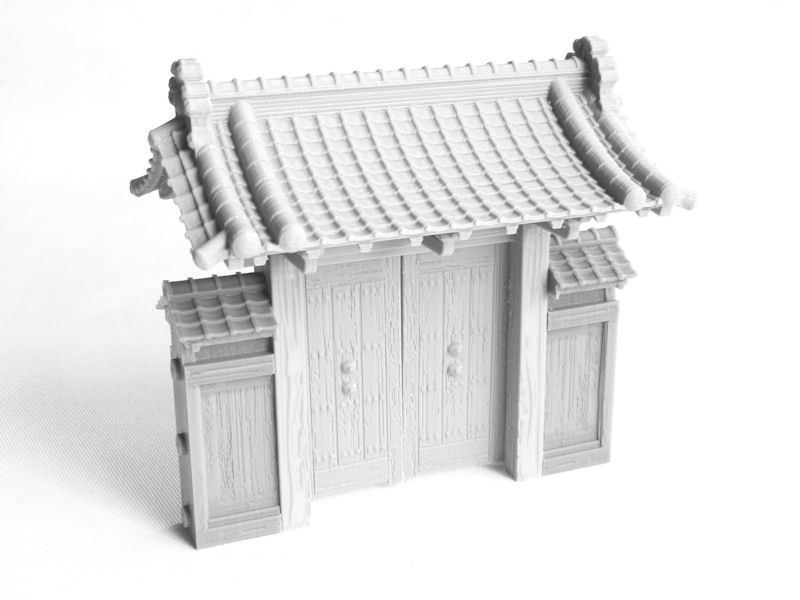
▲ The medium gate is a re-work of the existing gate from the Stone Walls set. The wall sections have been modelled to match these new walls.

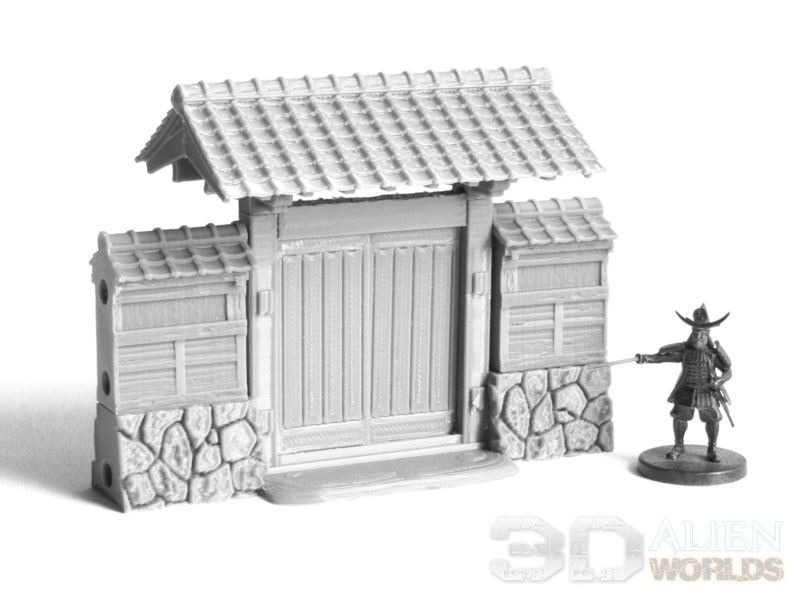
▲ The small gate is another new model included in this wall set, and is intended to be used inside the compound, as a 60mm section in the inner walls. There's a small stone step to both sides of the sliding door.
I've printed two of these smaller gates, to lead left and right from the main gate entrance to servants' areas.

▲ Here's one last photo for today, to show progress on the layout. This particular layout is the real-life layout of the Inaba Residence this model is based on, but obviously you're free to arrange your layouts as you want to. As you can see it almost covers the width of both tables - a massive 120cm (4ft) wide!
I've combined these new walls to the front with my older plain walls to the right-hand side. There is one main gate roughly in the centre, and two medium gates on the right, leading to the storehouses and gardens. These would be mostly used by servants and gardeners.
It's a little hard to make out, but there are also two small gates in the inner walls, leading left and right from the main gate approach. Just imagine the fights you'll be able to wargame, to hold those vital chokepoints!
Next on the work bench are the storehouses and outbuildings. Watch this space!
A new token cup (or dice cup!) is available today, themed for our samurai collection - the Wooden Sake Cup!
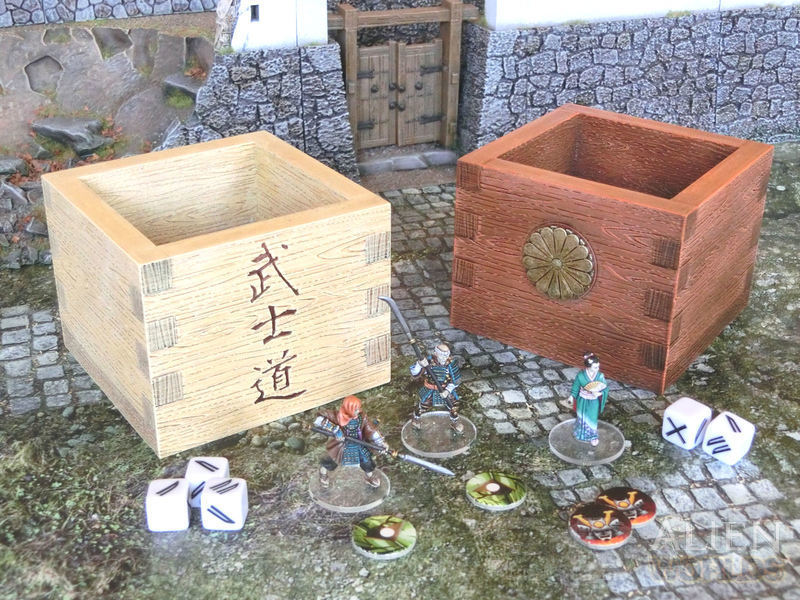
▲ A wooden sake cup that can be used for game tokens or as a dice cup, for use in games such as Test of Honour. The cup measures 90mm x 90mm and 70mm in height. It features a curved bottom inside to allow easy withdrawal of tokens.
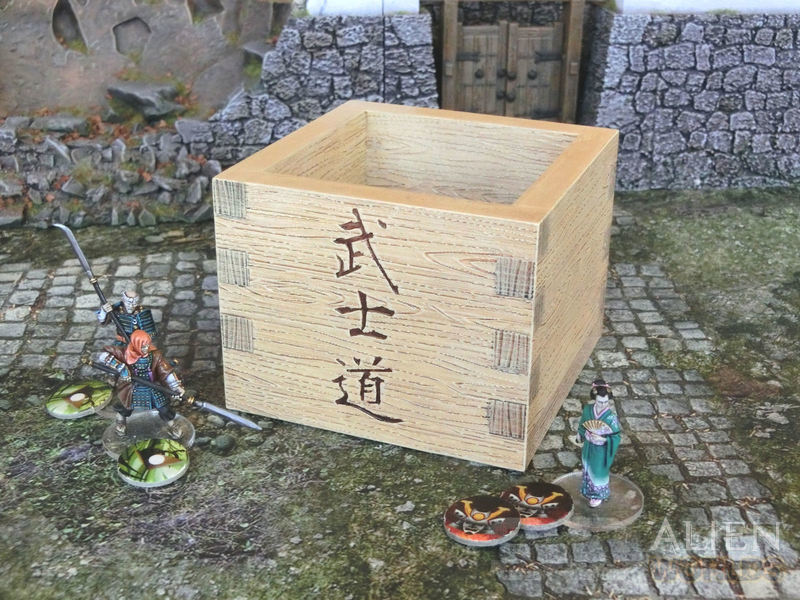
▲ The cup comes in 3 designs, all with realistic woodgrain patterns - a blank version, a version with the kanji character for 'bushido' engraved on one side, and a version with space for a 30mm symbol to be placed at the front of the cup.
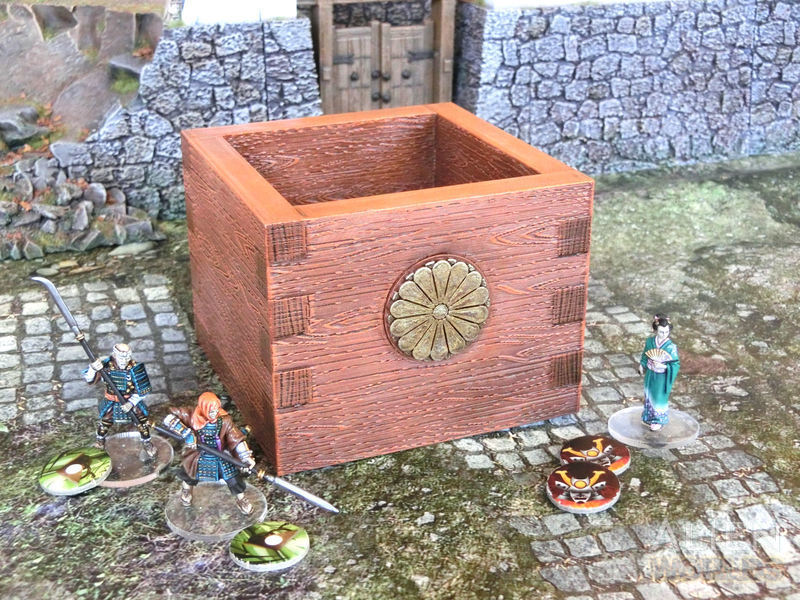
▲ The 30mm crest symbol for the Yamato Clan (also known as the Imperial symbol) is included in this set.You can also personalise your cup with your choice of clan symbol from this Samurai Clan Symbols Set.
This cup makes a great gift, as you can also emboss your own club logo or name on the front, using free software in only a few minutes. See the blog article on how to emboss your club logo >>.

▲ The new Wooden Sake Cup is available for download from today!


4 Comments :
Magnus
2024-01-26 (Fri) 2:34AM
Looks amazing!
(not sure ’bout the 12 mat tatami pattern though).
Do you have a rough estimate on when the complete set will be available?
2024-01-26 (Fri) 7:50AM
No fixed date in mind for release - but it should only be a few more weeks.
Terry Broomhall
2024-02-21 (Wed) 4:36AM
Amazing print and details.
2024-02-21 (Wed) 7:09AM
Thanks, Terry!
Write a comment :