3d-printable terrain for all your samurai wargaming needs


| << Designing the samurai lighthouse 2024-07-25 | Castle lighthouse is available NOW! >> 2024-08-02 |
The new Lighthouse is a quick and easy print to add to the samurai collection, and works well on a castle-themed or coastal-themed board, as well as a game objective that needs to be captured or held.
▲ This is a pretty straightforward print, starting with the stone base, the curved wood lower section, and the wood-beamed middle section. The model can also be used without the wide stone base, for a smaller footprint on your table.
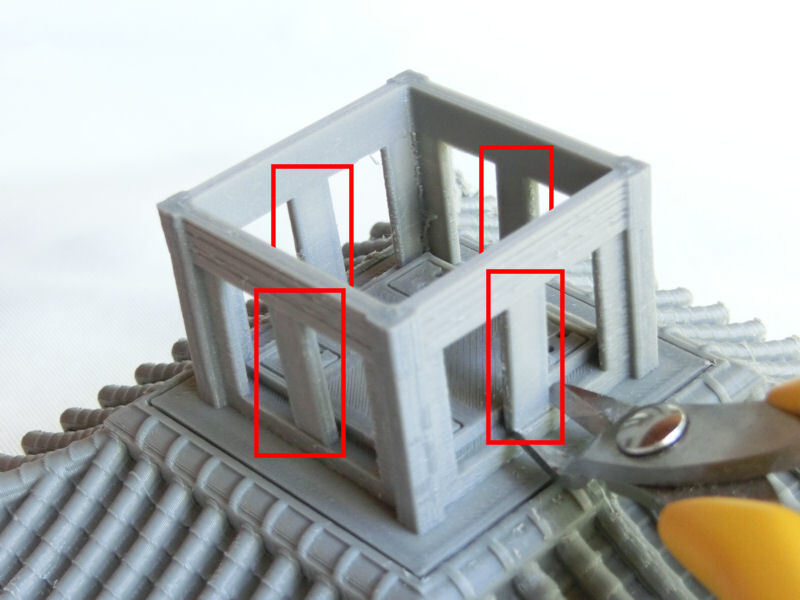
▲ The lower roof section prints in two halves, and does require print supports for the large gap in the centre. The clever battery and LED bulb section simply slots into the roof, although you should remove those 4 fat print supports (shown in red in the photo above) before the next step.

▲ This is the underside of that lower roof section (please excuse the mess my printer made of those beams - I made a mistake in the retraction settings!). You can see that it has slots for four 3V CR2032 coin batteries. If you grab some LED bulbs from cheap tealights (or Amazon/AliExpress) these should fit into the paired holes on the top side. The two metal prongs for each bulbs make direct contact with the + and - sides of each battery, but note that the longer prong is usually the positive + side, and they won't work if the battery is reversed.
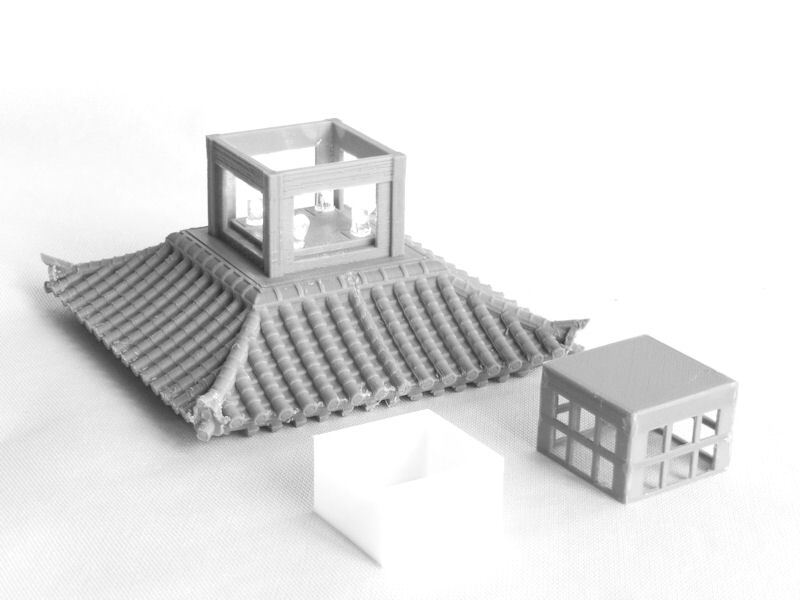
▲ You have some assembly options for the light section. Of course we would recommend printing the version designed for LEDs, which is the frame box (shown on the right of the photo above), which slots neatly into the main section.
There is also a solid box included in the files, which is intended to be printed in white filament using "VASE MODE" in your slicer. Currently, this is a simple checkbox in Cura (other slicer software may vary) in the Special Modes menu, labelled Spiralize Outer Contour. When you check that box, you'll see that the software changes the solid 6-sided box to a square 'vase' with no top. It will also prints at only 1 wall thickness (i.e. 0.4mm thick), which is ideal for letting LEDs shine through! So in the photo above, that white box has been printed in vase mode, and slides inside the frame box.
Alternatively, you could just fit some semi-transparent paper inside the frame. Baking sheet works well for that!
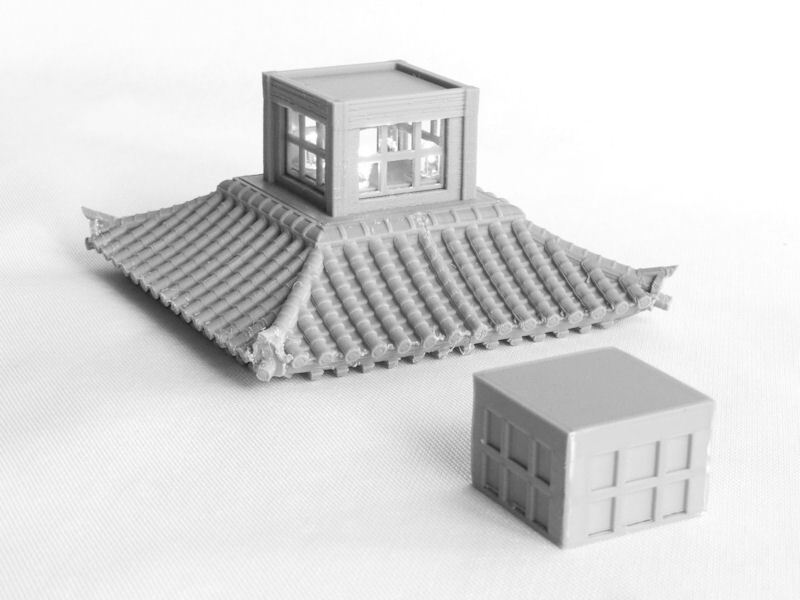
▲ If that seems too much hassle, then you can ignore all of the LEDs and batteries, and simply print the solid version of the light section, as shown in the photo above.

▲ Here's the finished lighthouse building, with LEDs shining bright. This model will be hitting the paint desk this week, and should be ready for release very shortly. Watch this space!
| << Designing the samurai lighthouse 2024-07-25 | Castle lighthouse is available NOW! >> 2024-08-02 |


